
Hi, welcome to my website, my name is Mehdi Ahmadi, I'm a CG Artist, I have been working in the Animation and Visual Effects industry for about 15 years since 2007.
In the early years of my career, I was working as a CG Generalist in many projects so, I have experience in most production departments, but since 10 years ago, I have been working as a Technical Director, Character TD, Creature TD, CFX Artist, or Rigging TD in most projects.
I am a self-taught artist, and I am always looking to learn new tools and techniques, and I believe that there is always something new to learn and the quality of work can always be improved.
I always avoid the "comfort zone" because I believe that the conditions that make a person improved are not necessarily the conditions in which one can feel comfortable and satisfied.
I am passionate about what I do, so even in tight deadlines and working under pressure, I always try to enjoy my work and I am certain that if you work with enthusiasm and joy, nothing can stop you from achieving success.
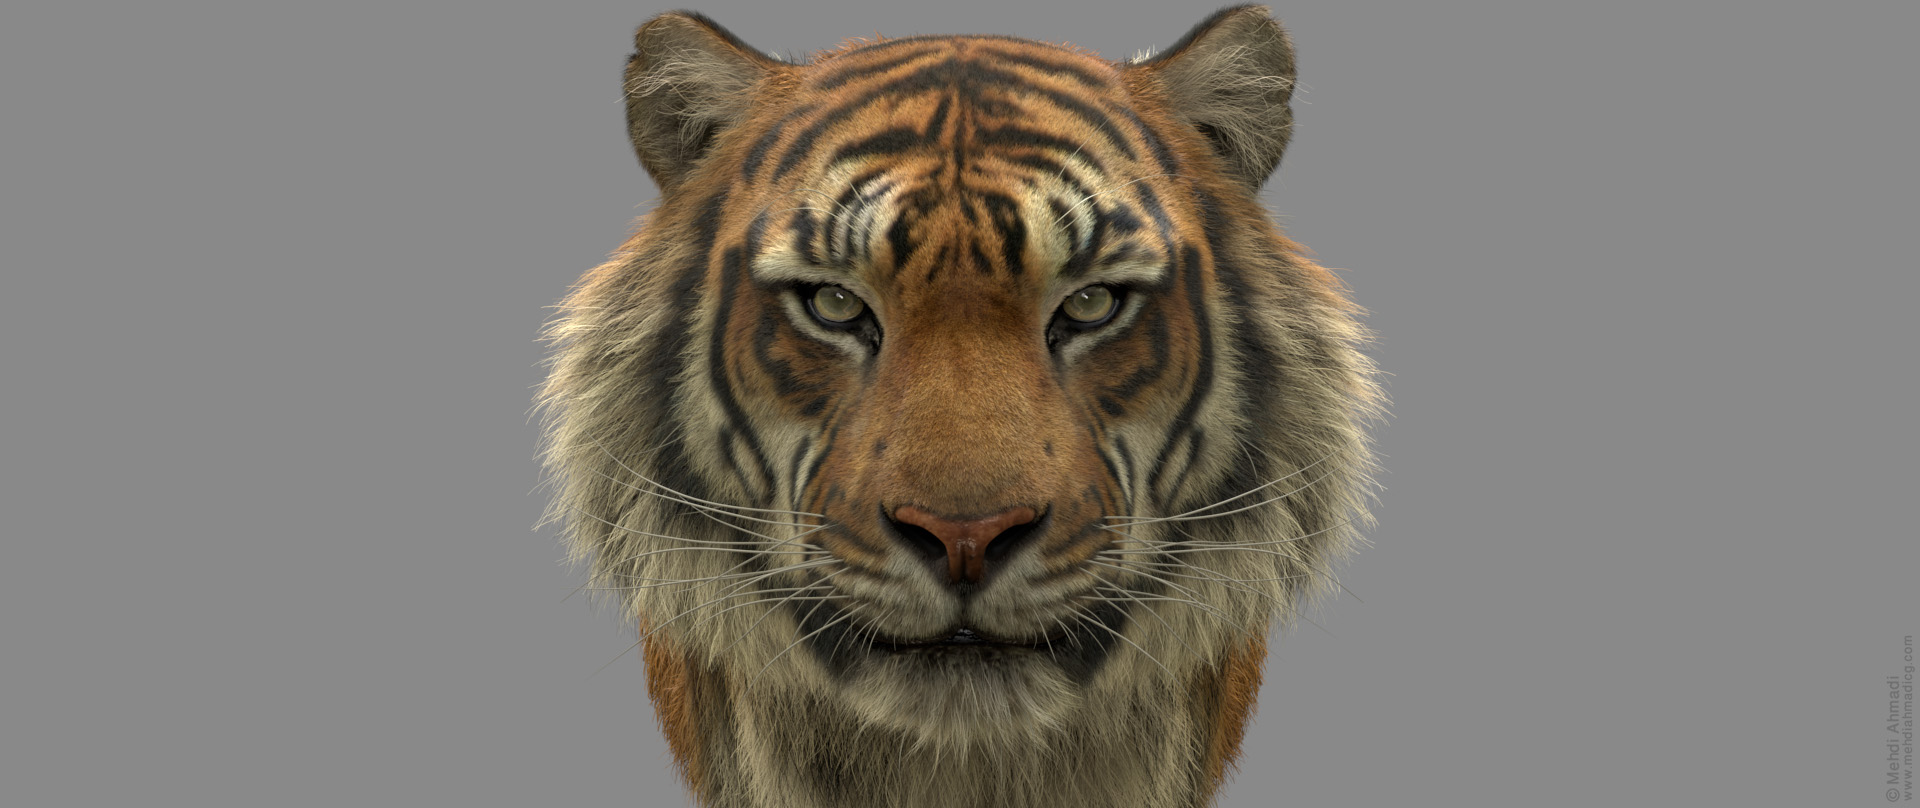
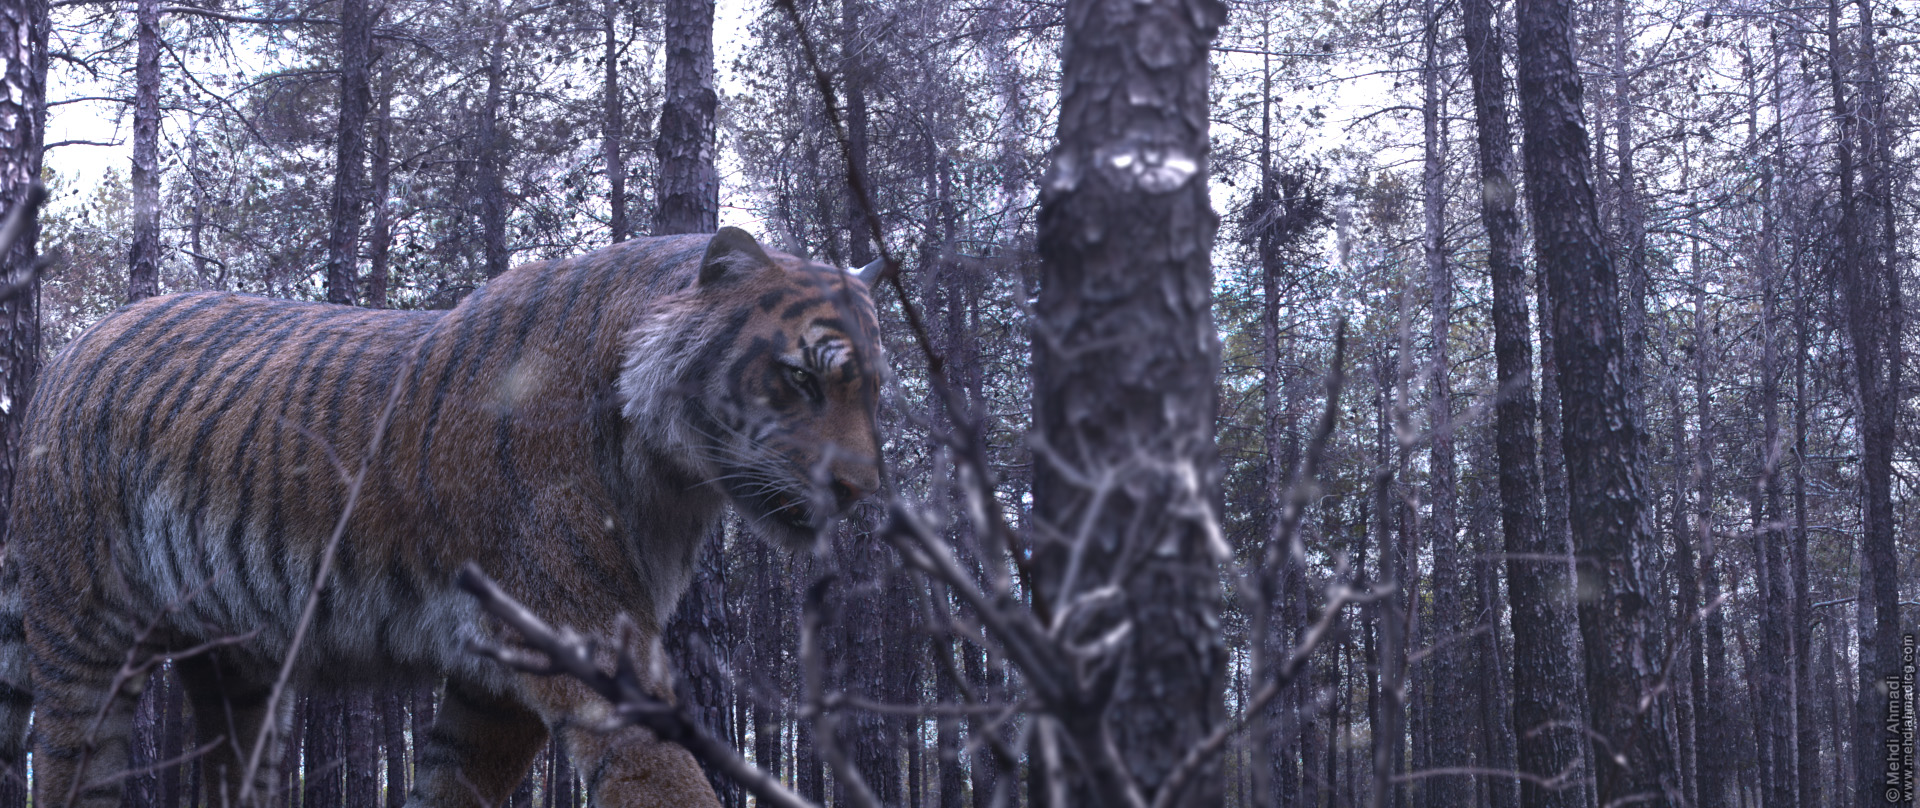
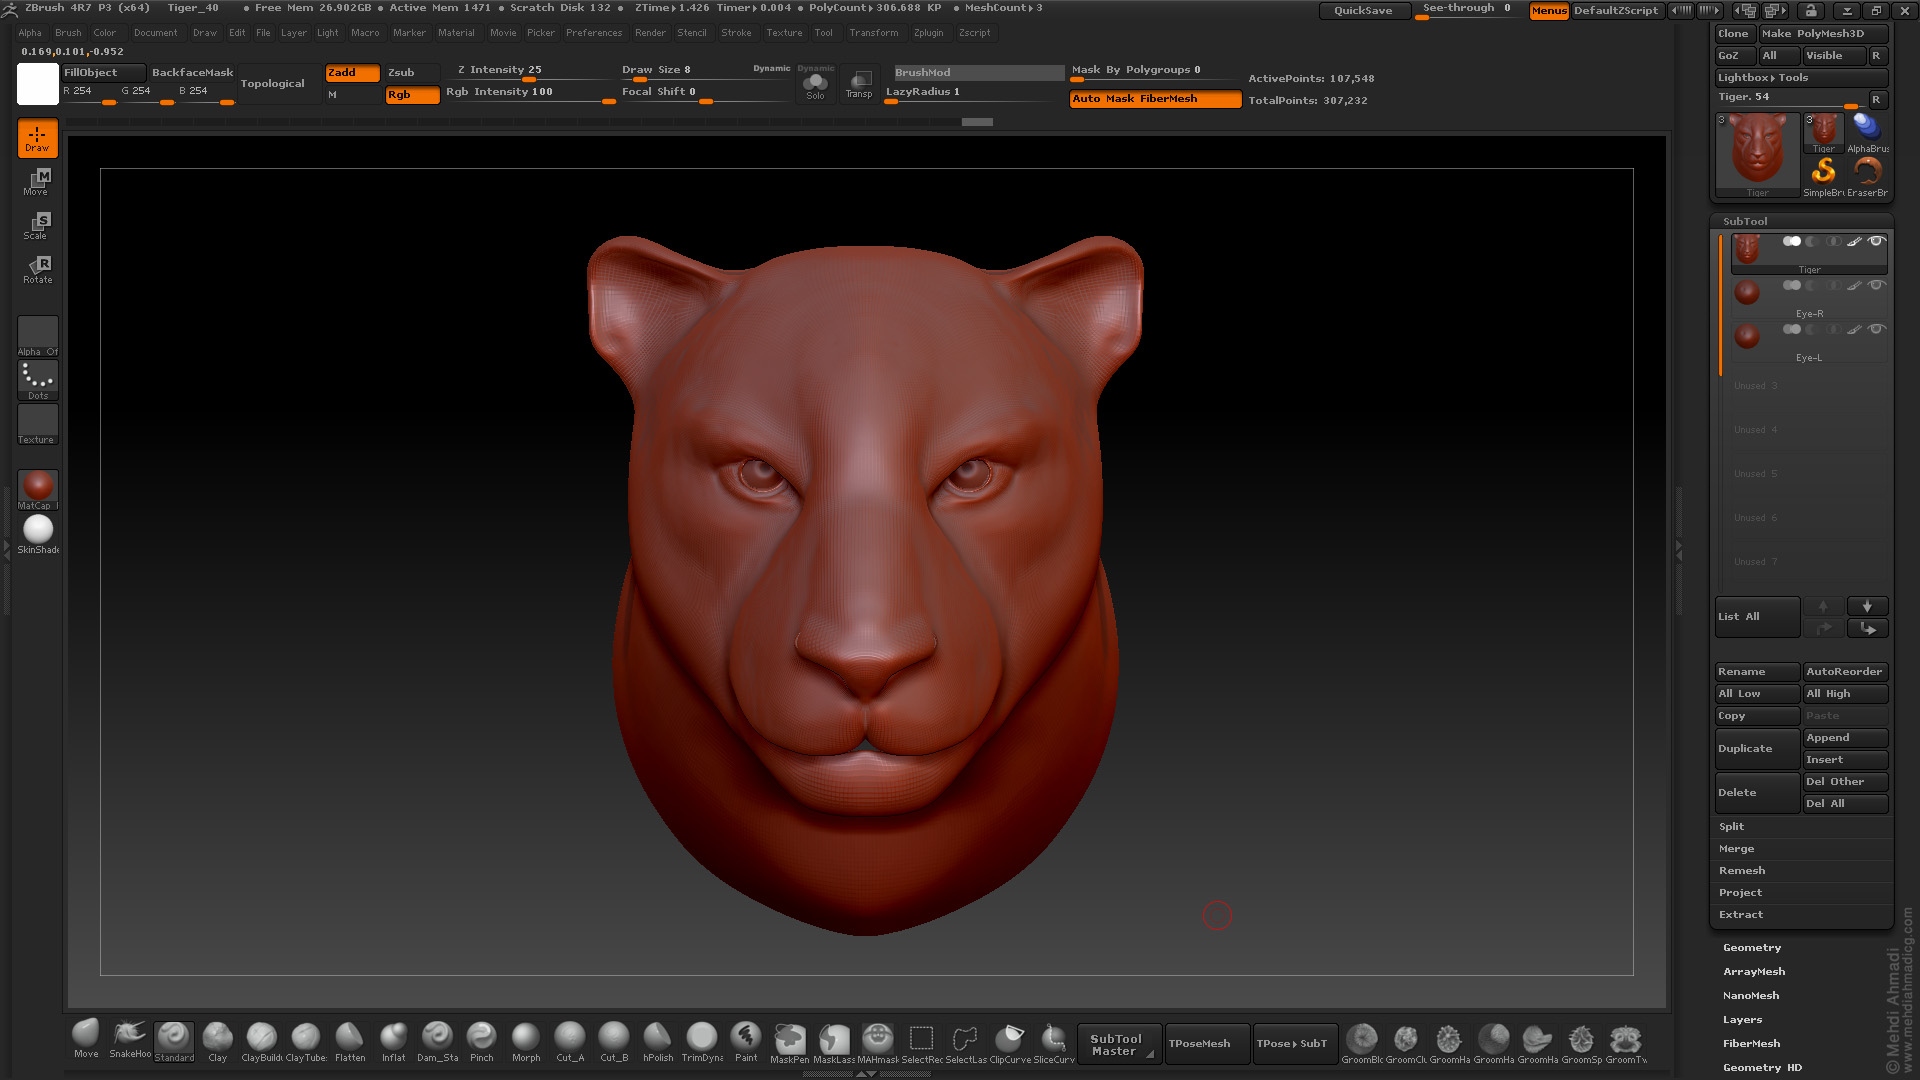
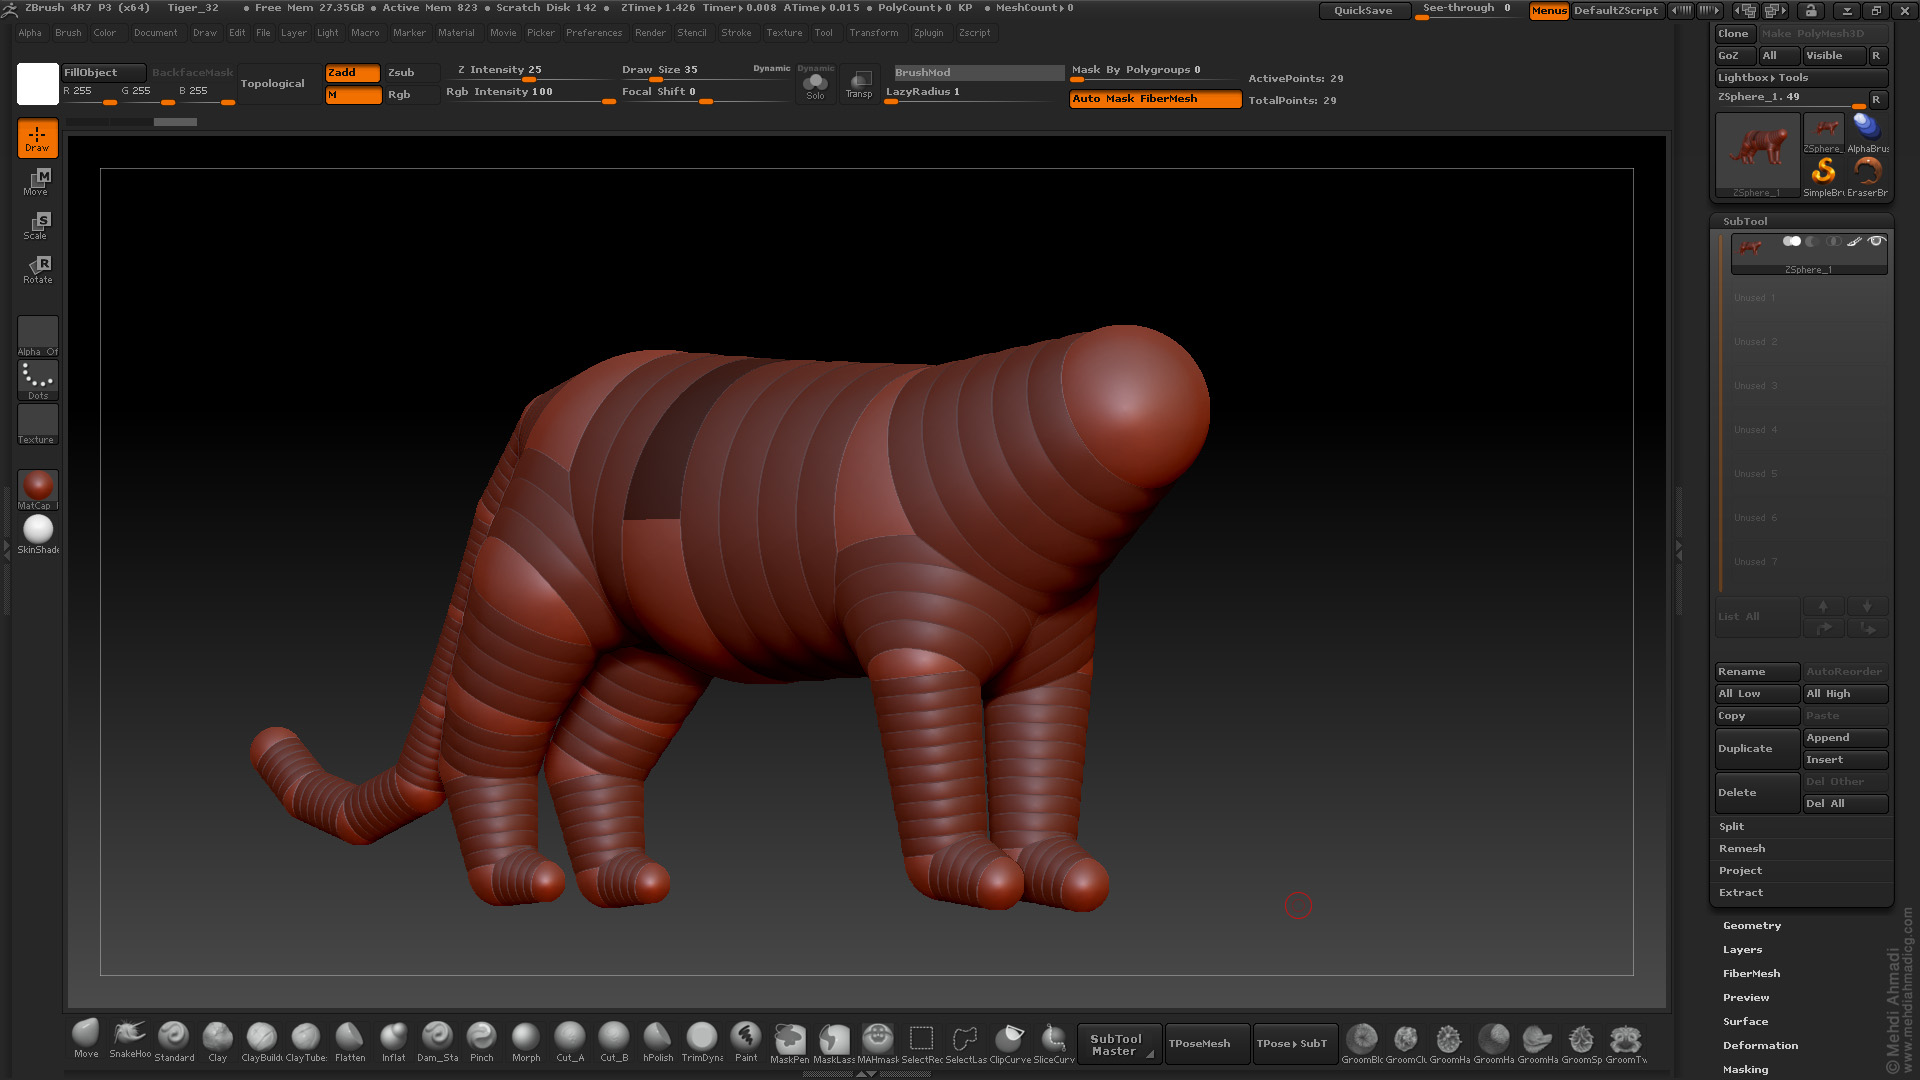
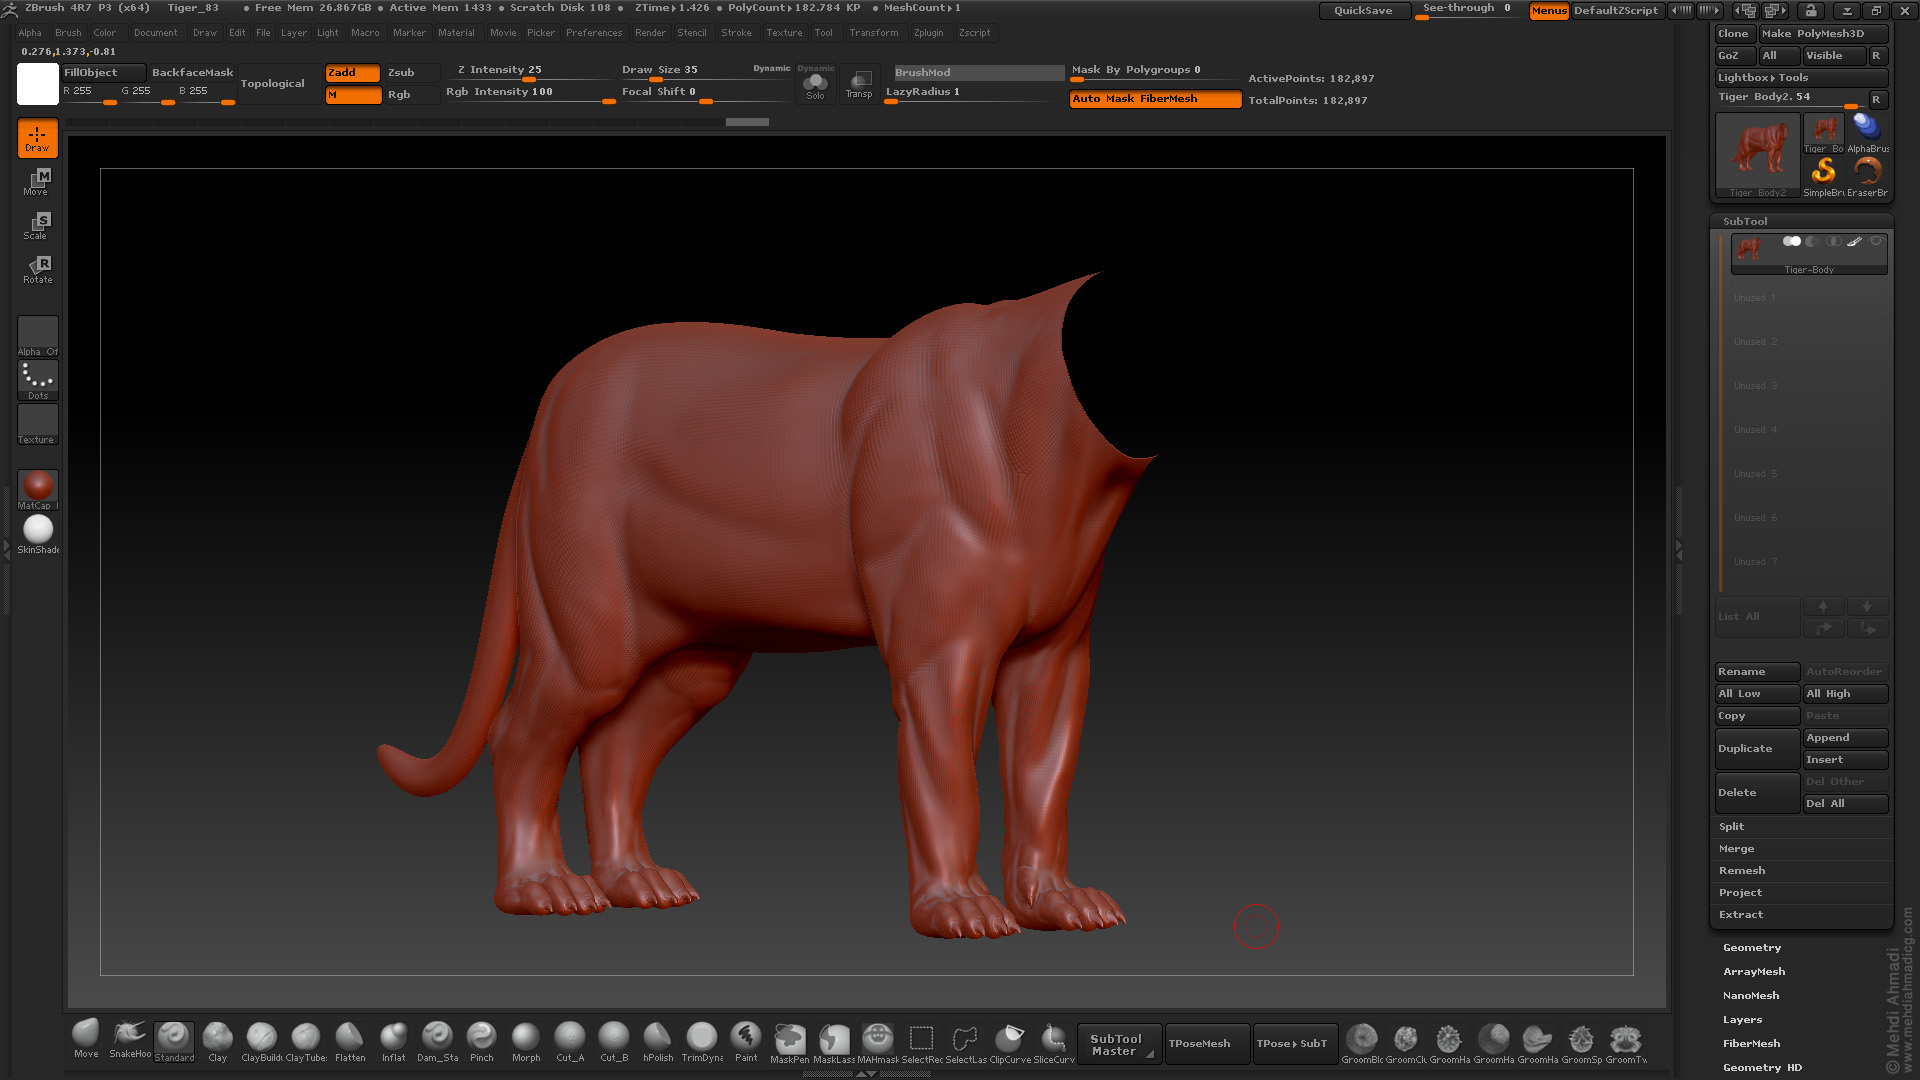
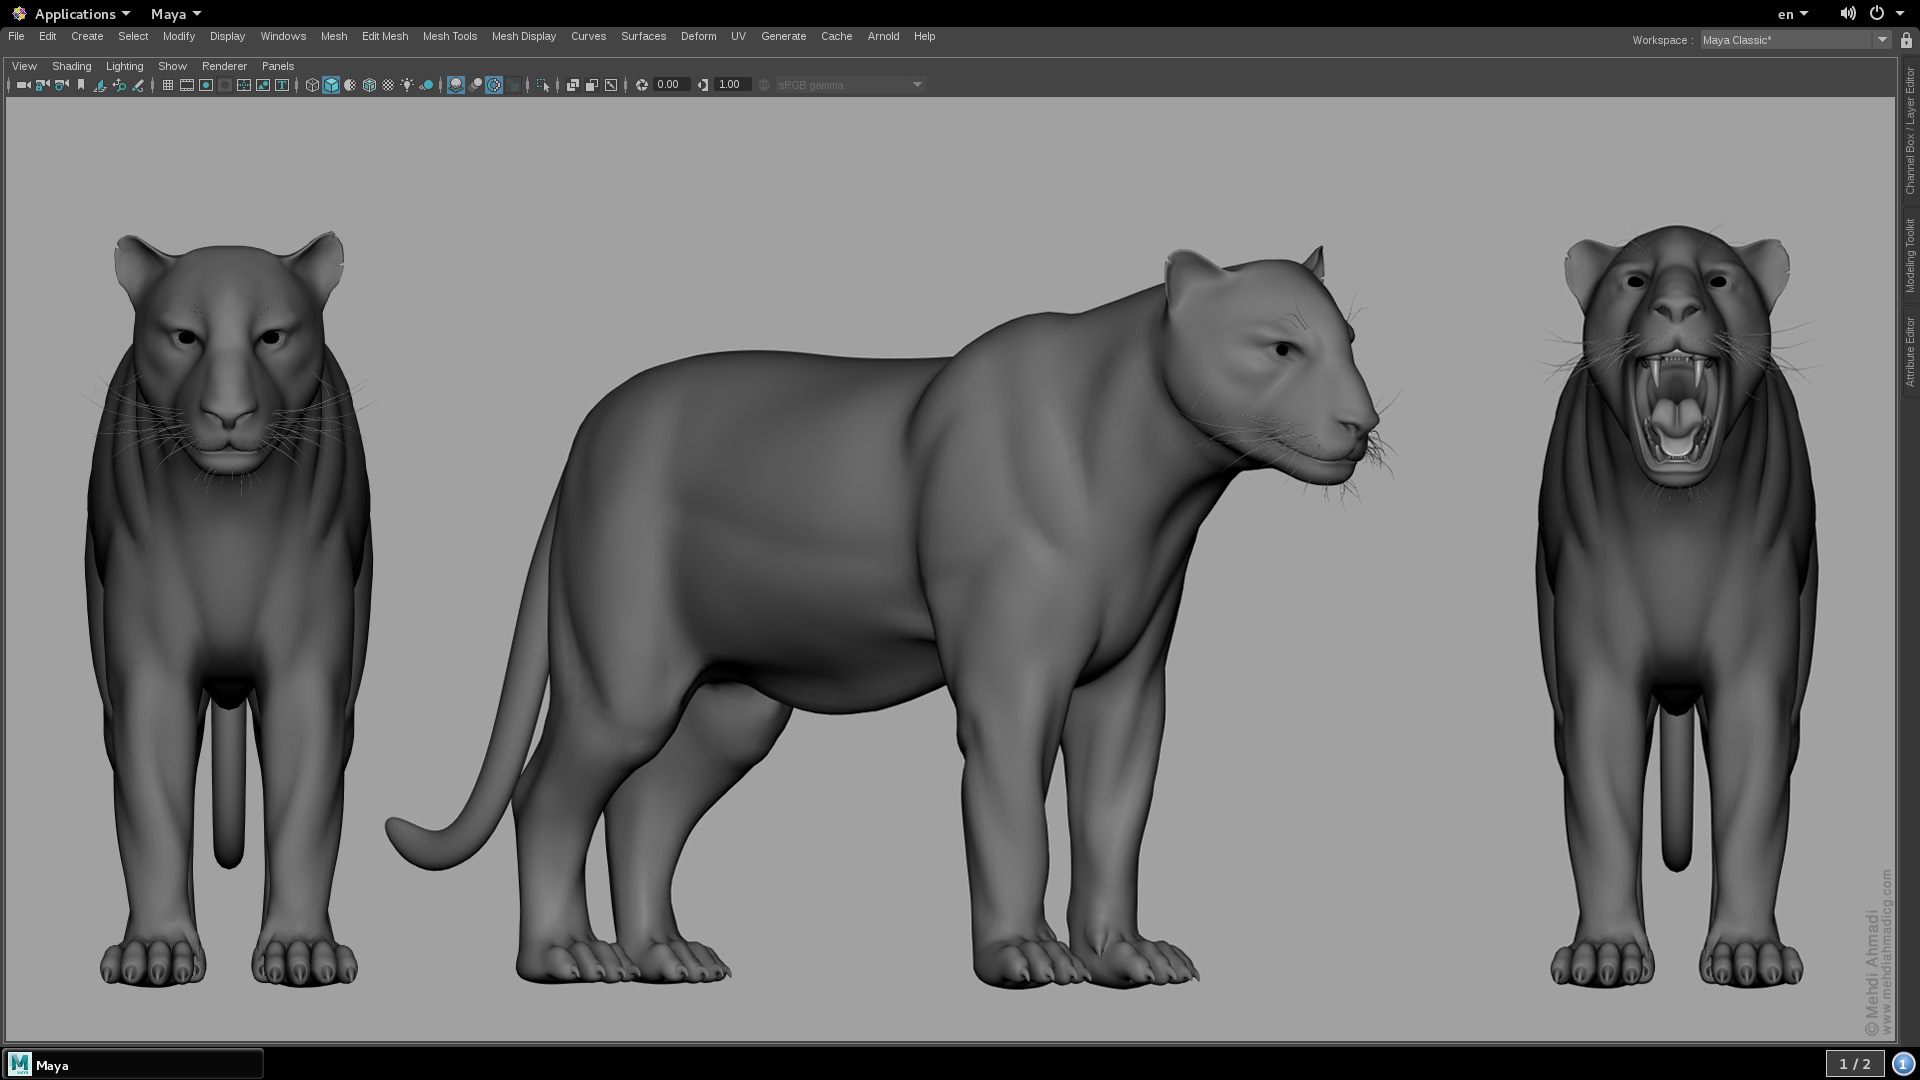
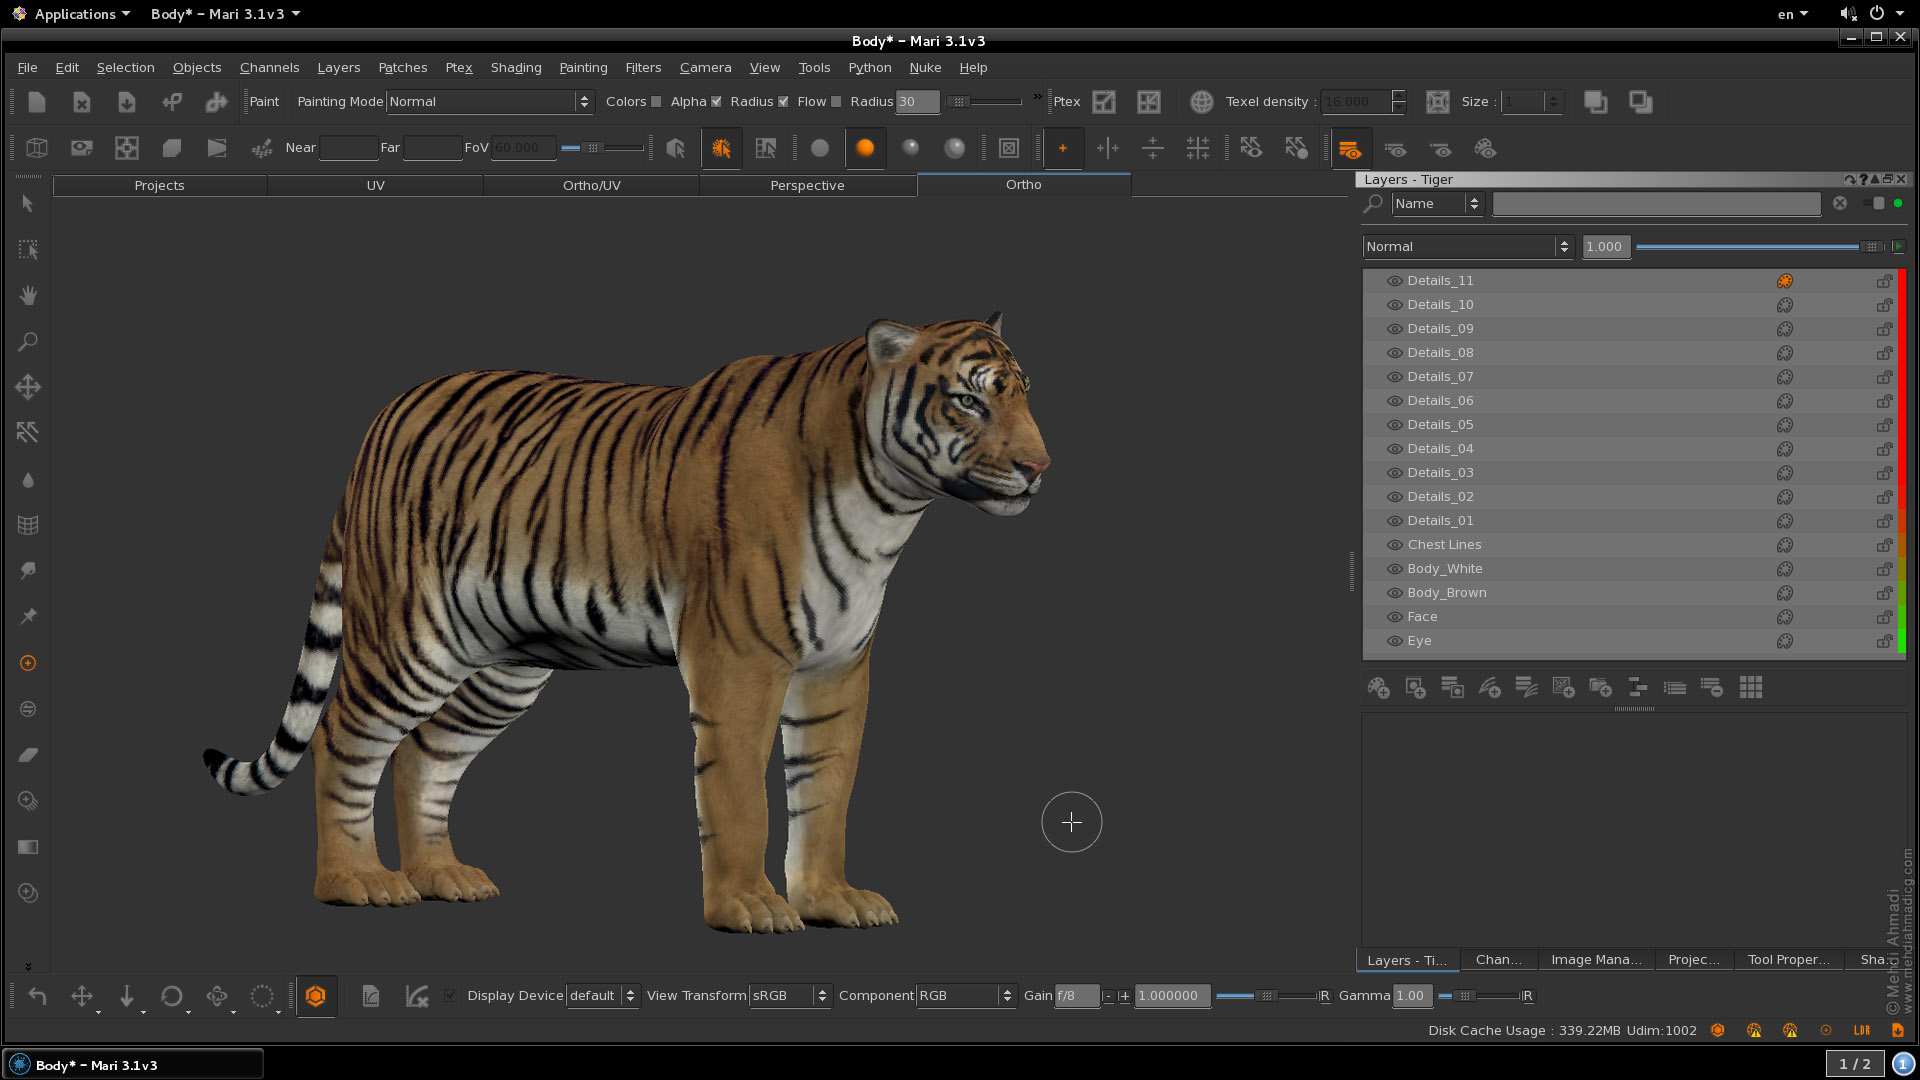
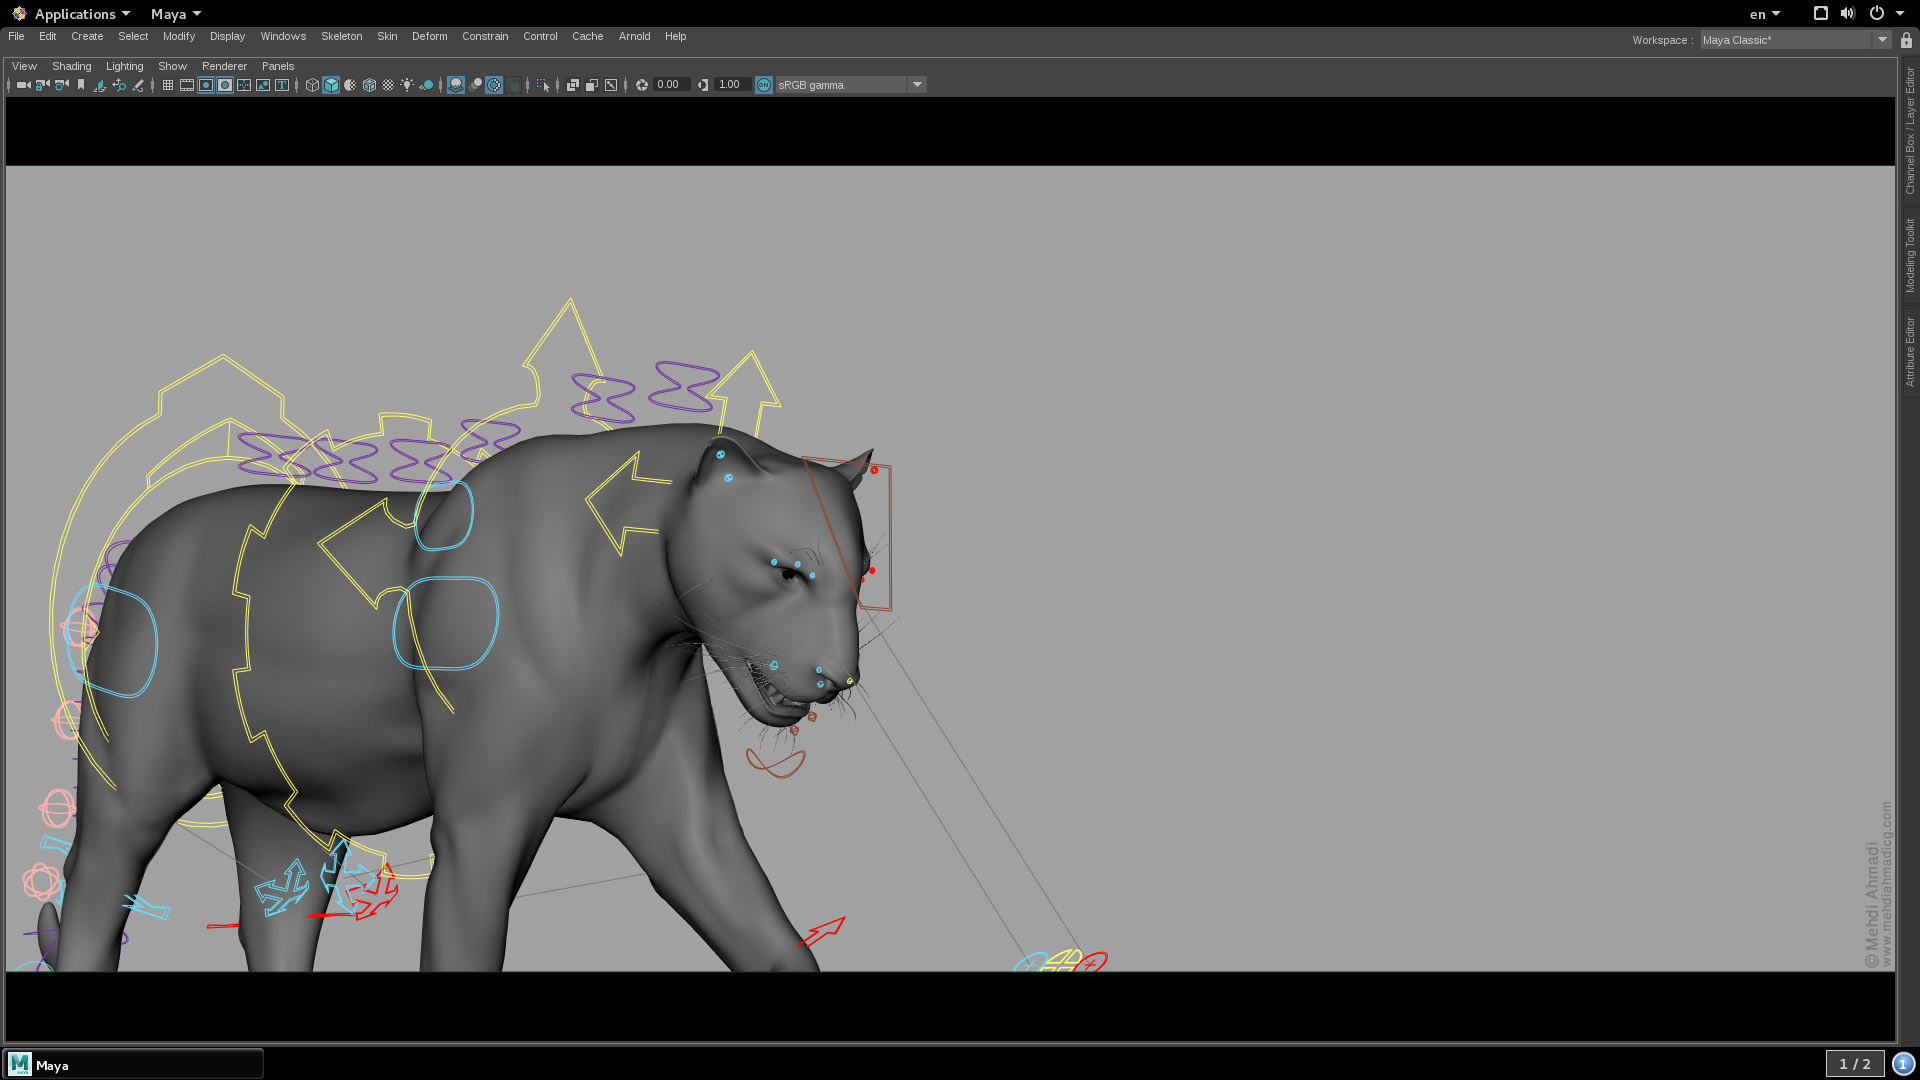
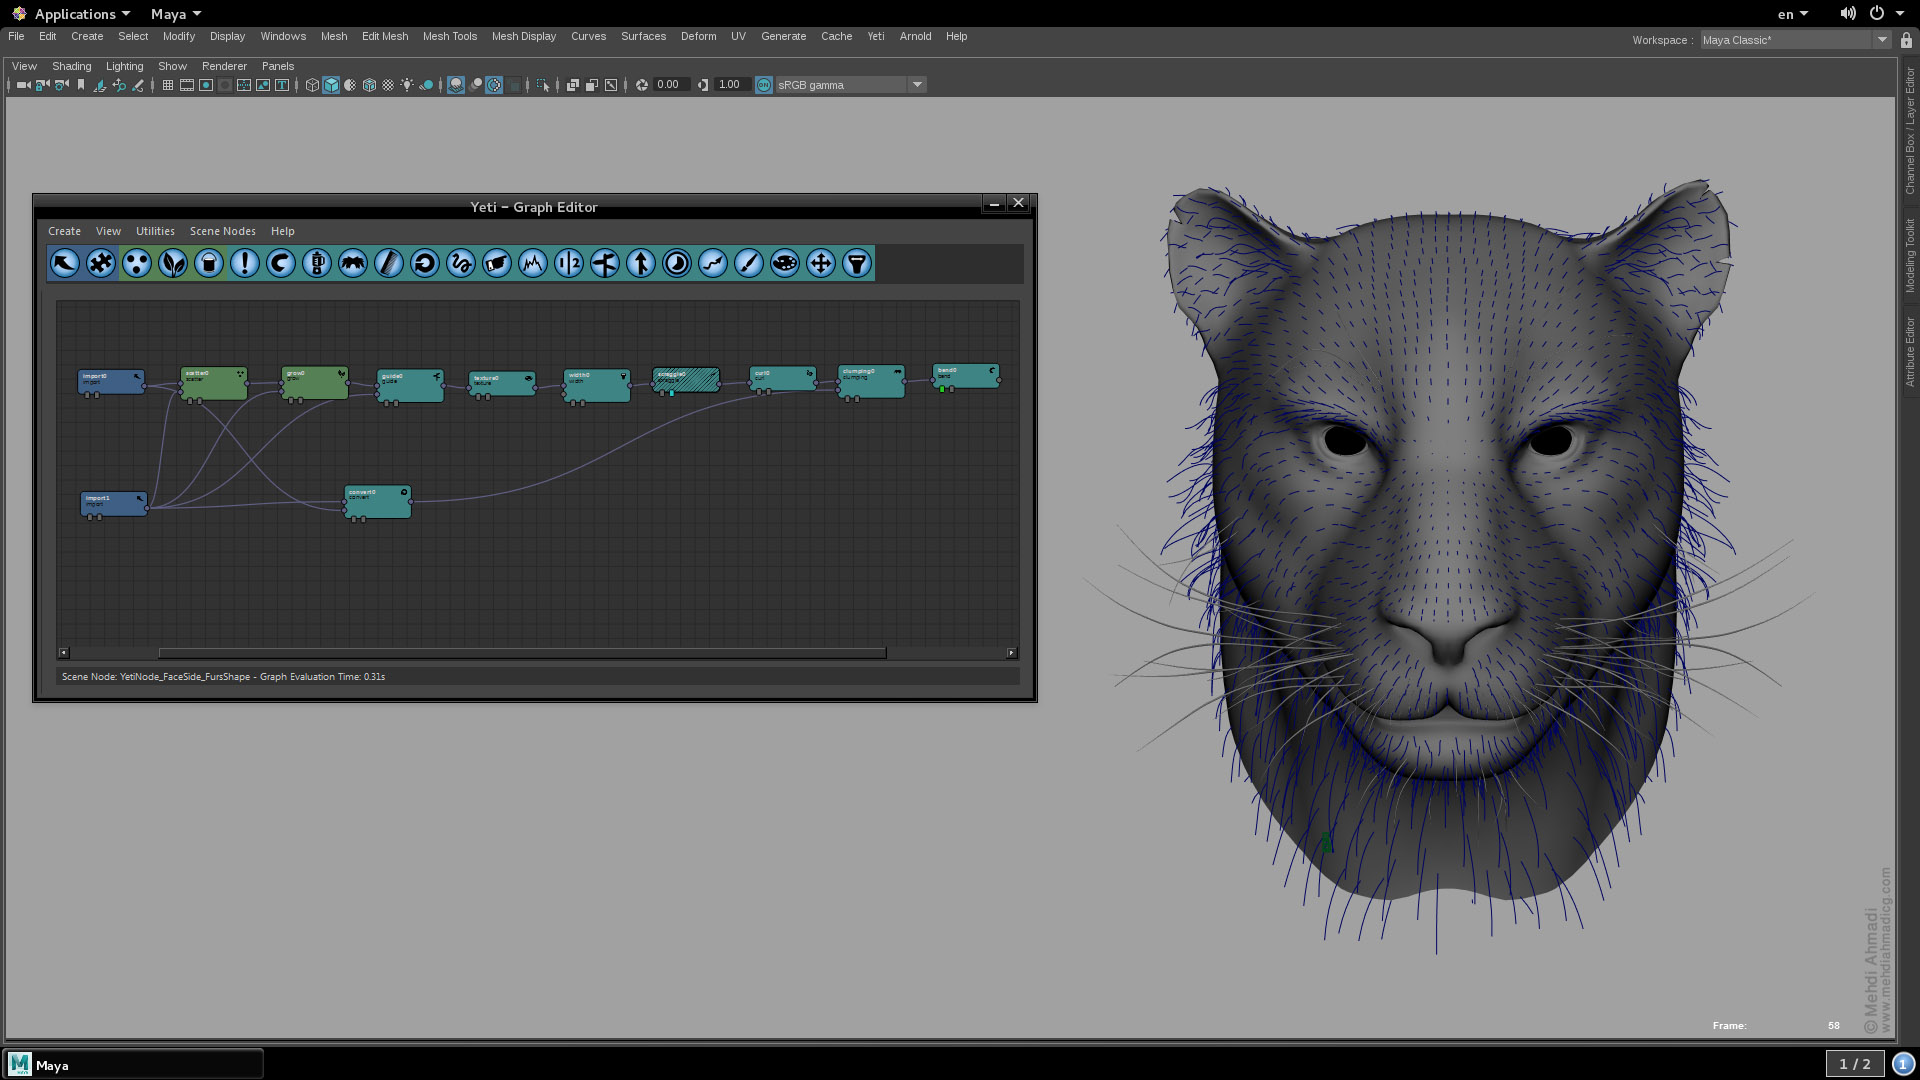
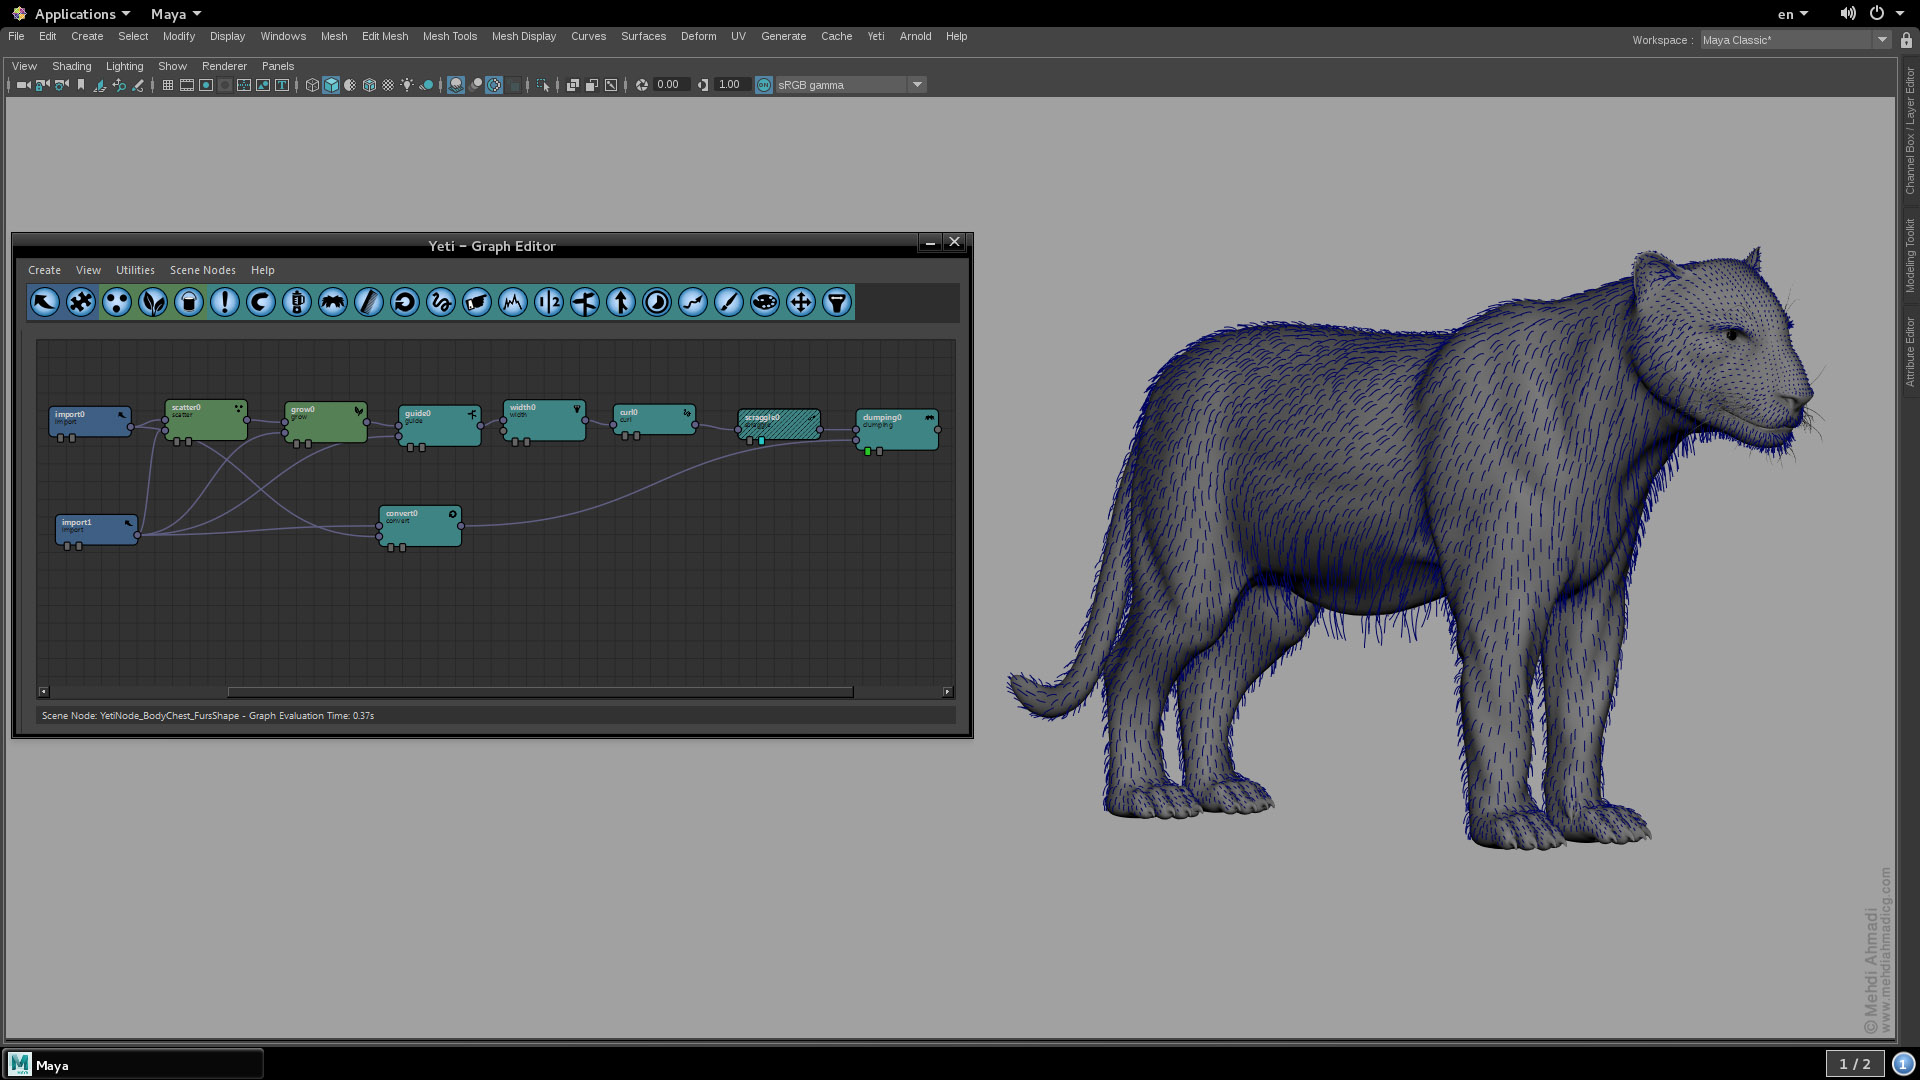
I have always been interested in the anatomy and the animals body structure, and therefore, a while ago I decided to make a 3D tiger.
My main goal was to create a tiger walking in front of a camera in a jungle.
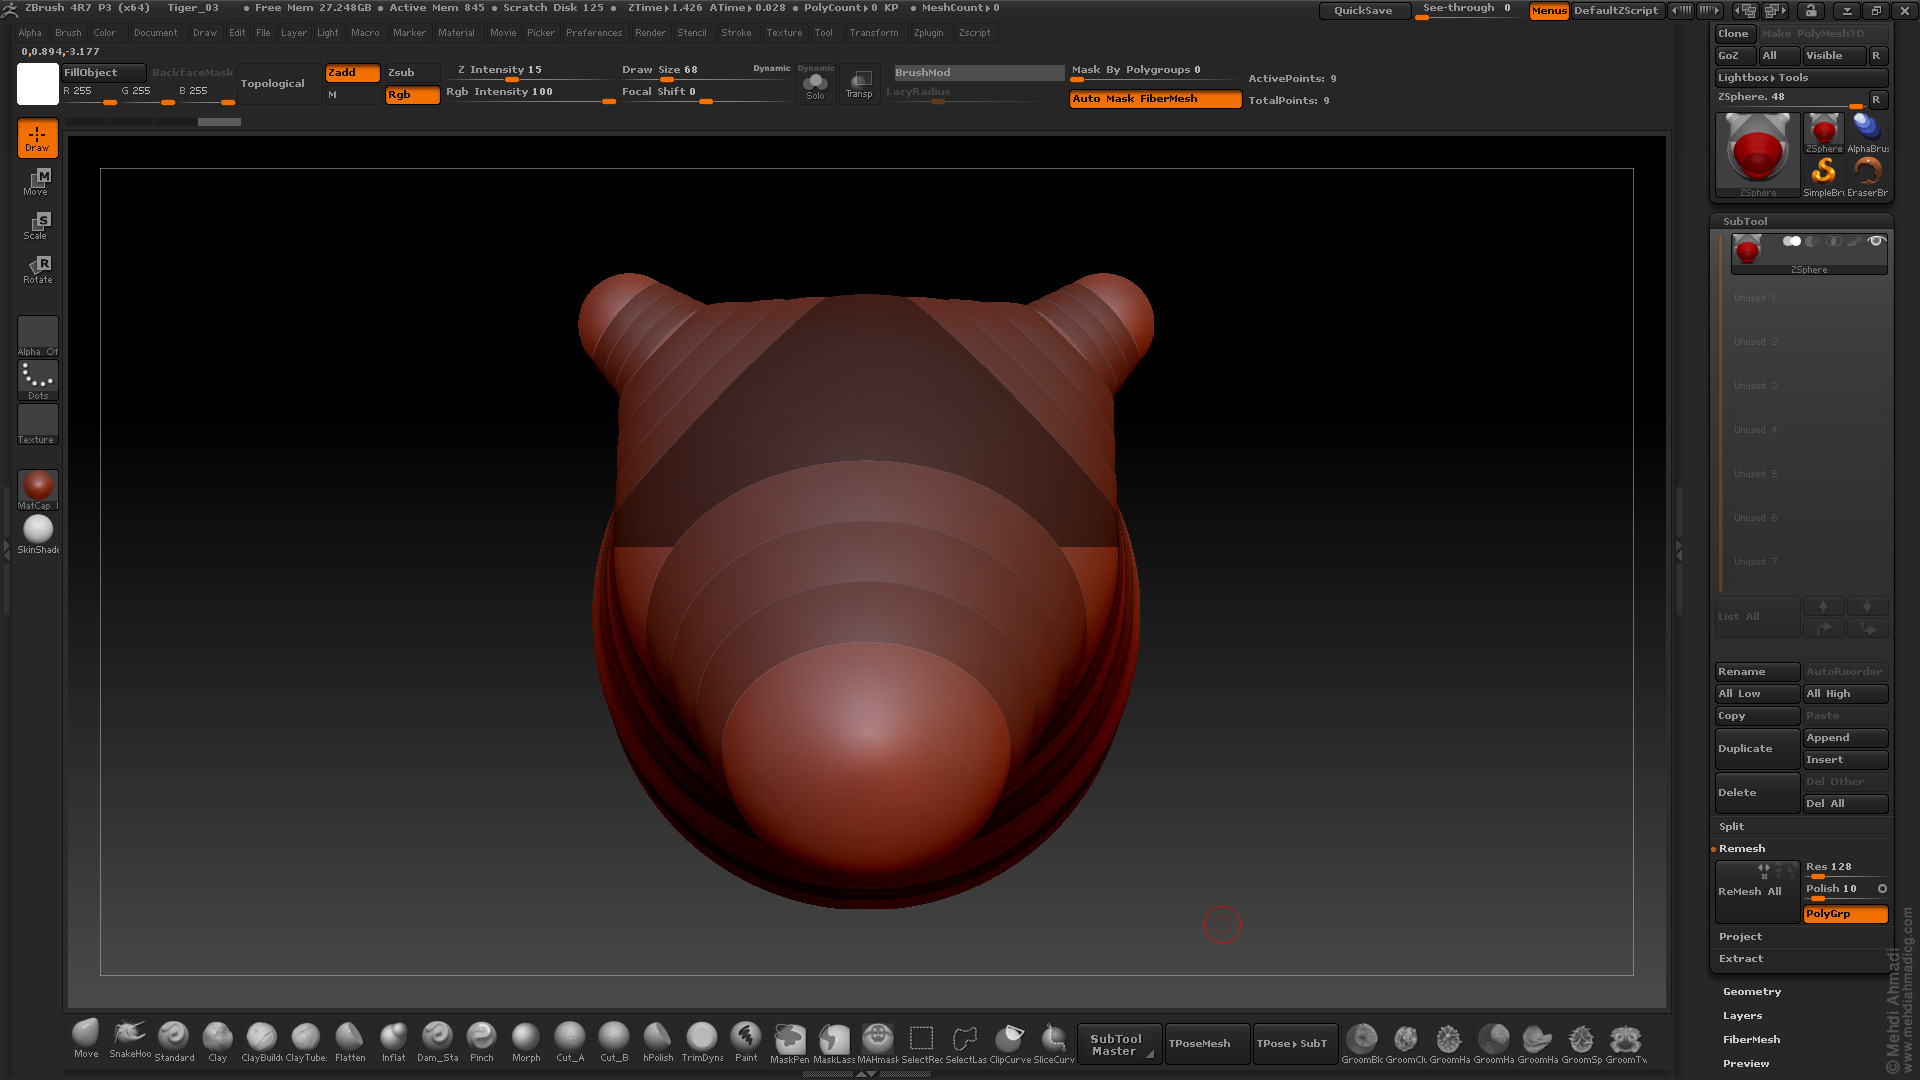
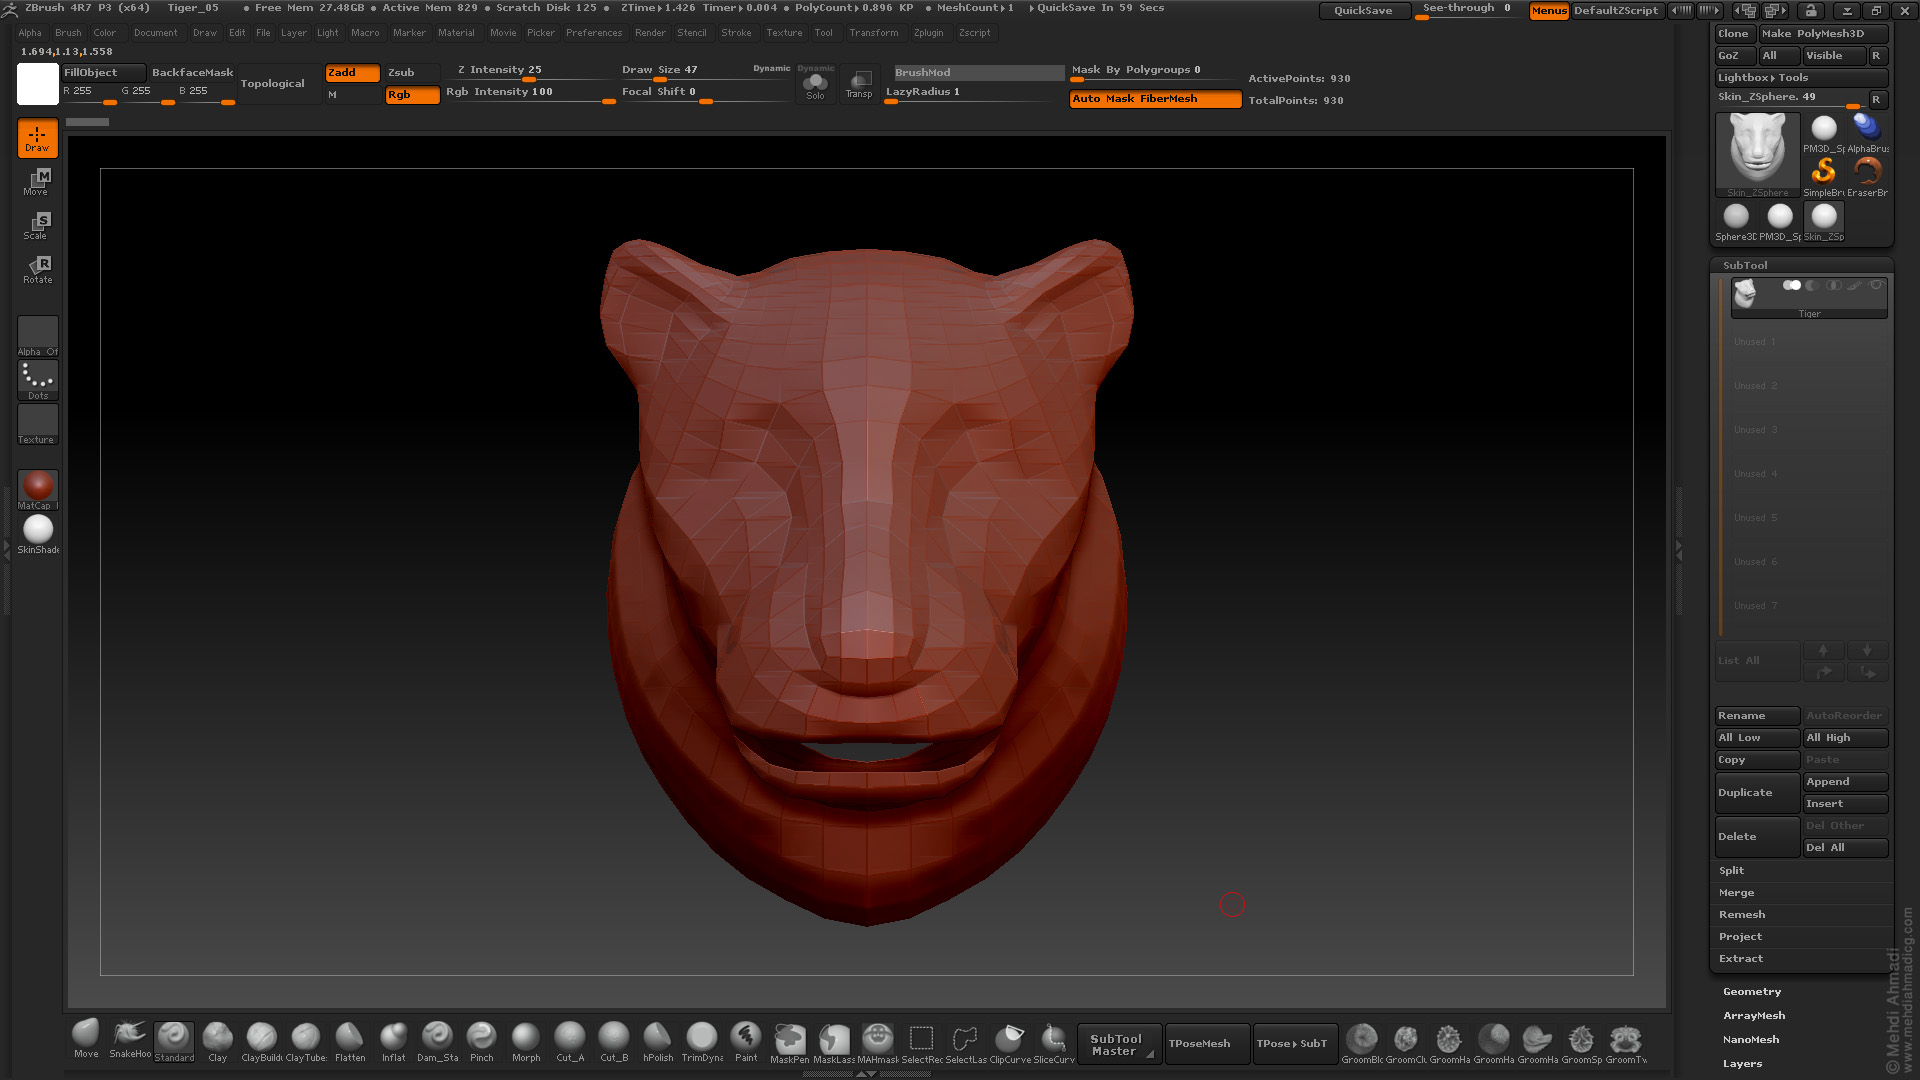
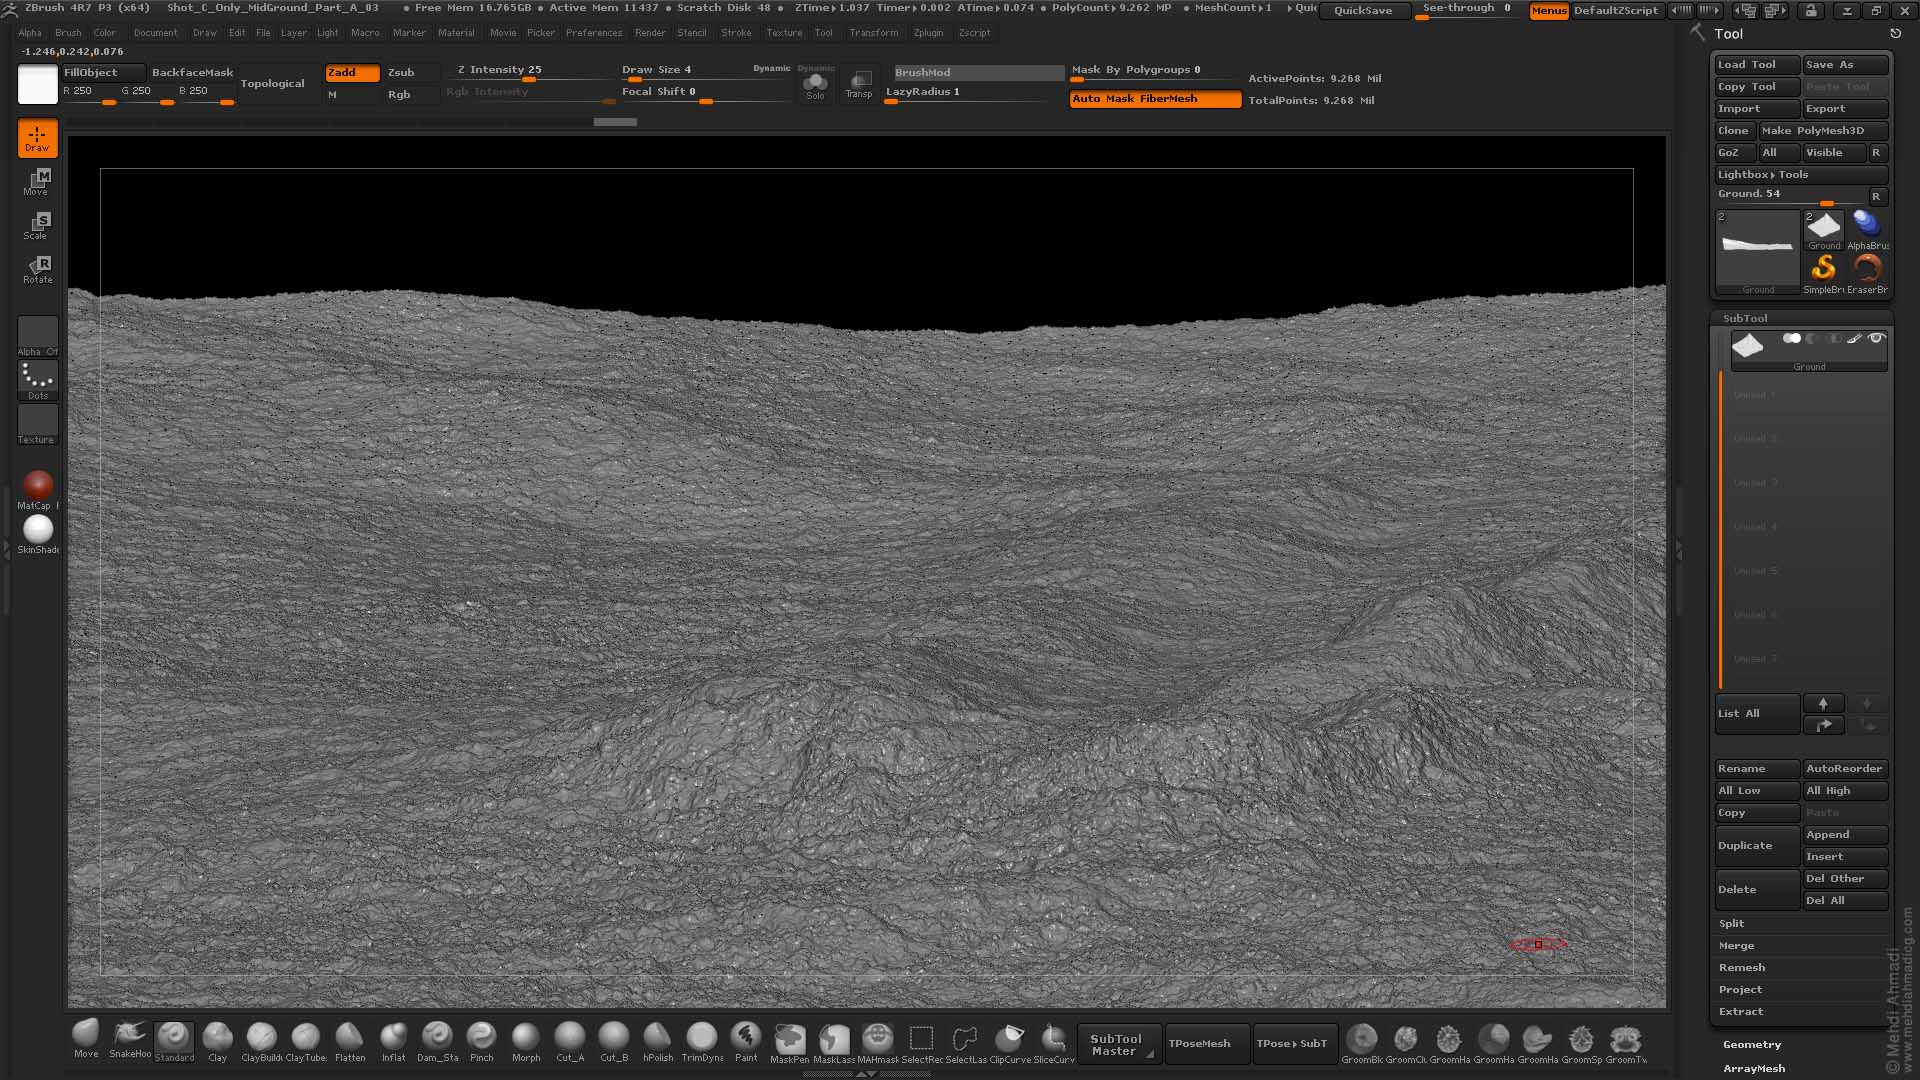
First I made the model of the tiger in the ZBrush and did the texture in Mari, then it was groomed with Yeti, and finally, I rigged and animated it in the Maya.
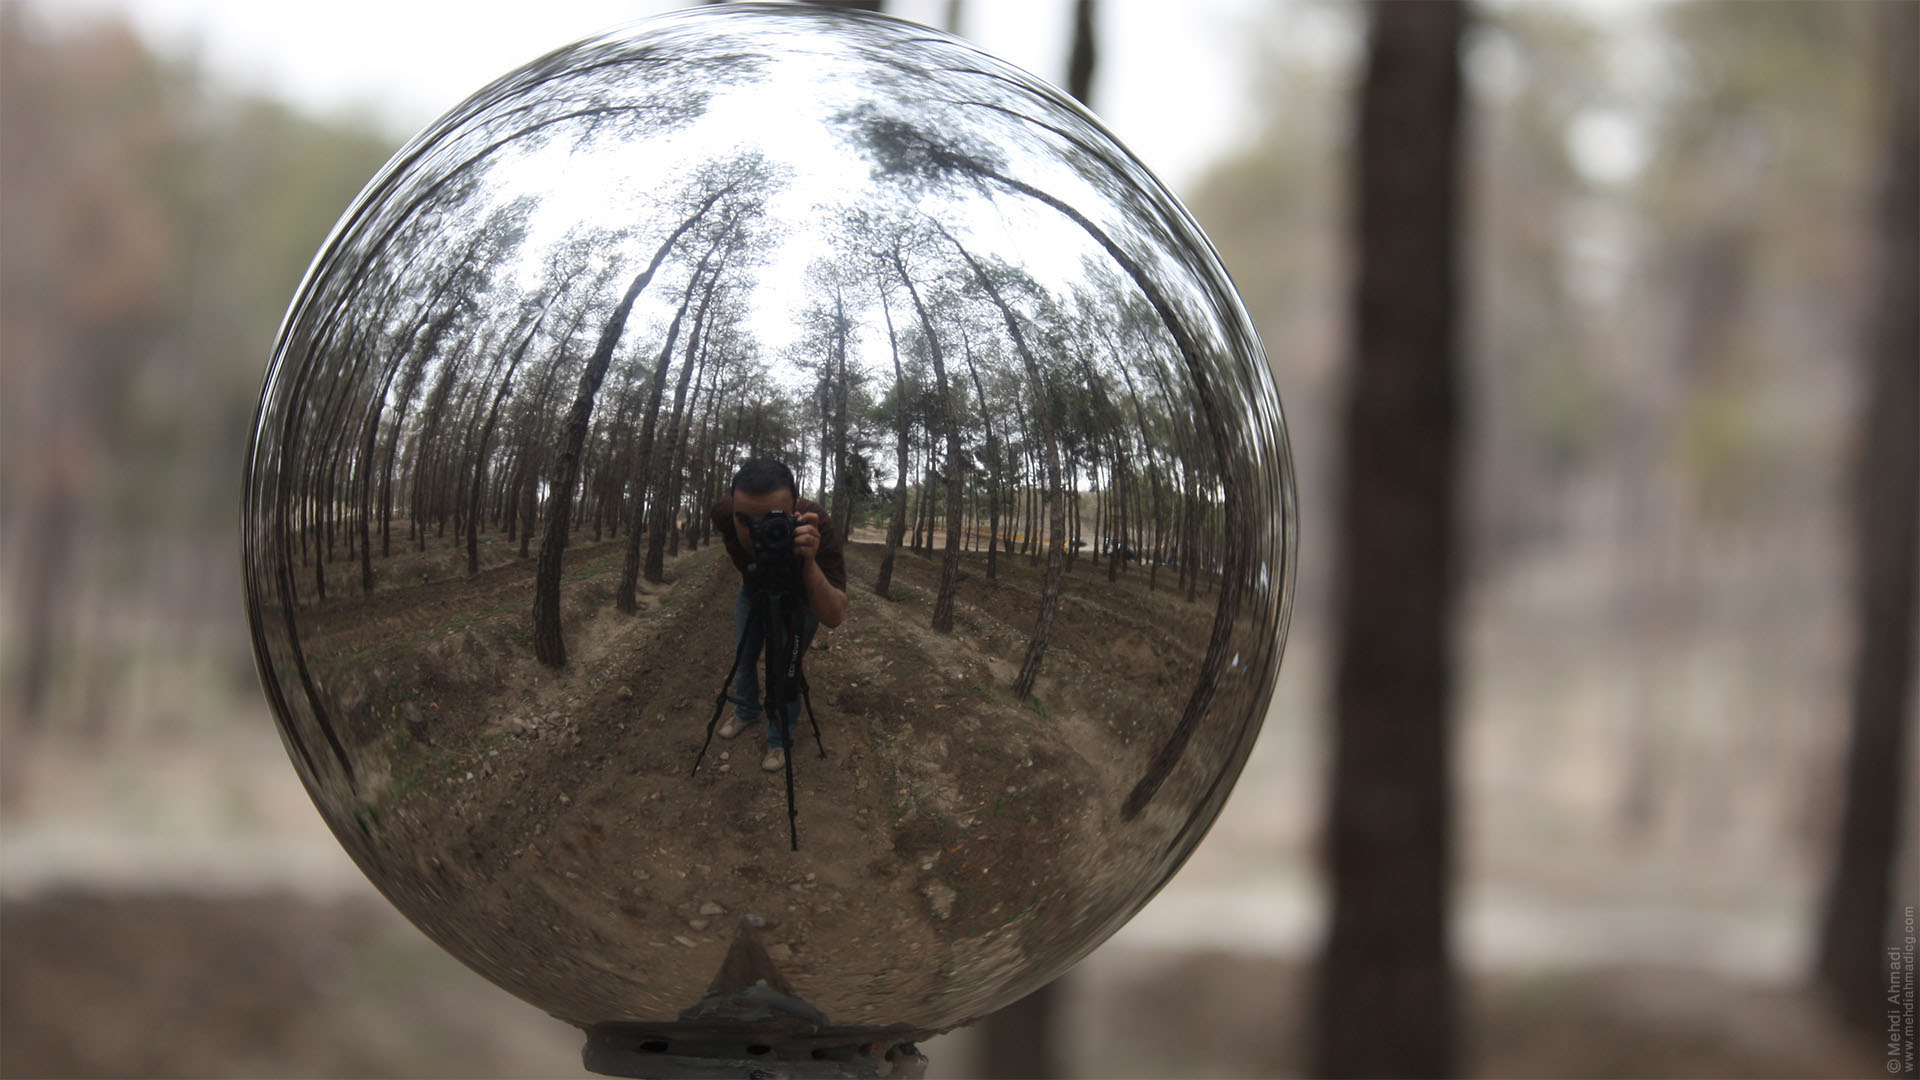
After the creation of the tiger was over, I had to create a jungle, and one of the things which was interesting for me in this project was the HDRI photography of a forest park to create the jungle environment.
To prepare the HDRI map of this work, first I built a Mirror Ball manually and then I placed my Mirror Ball in the center of a forest park and totally took 104 pictures with different exposures from 8 different angles (13 pictures for each angle) and finally I created an HDRI map by merging all the images in the Photoshop, to use it in the Maya.
I was responsible for all aspects of this project from beginning to end and I did all the steps of the work myself.
These steps included :
Gathering the References, Modeling, Texturing, Grooming, Rigging, Muscle Setup and Simulation, Skin Simulation, Animation, Photography and creating HDRI Map, Shading, Lighting, Rendering, and Compositing.
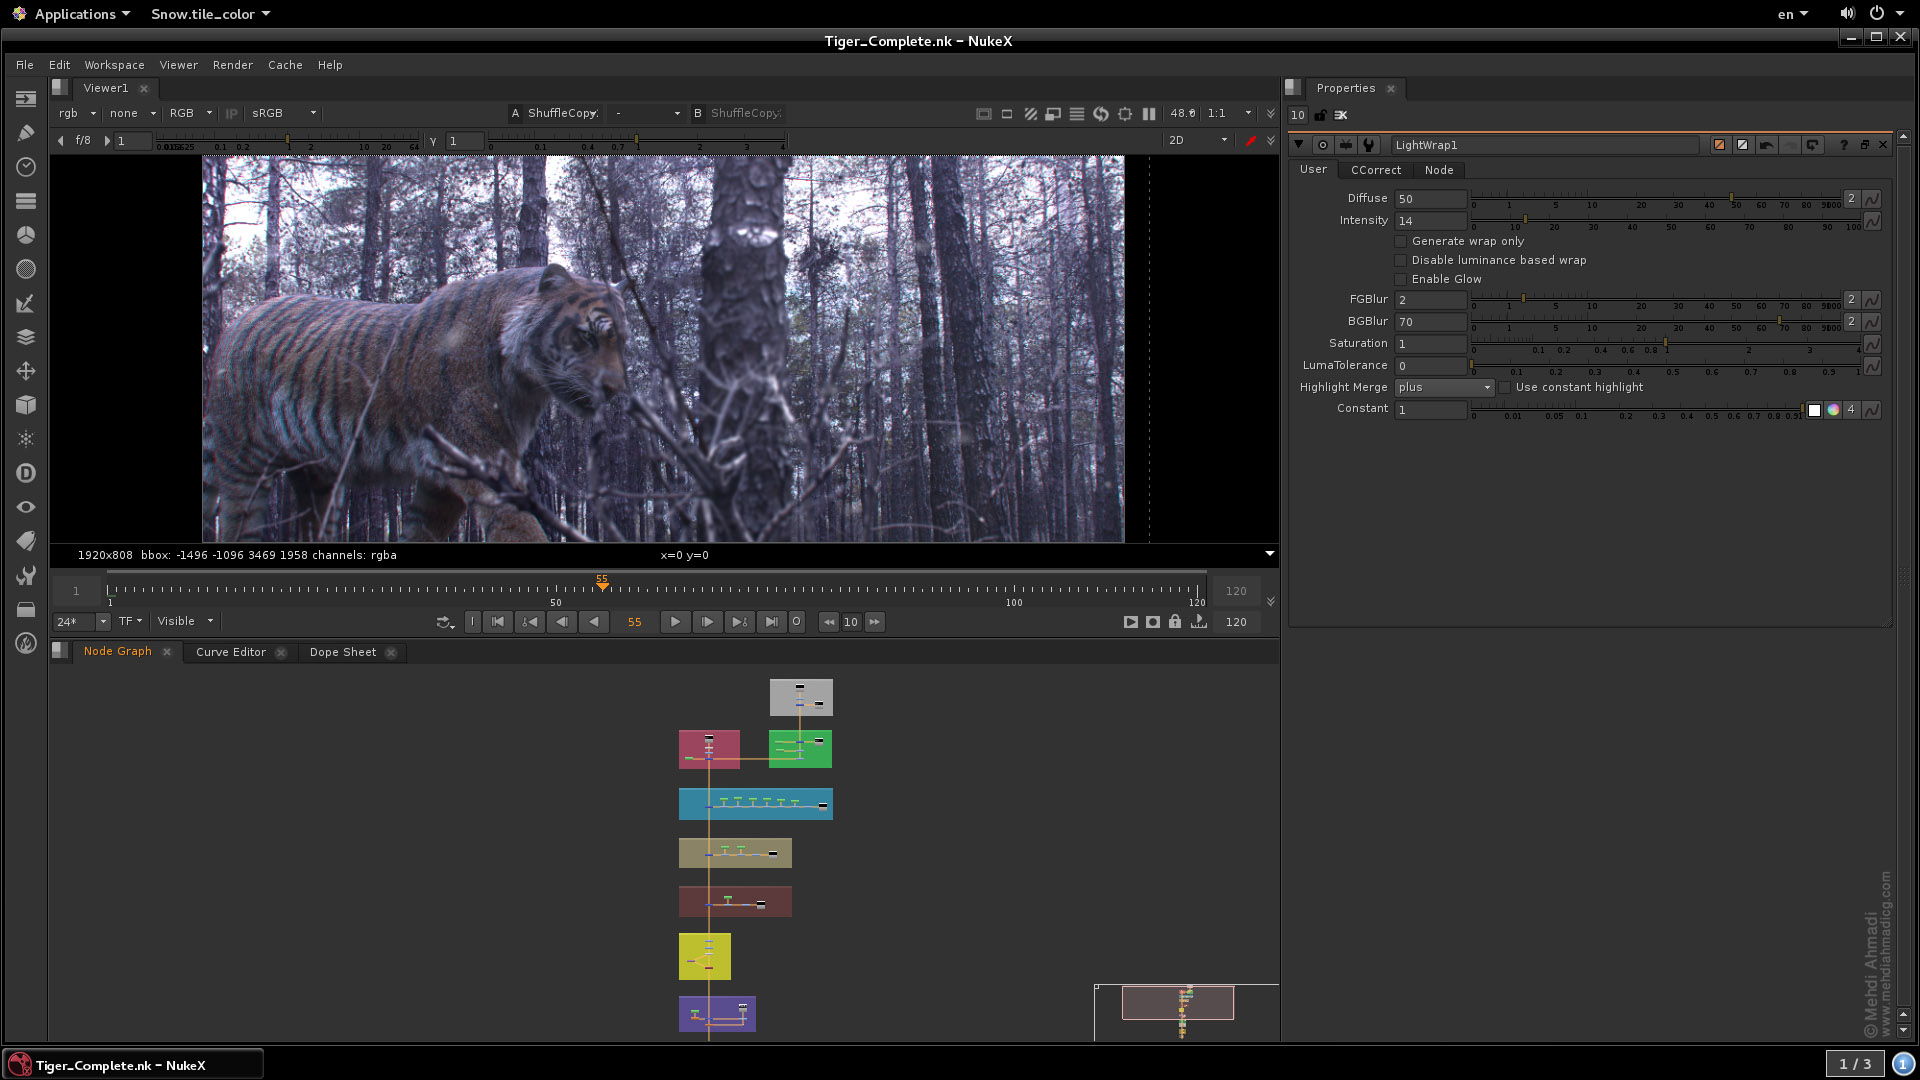
And for this project, I used Maya, ZBrush, Mari, Photoshop, Yeti, Arnold, After Effects, and Nuke.
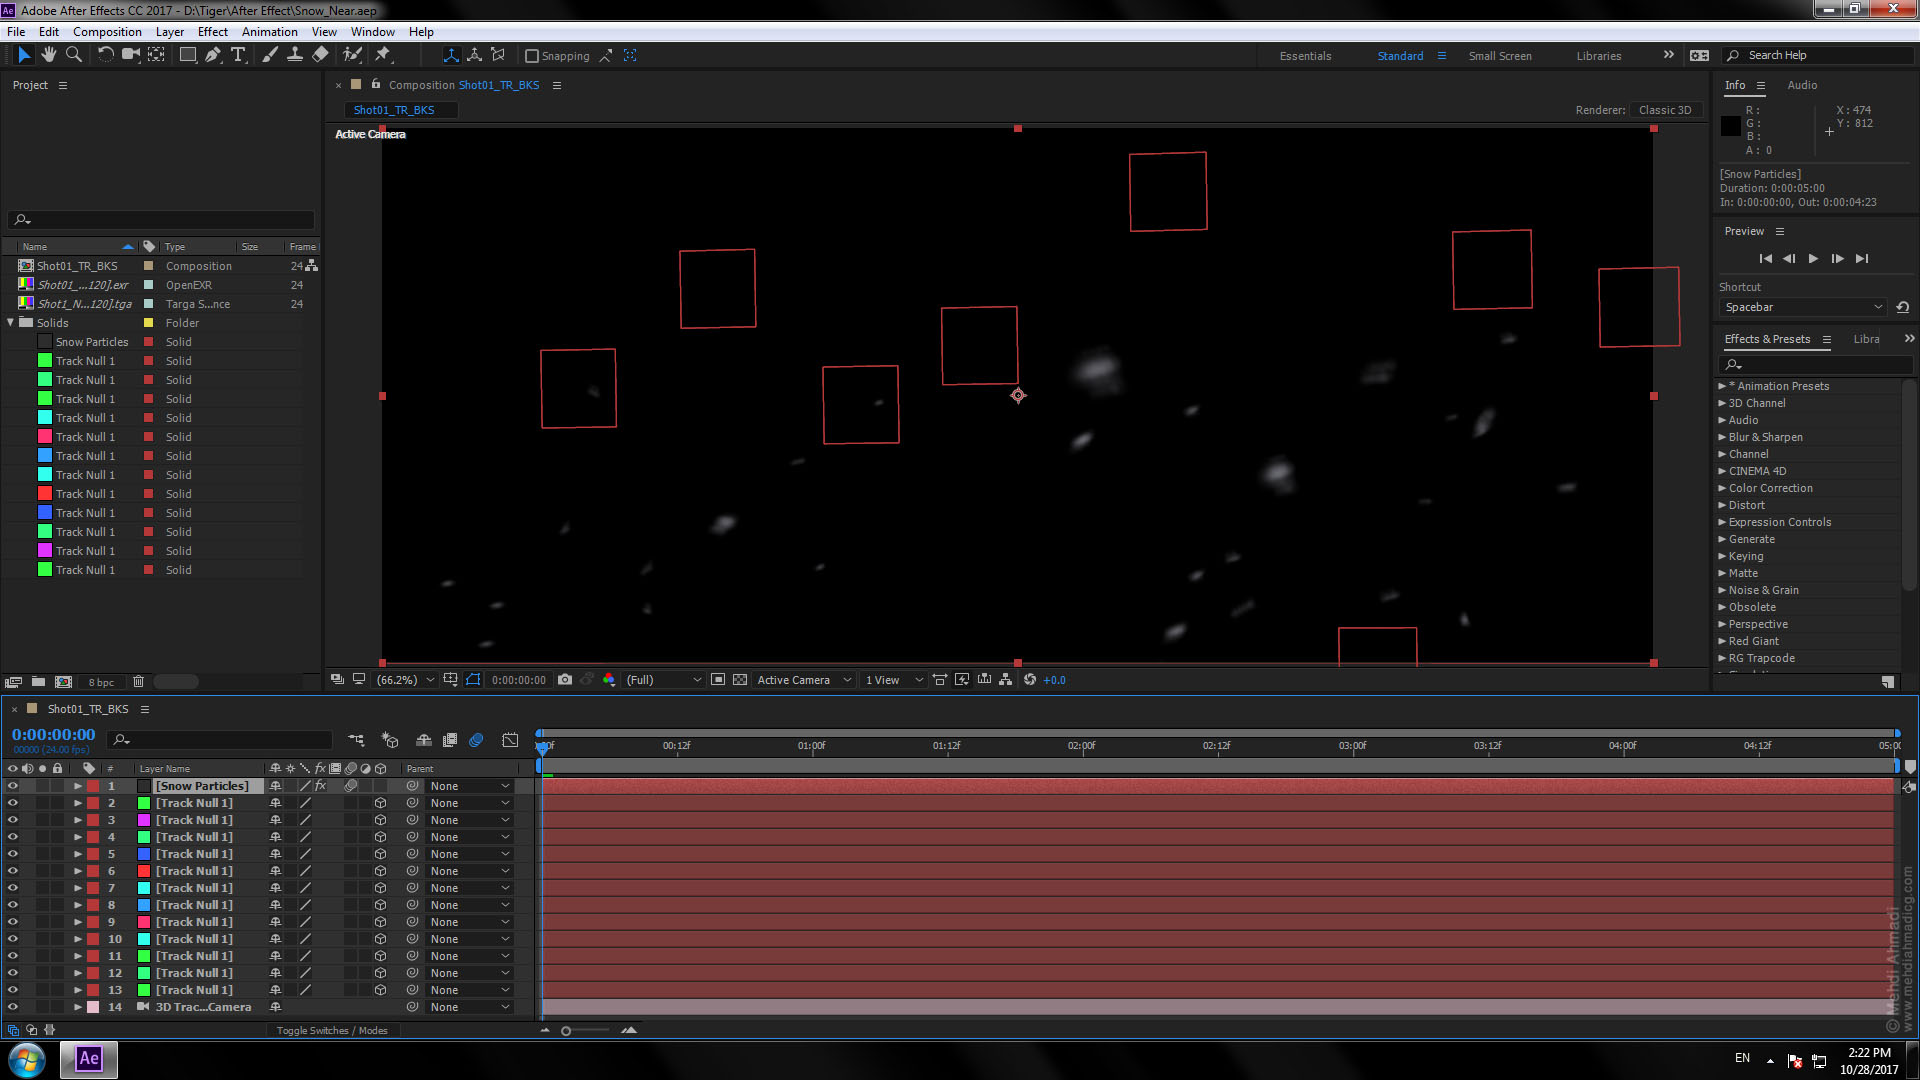
Below you can see some pictures from different steps of my work.


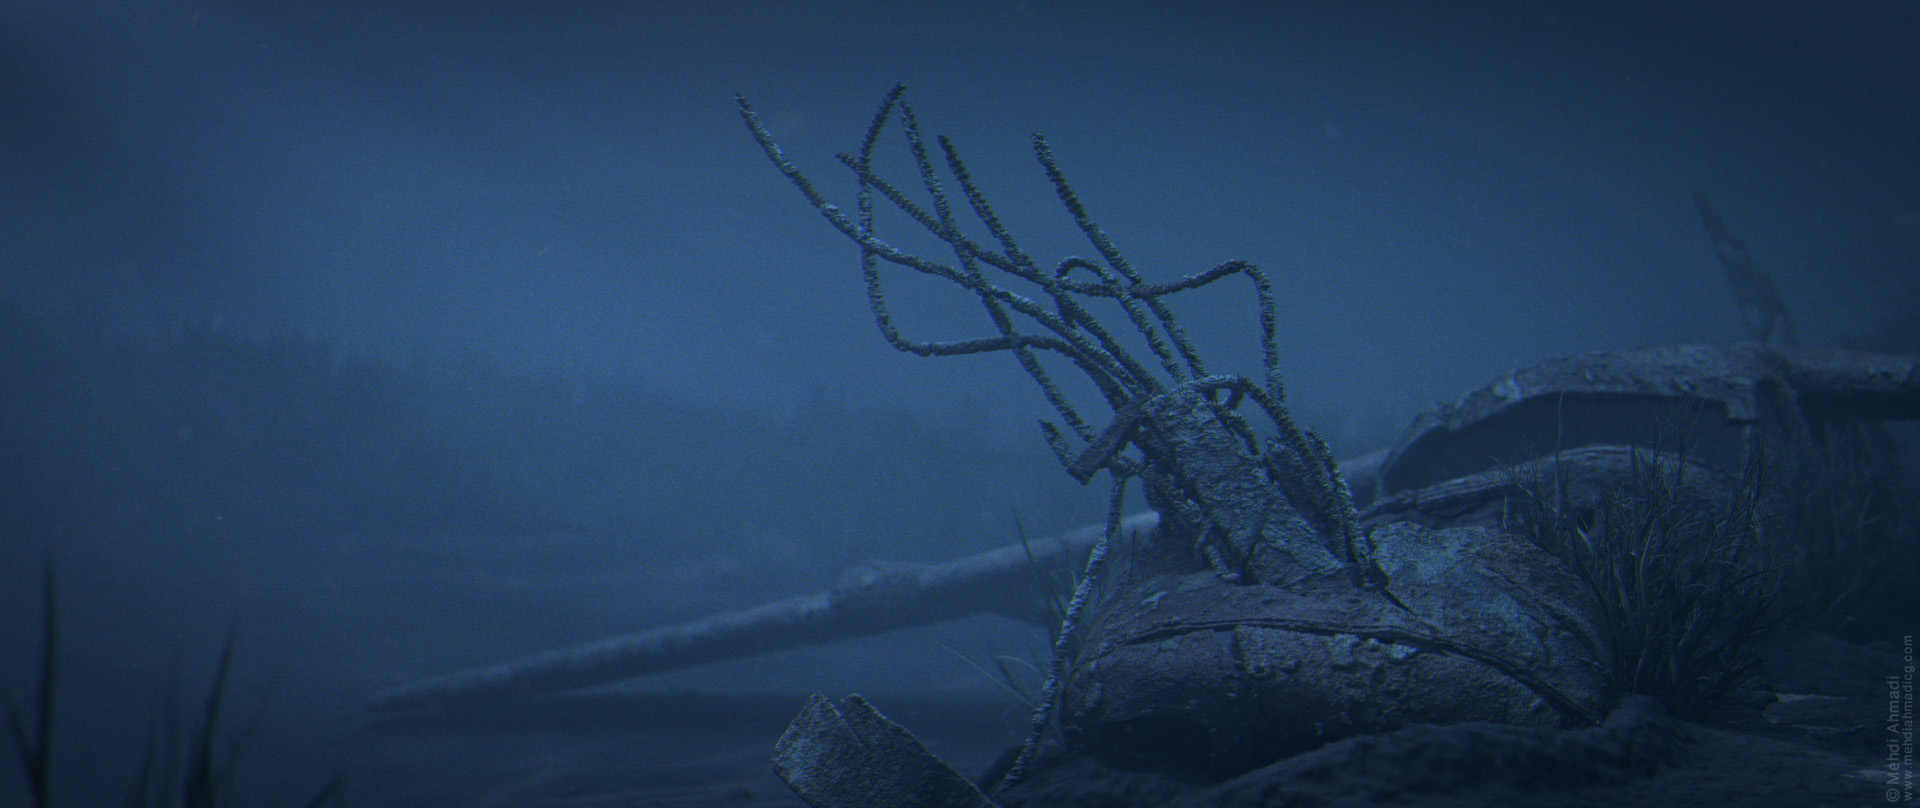
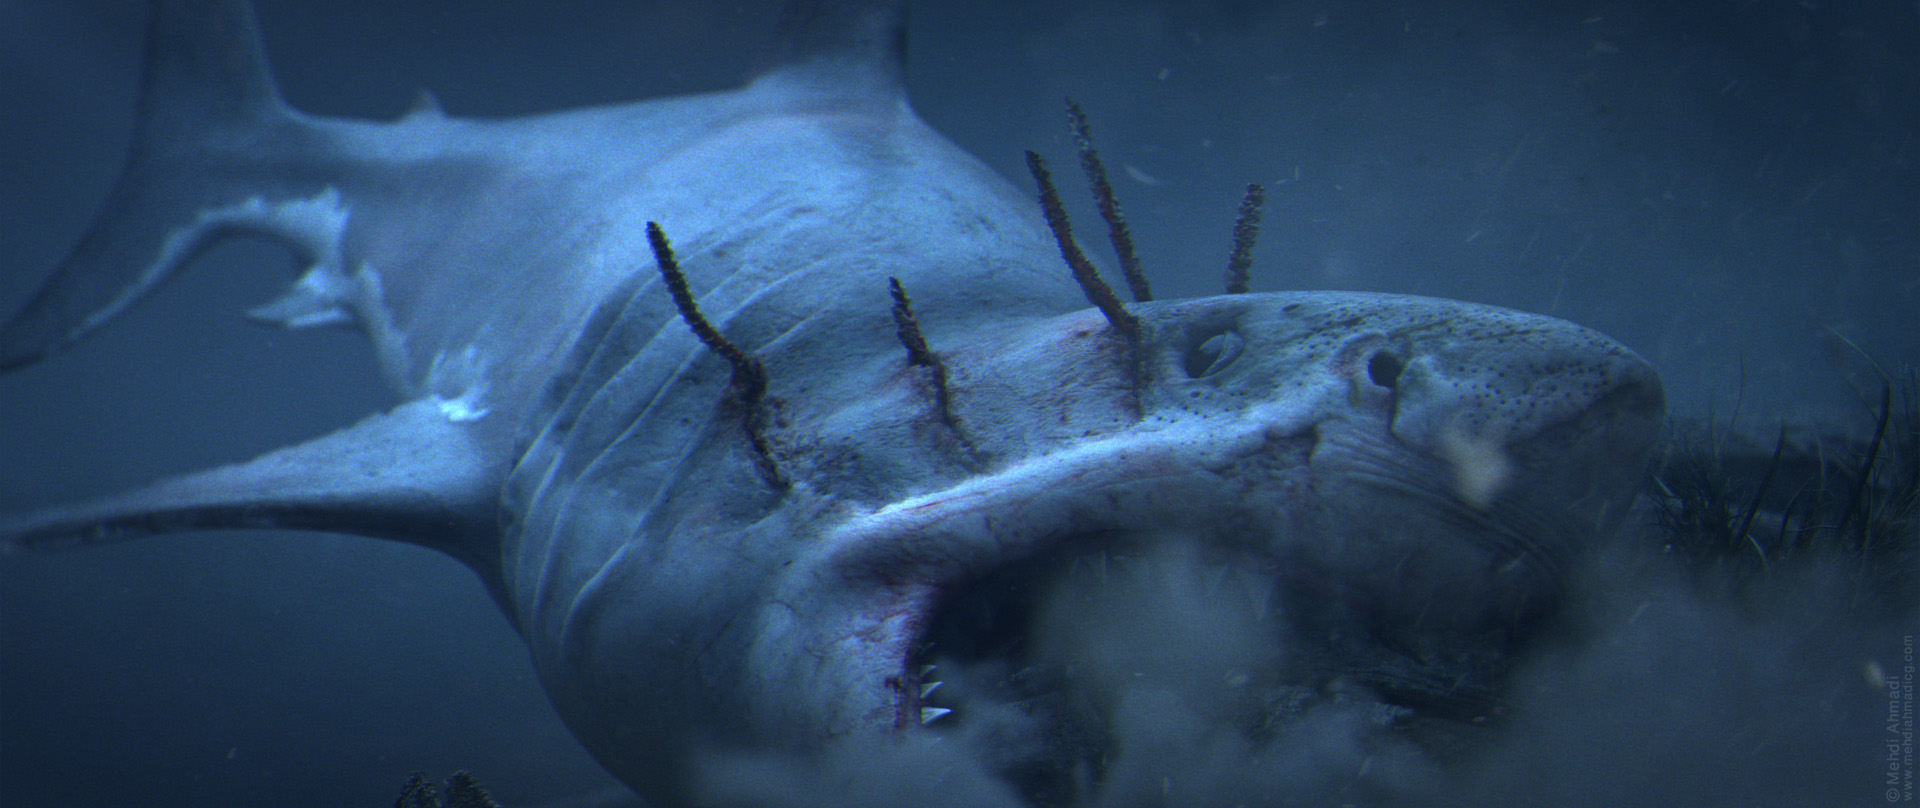
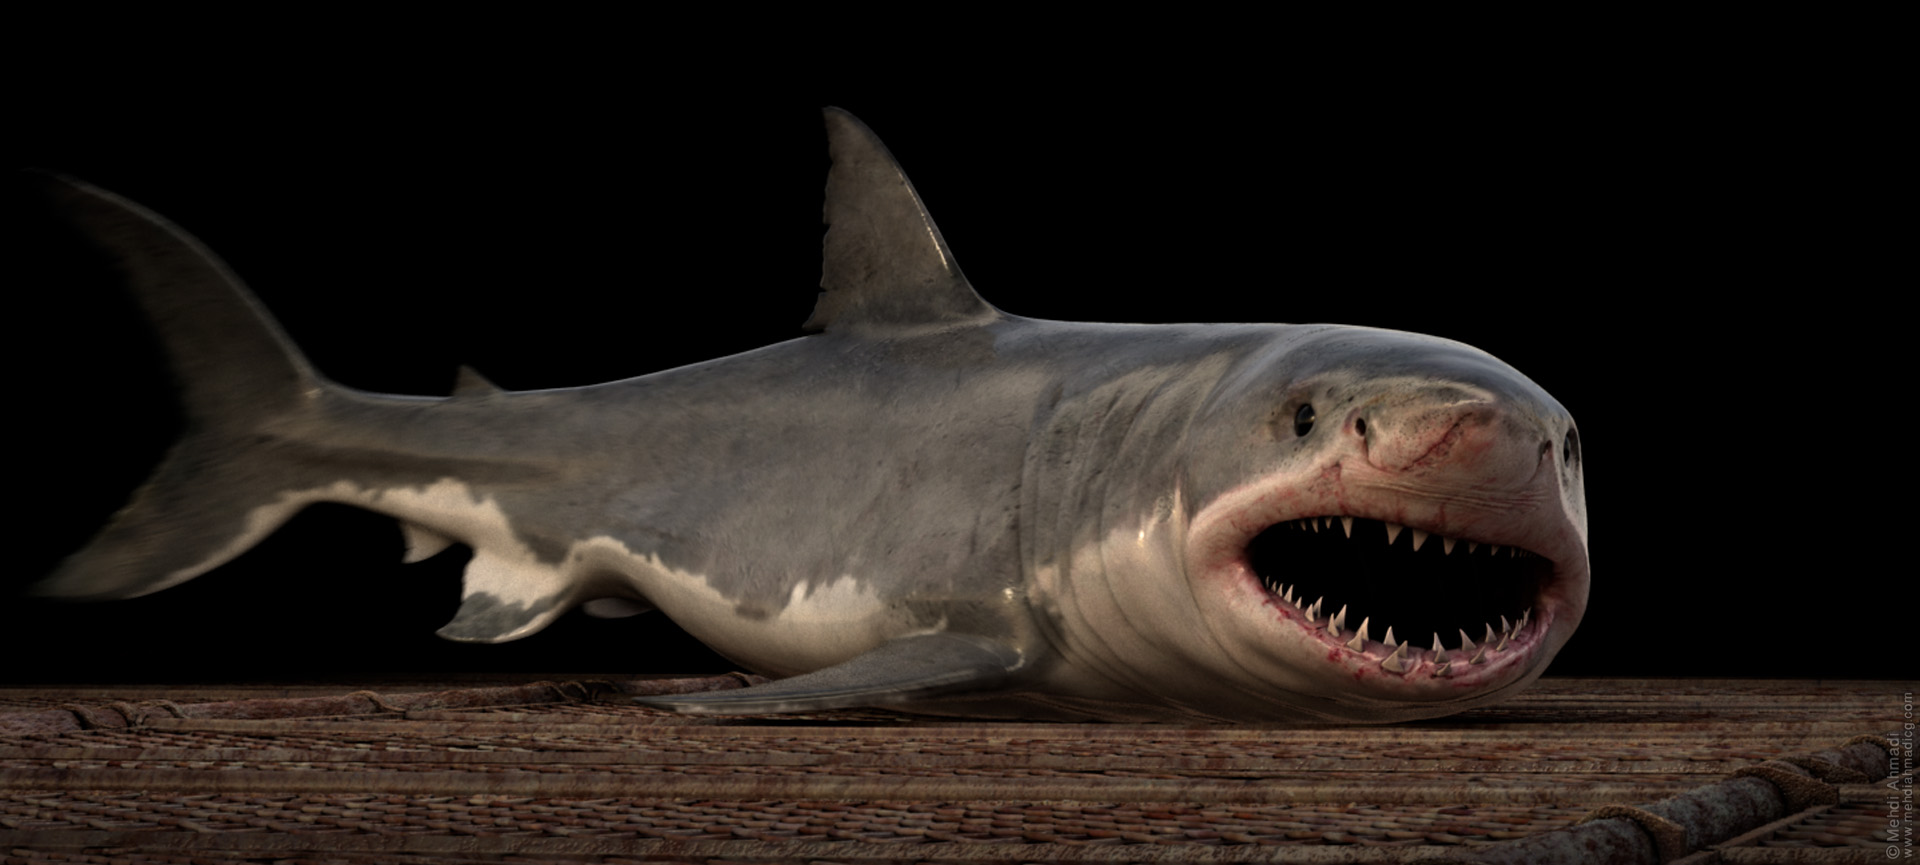
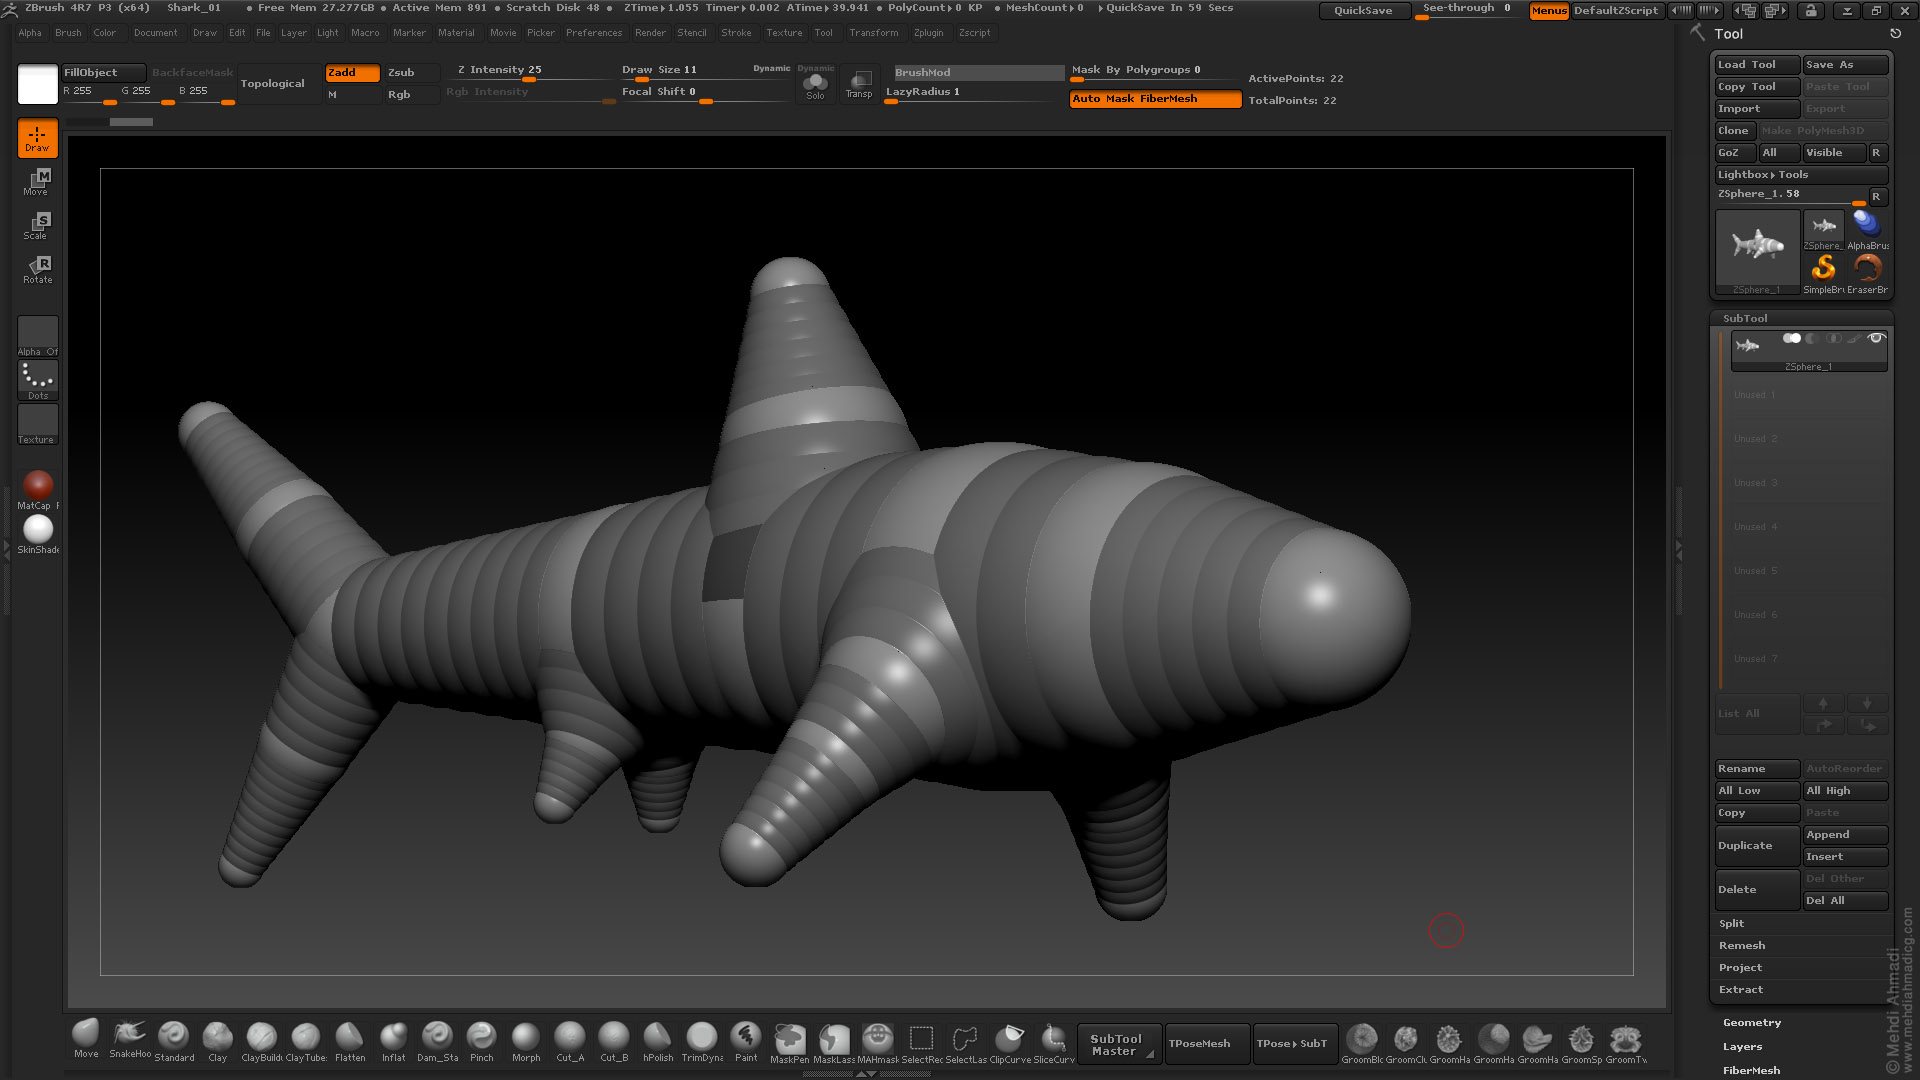
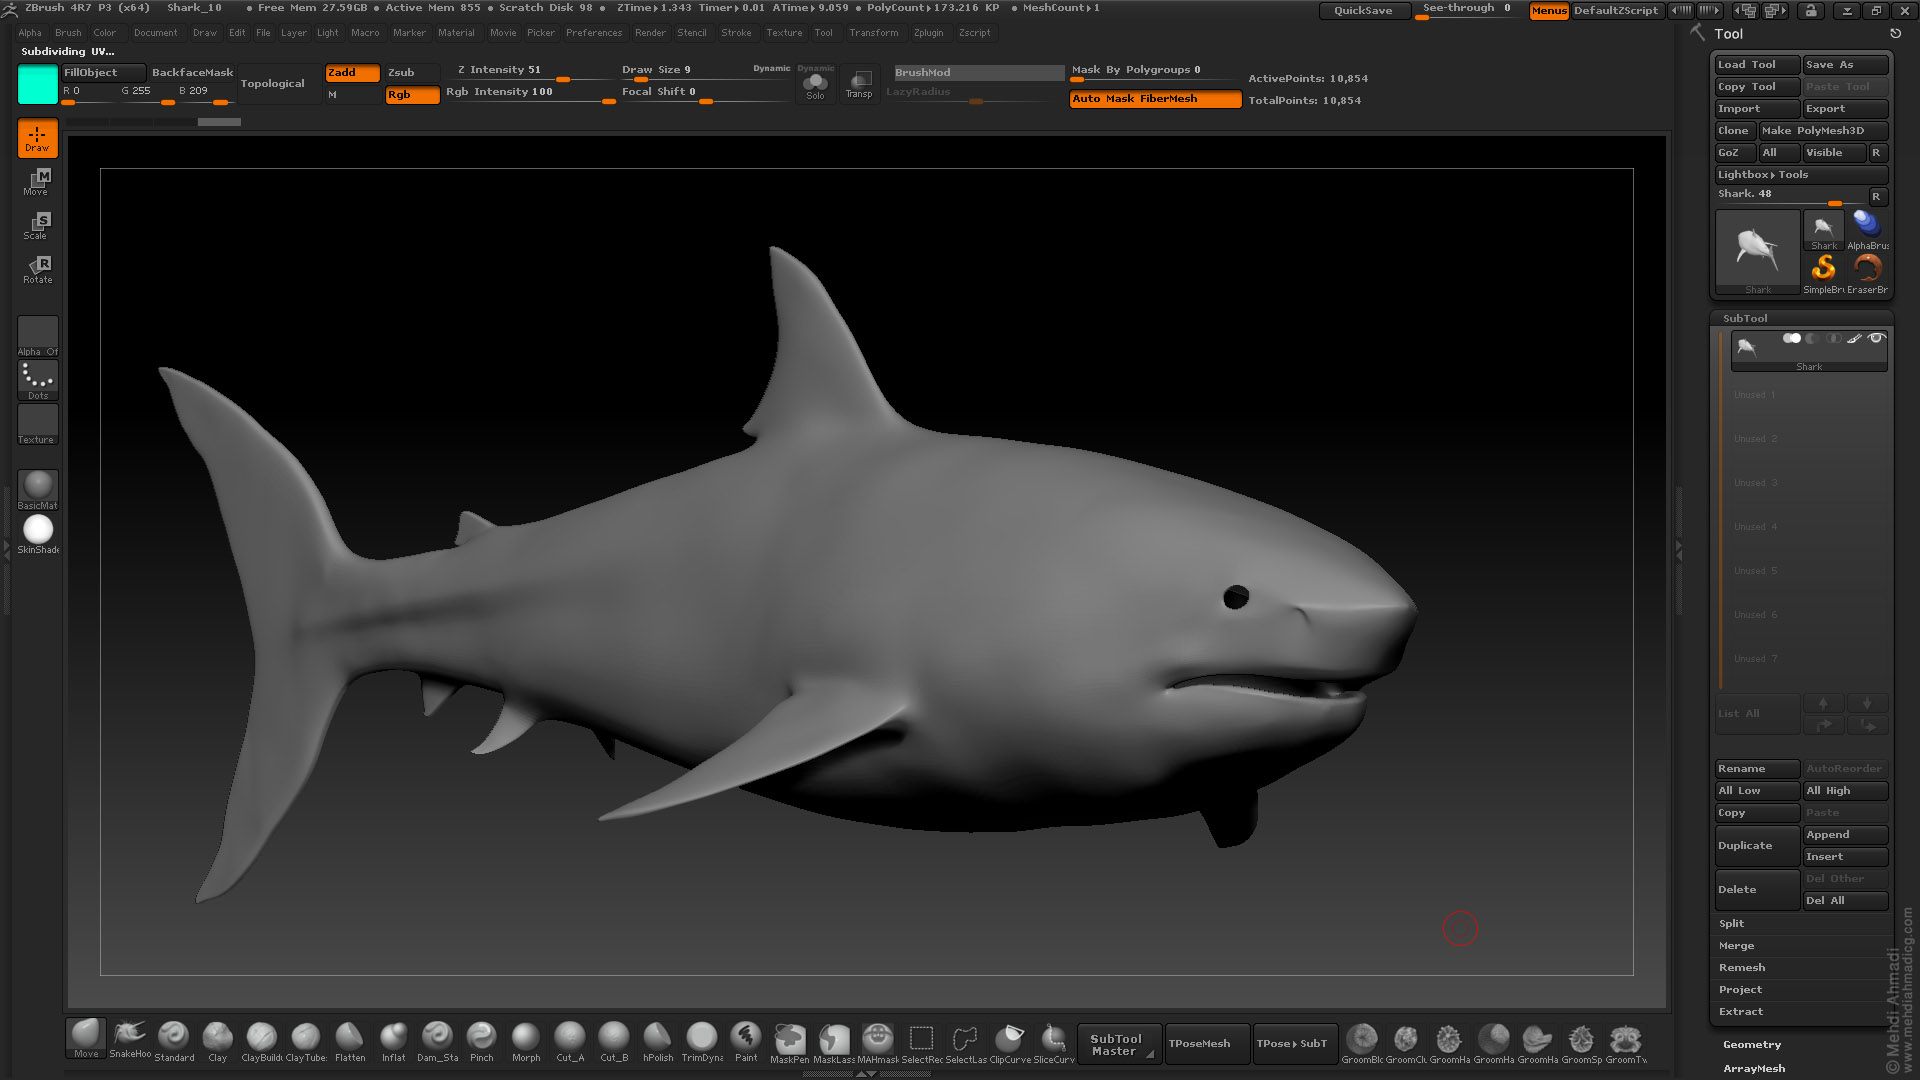
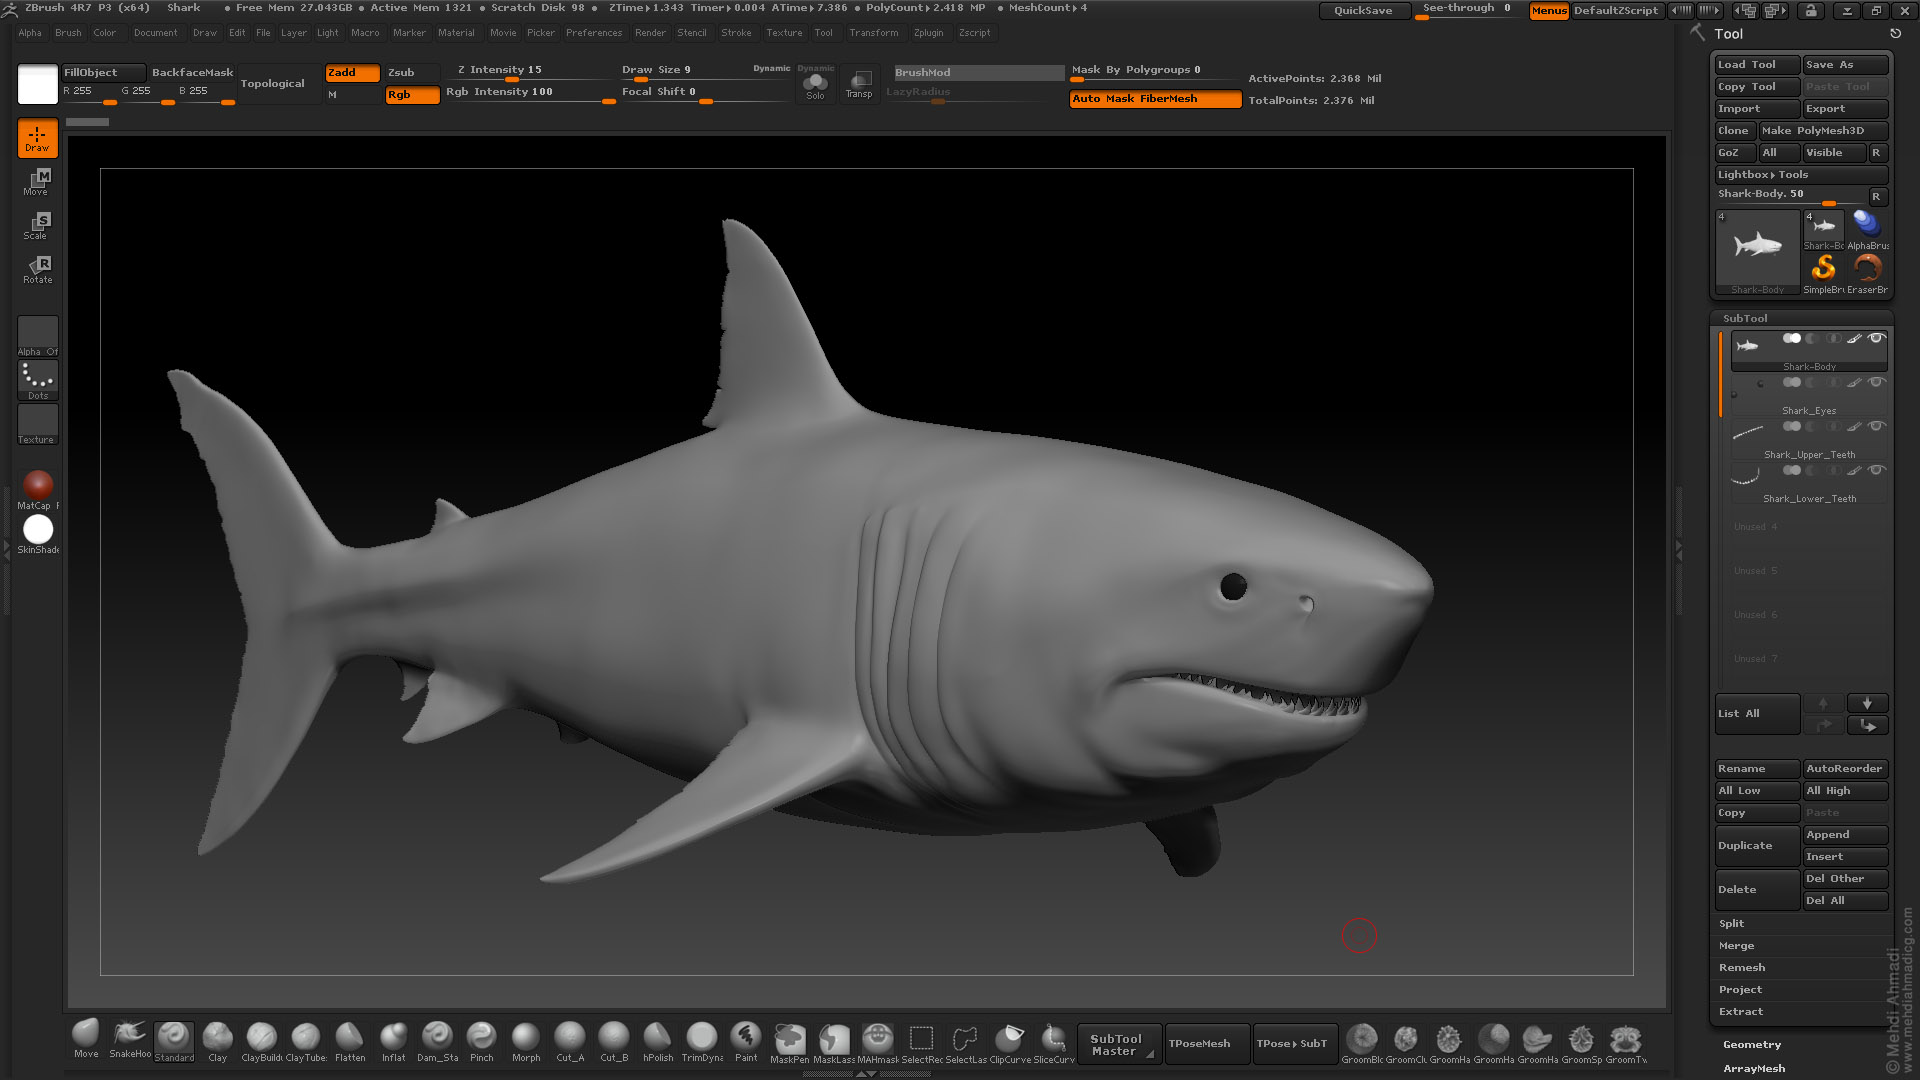
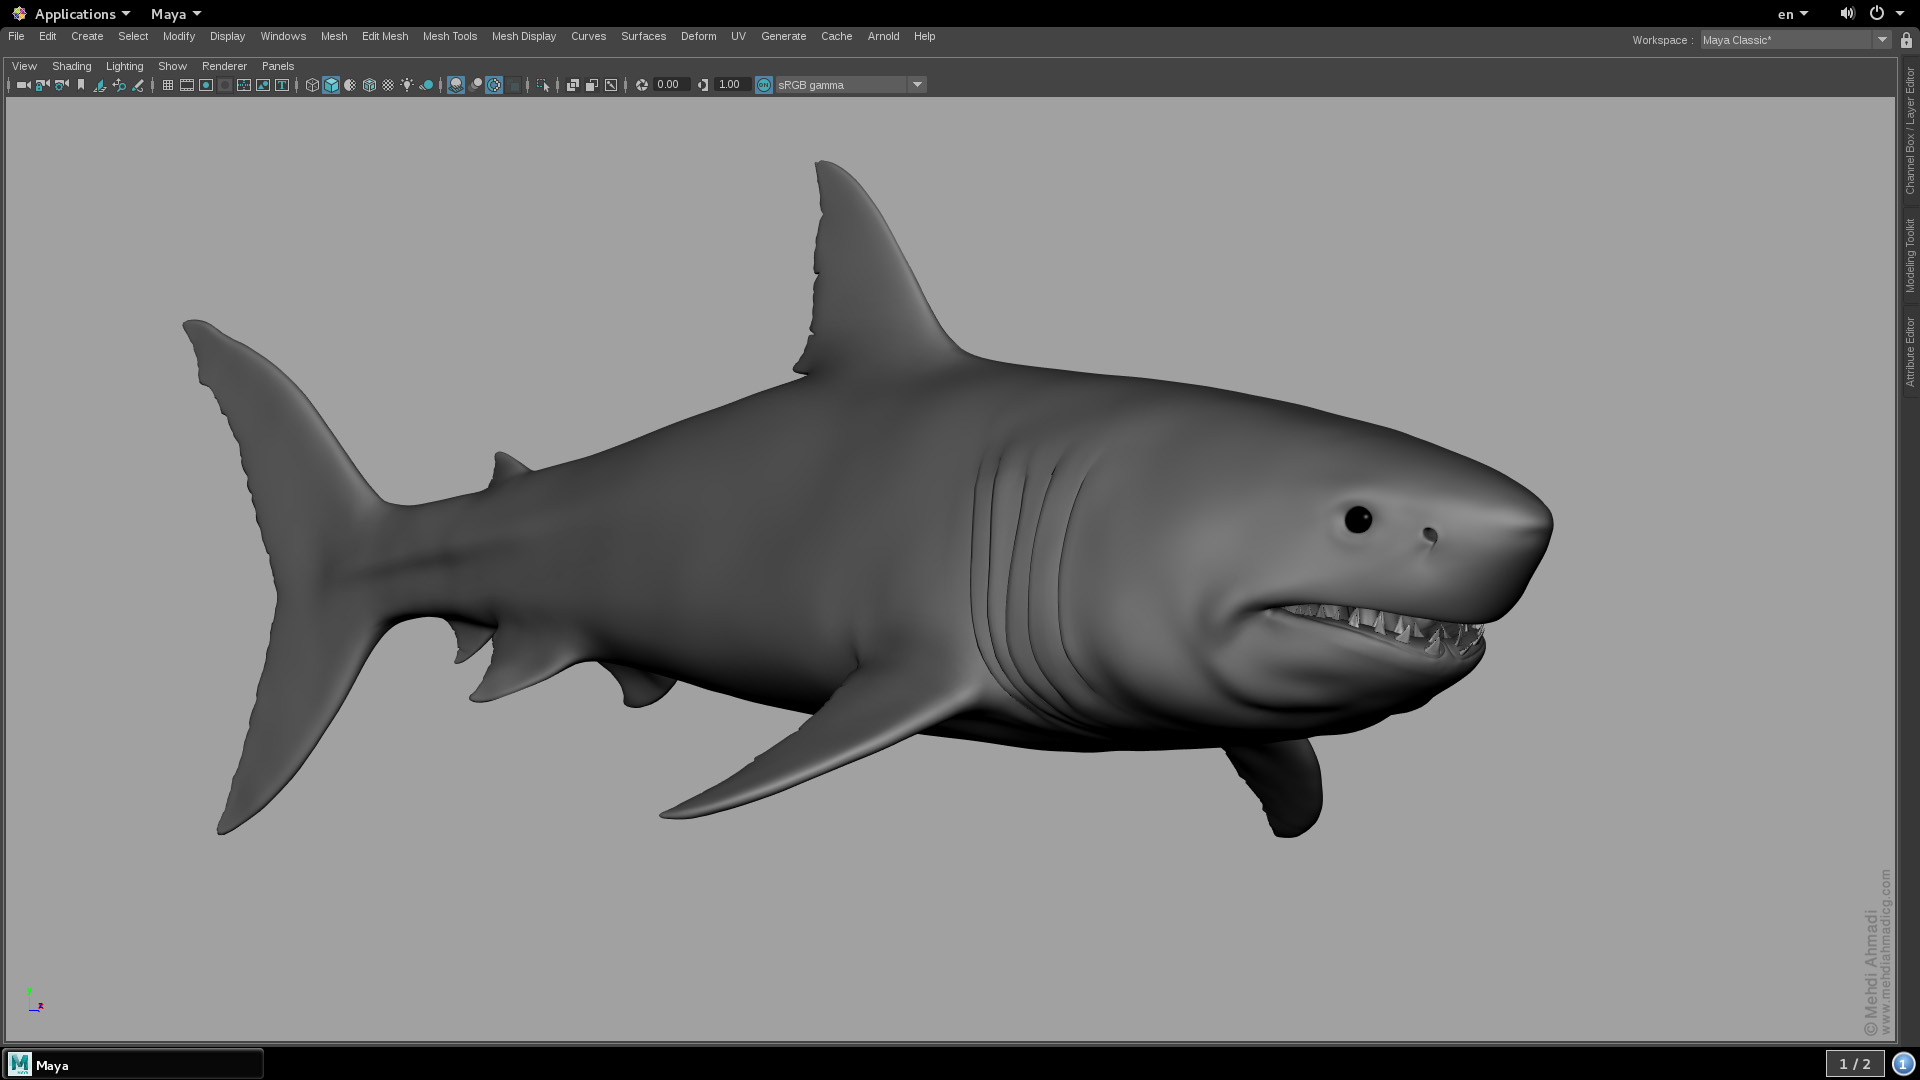
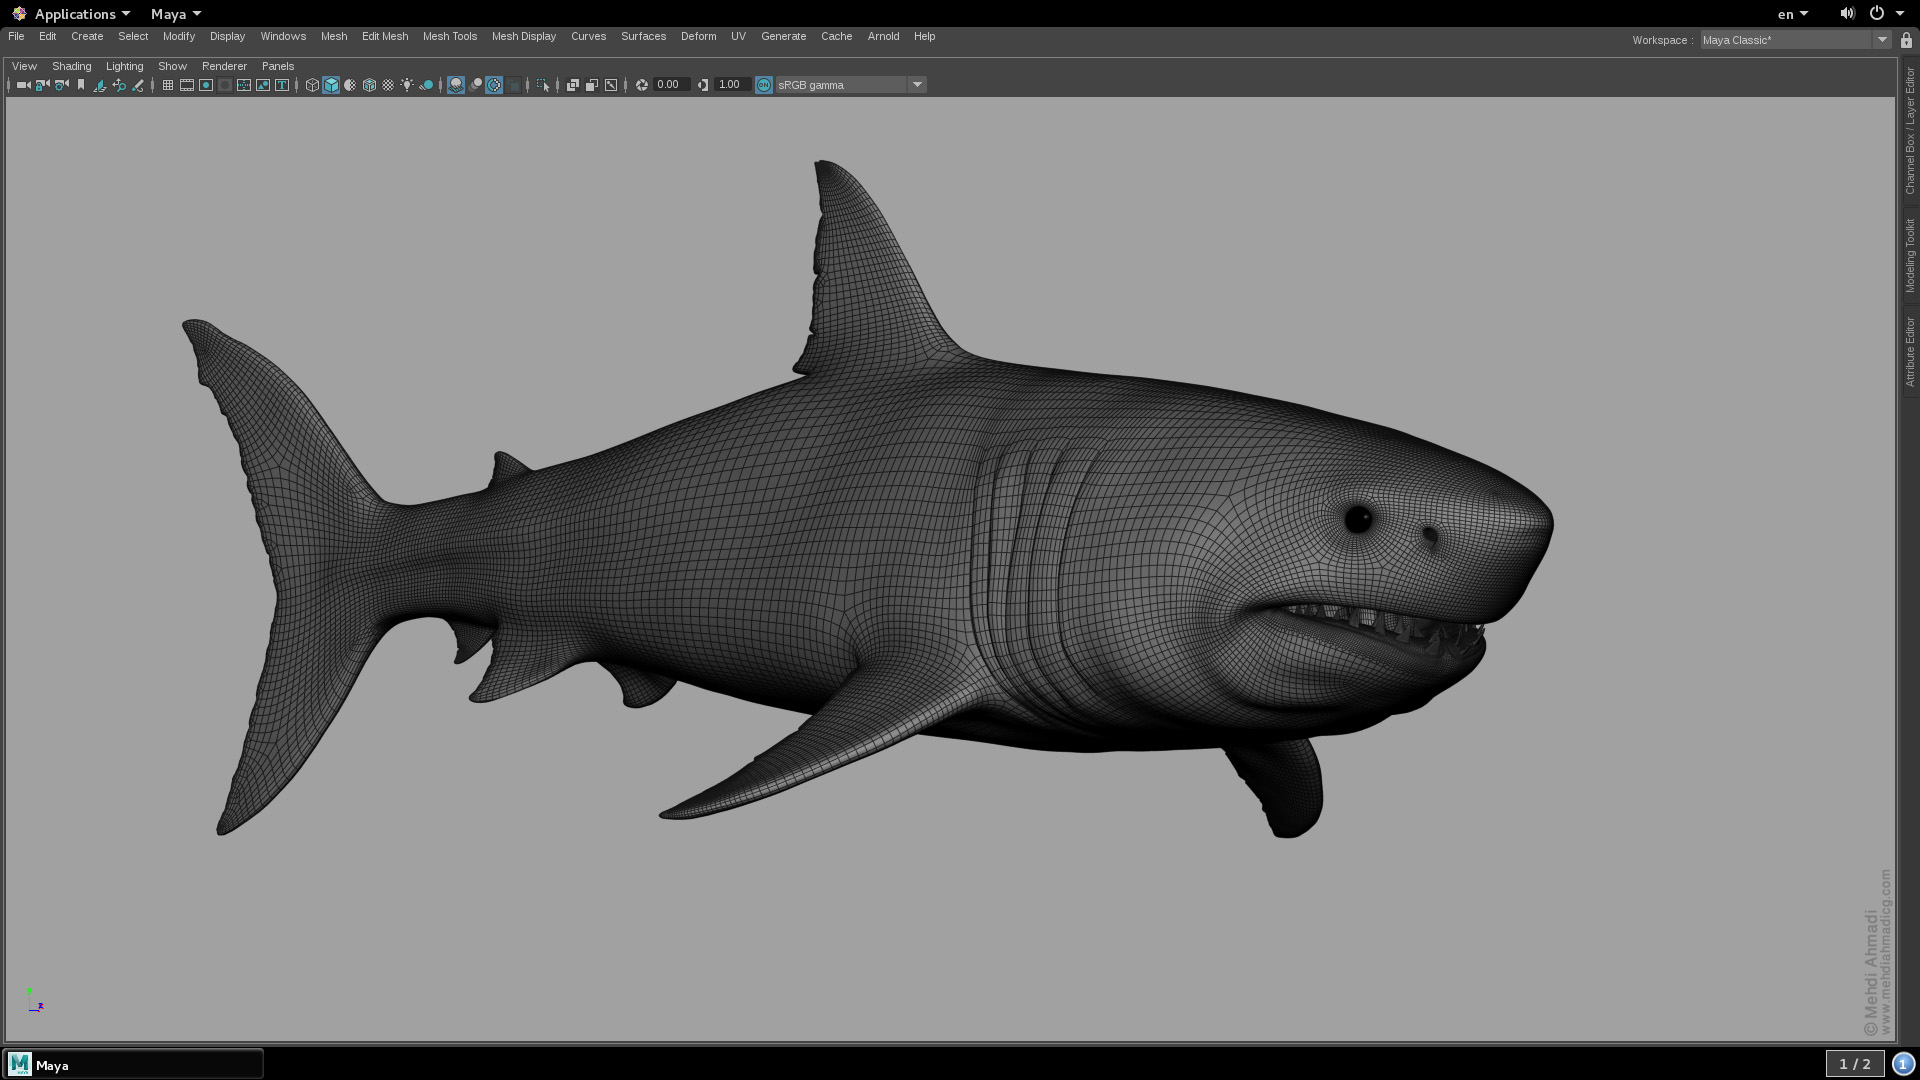
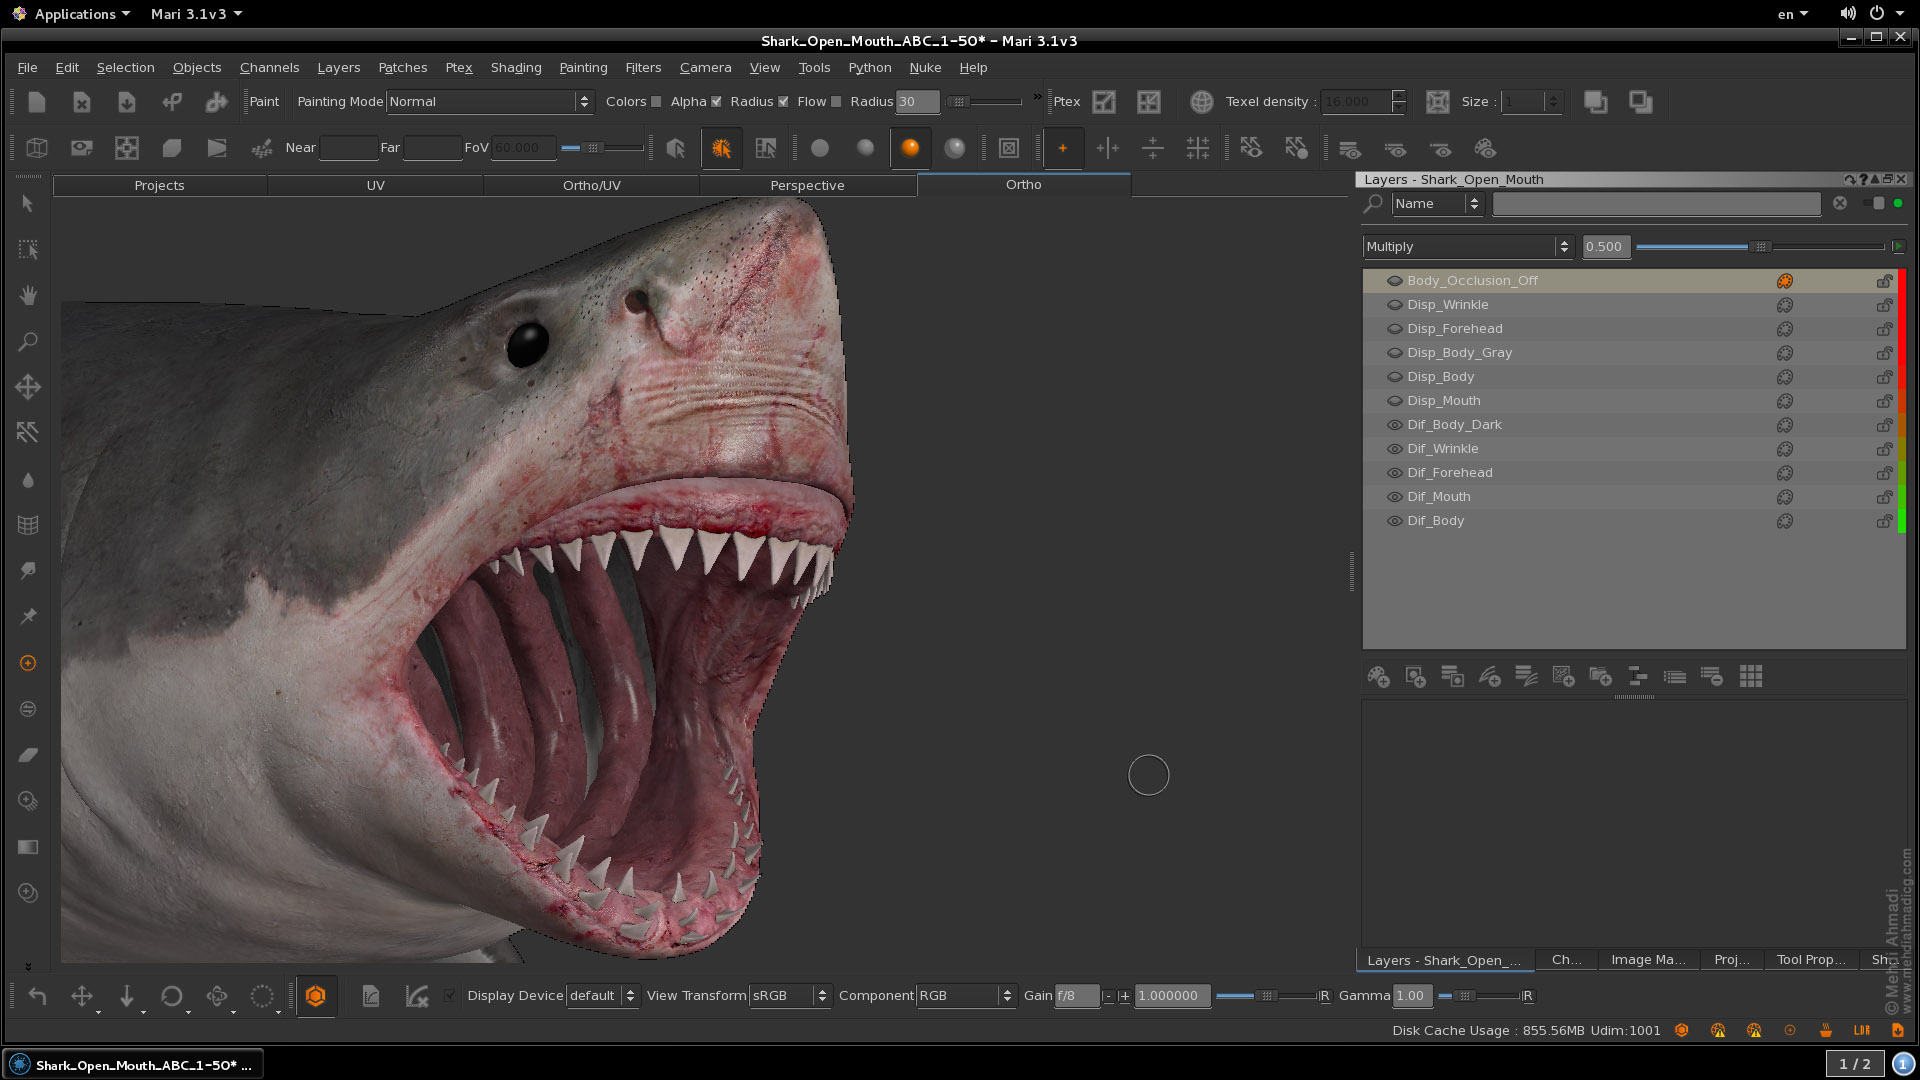
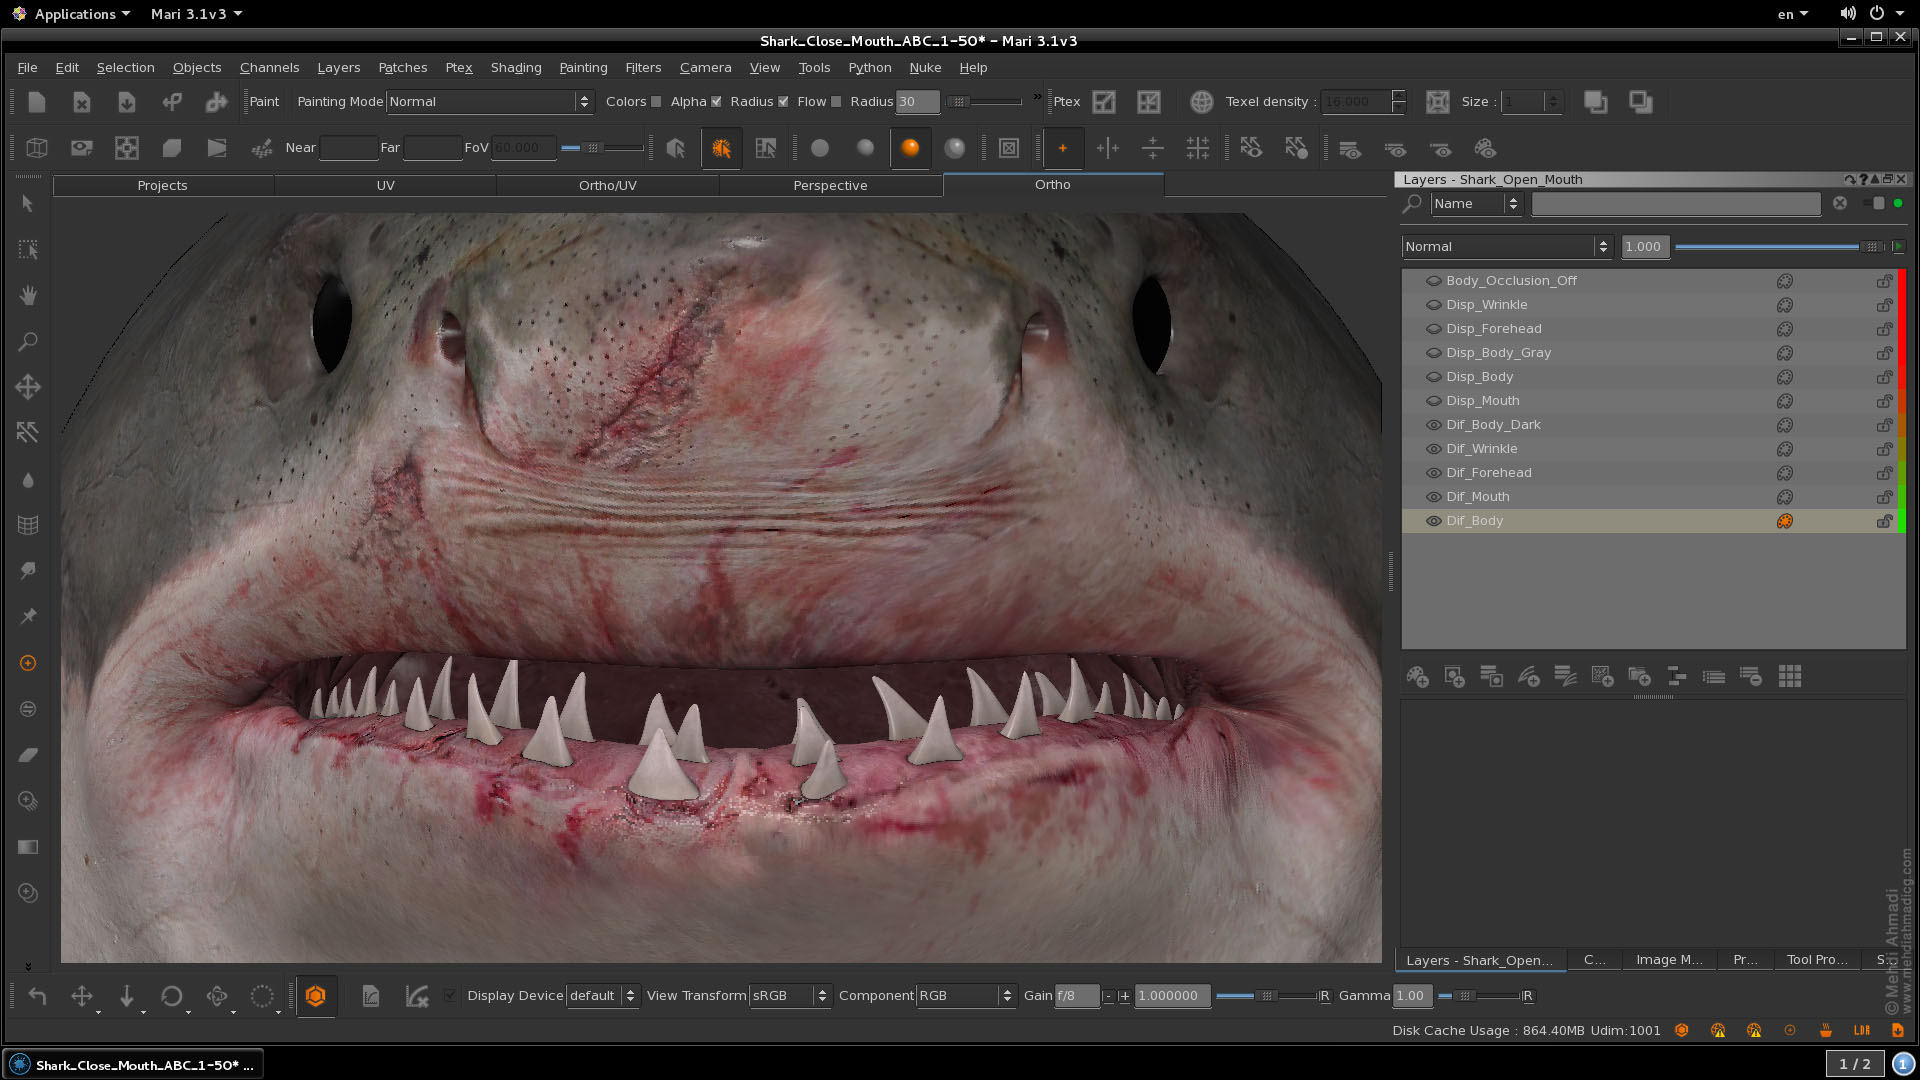
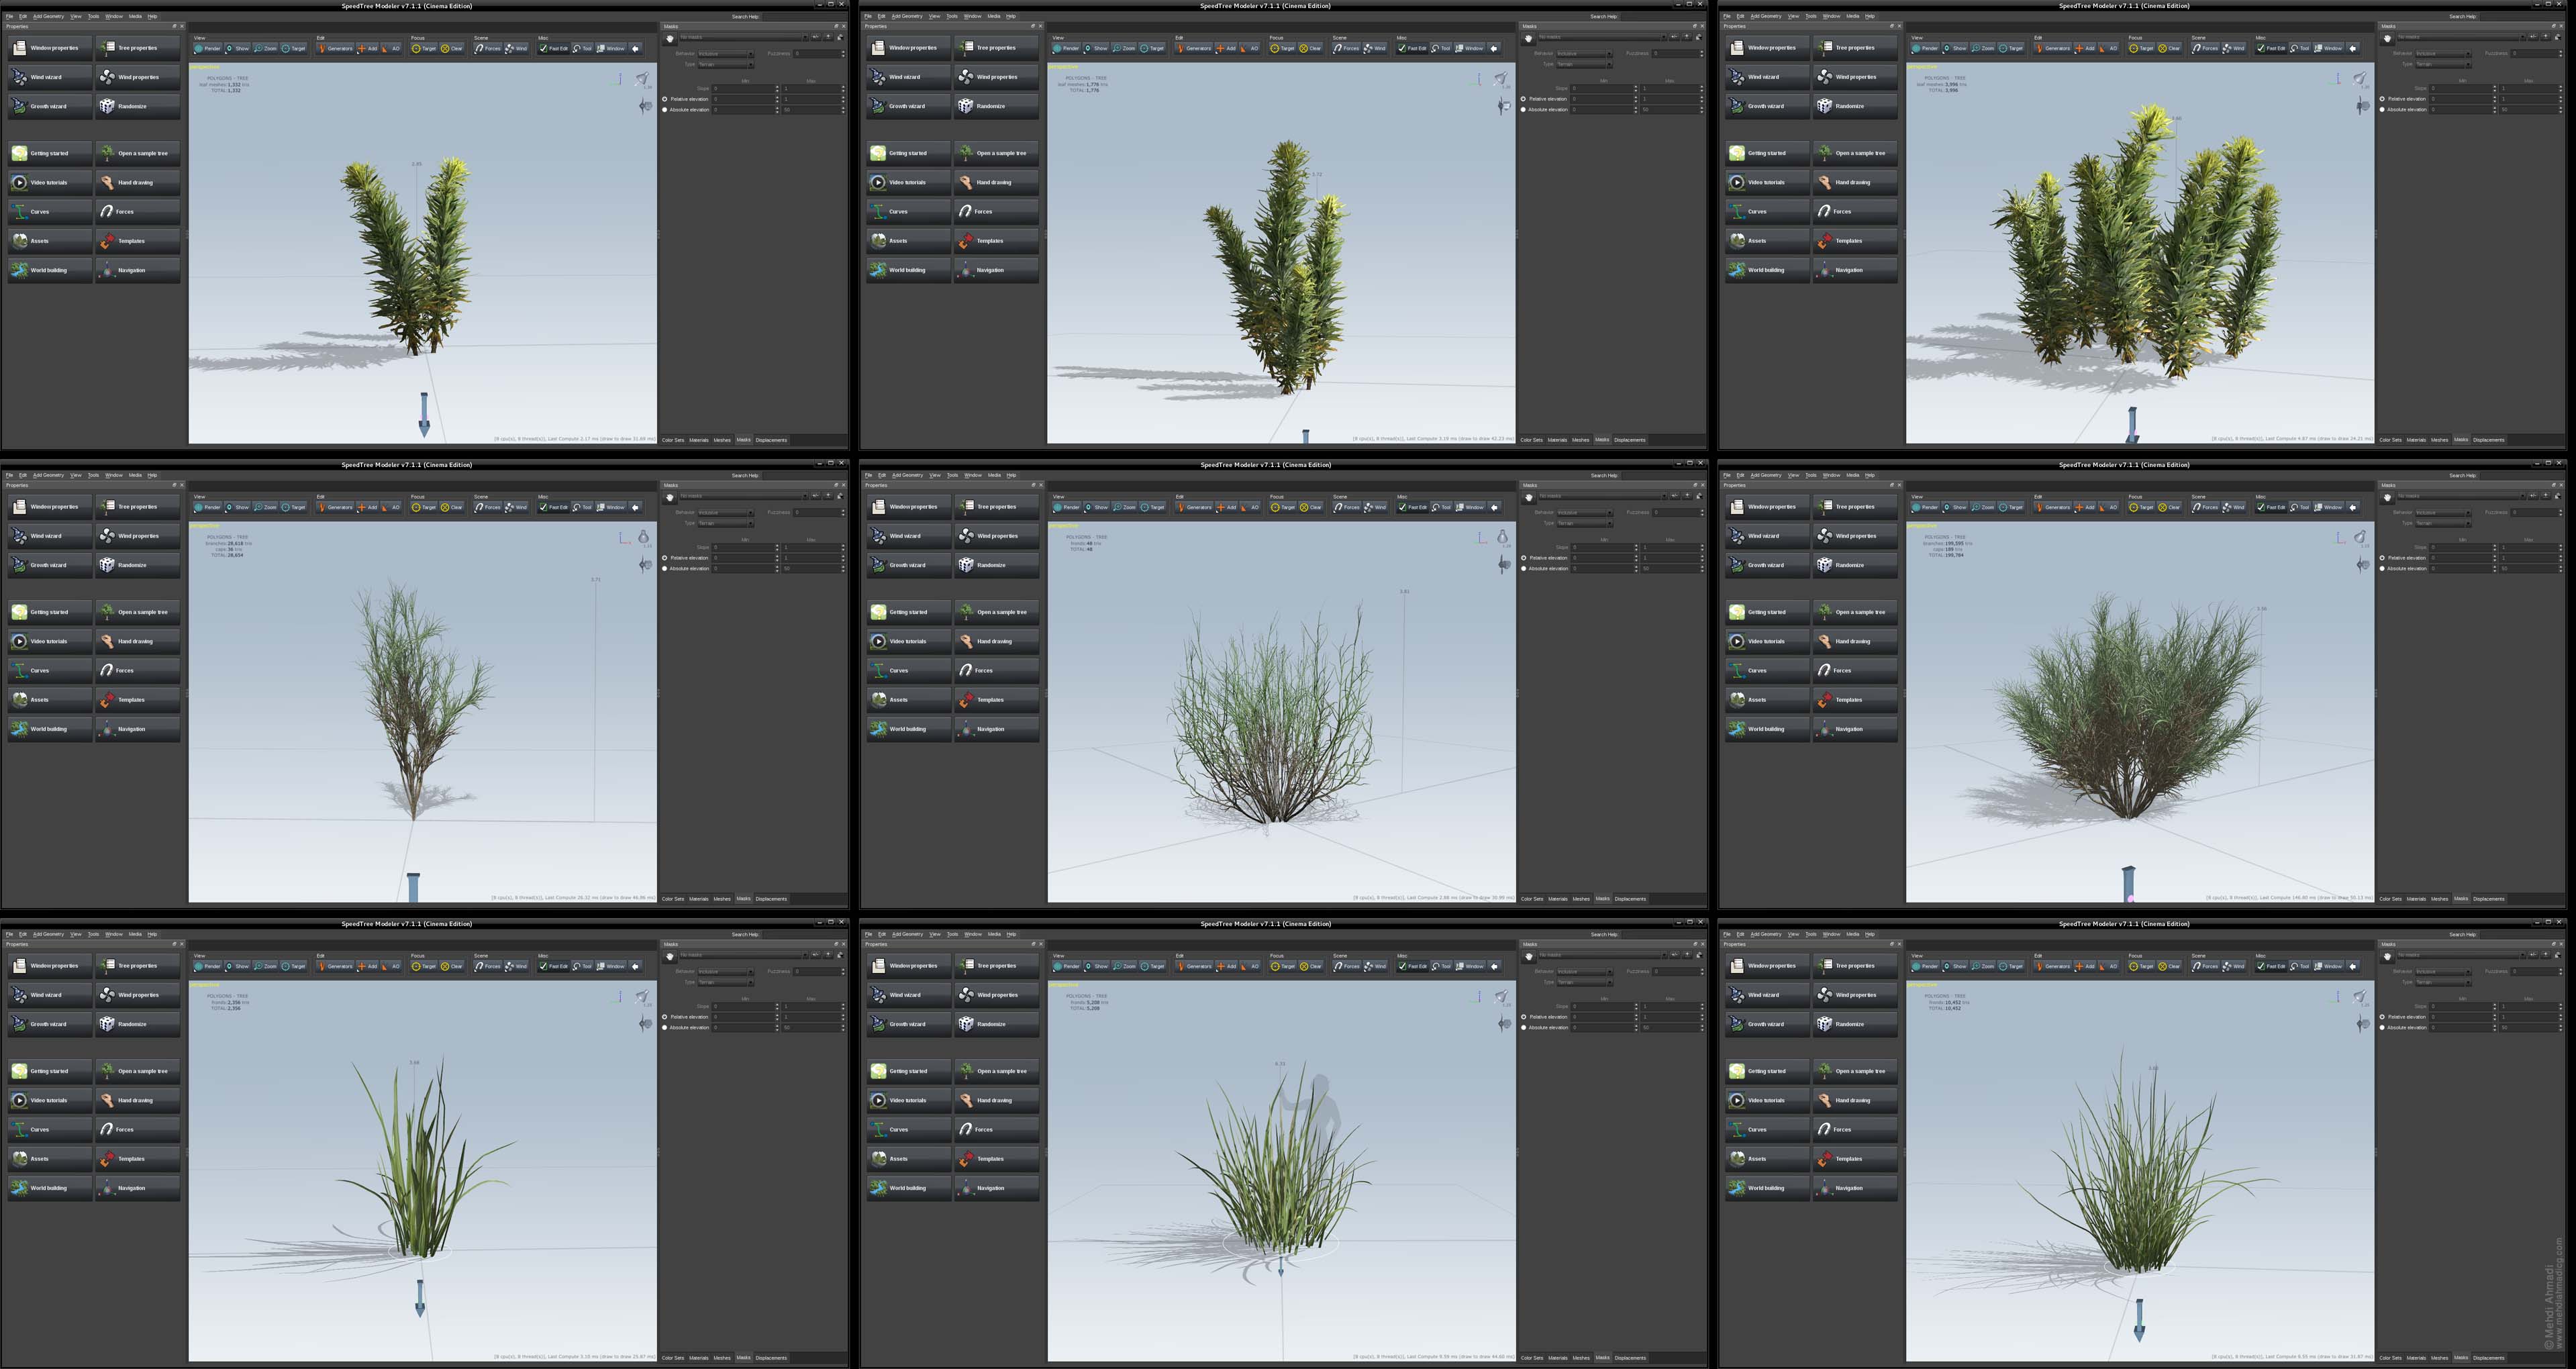
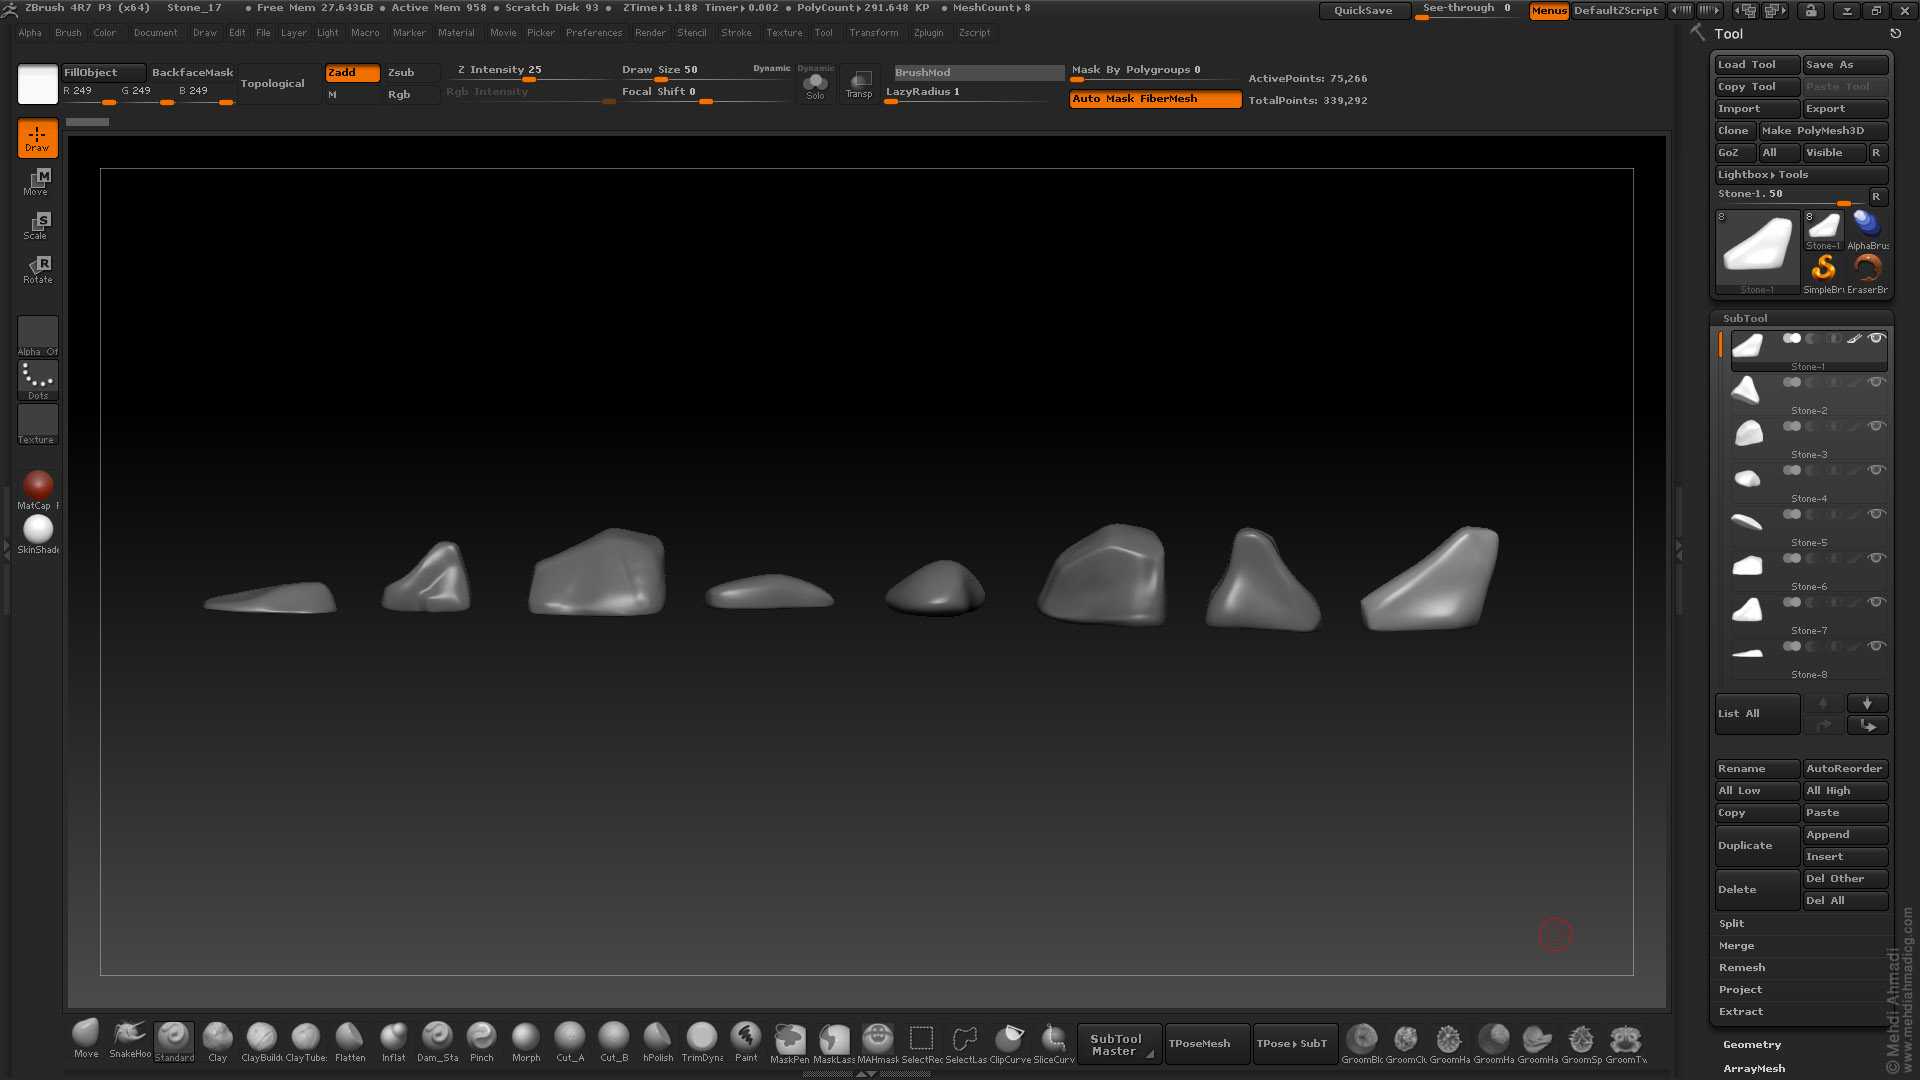
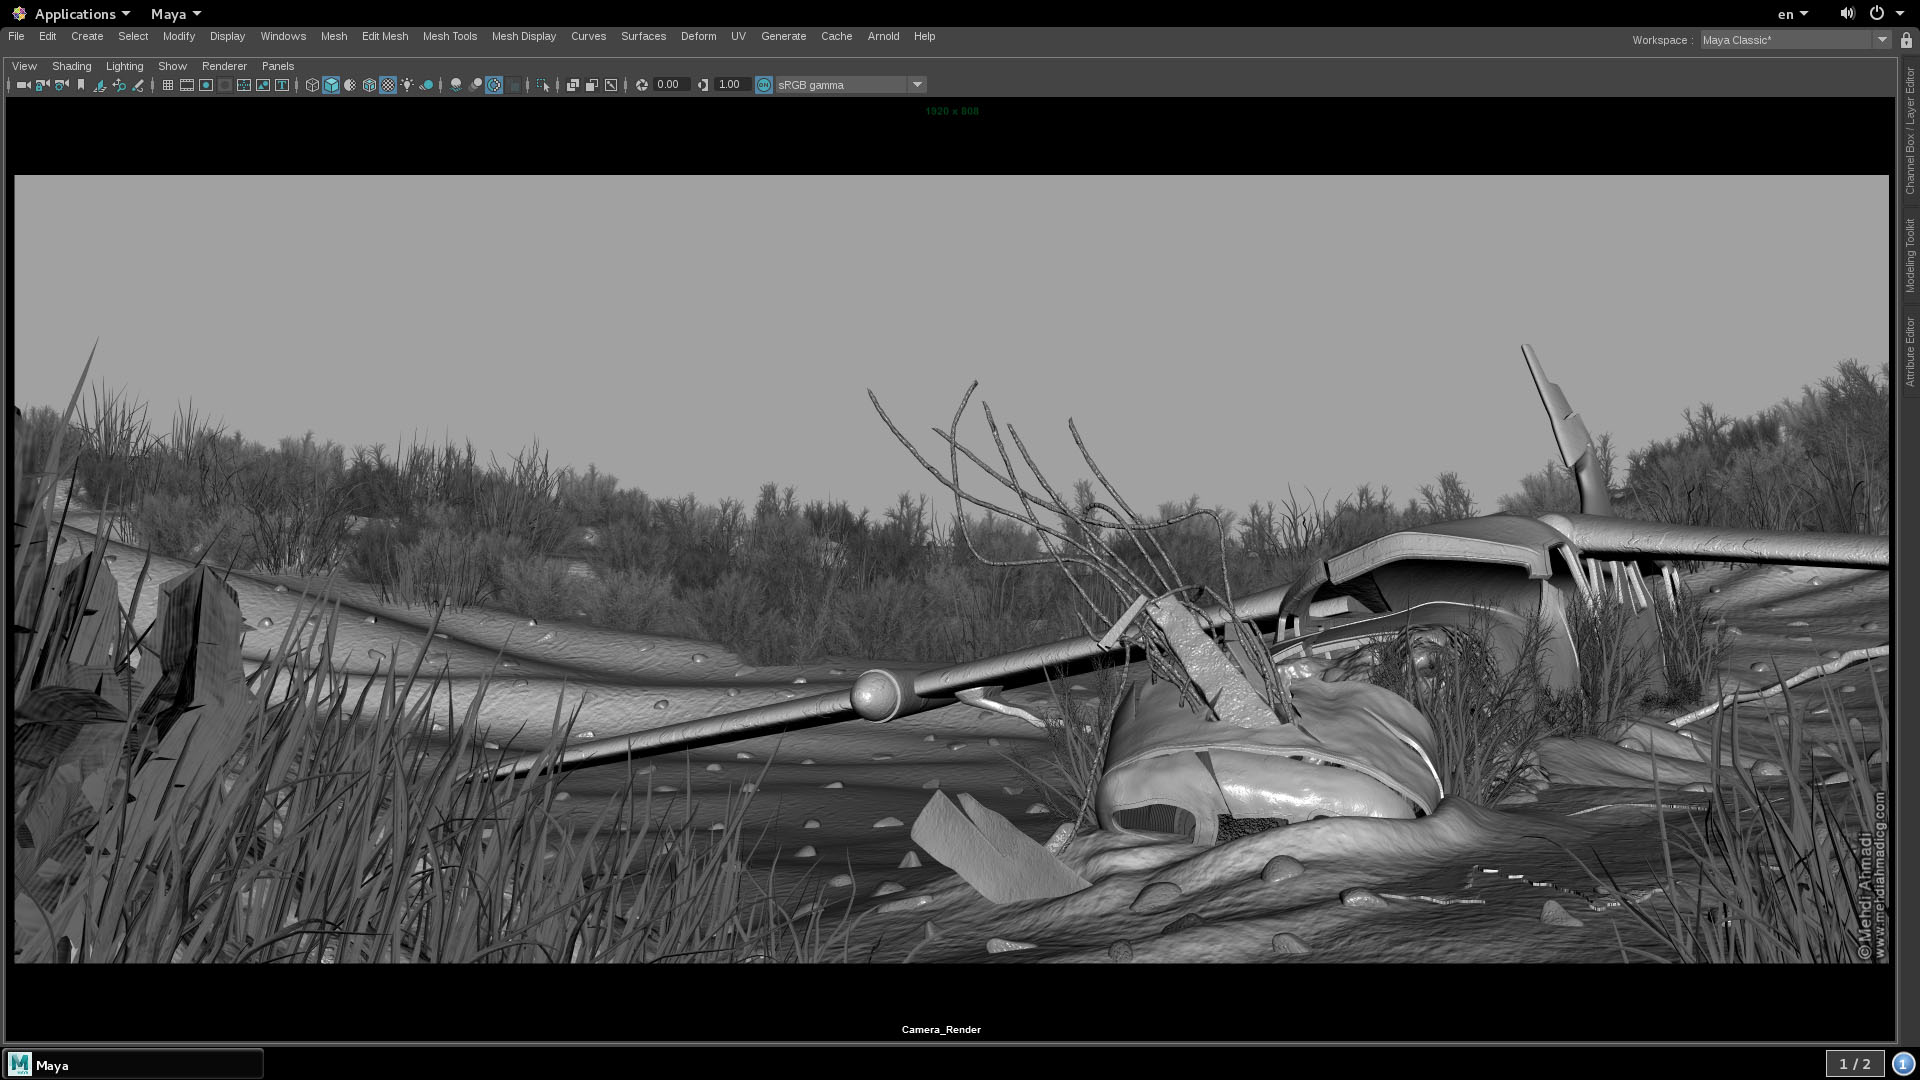
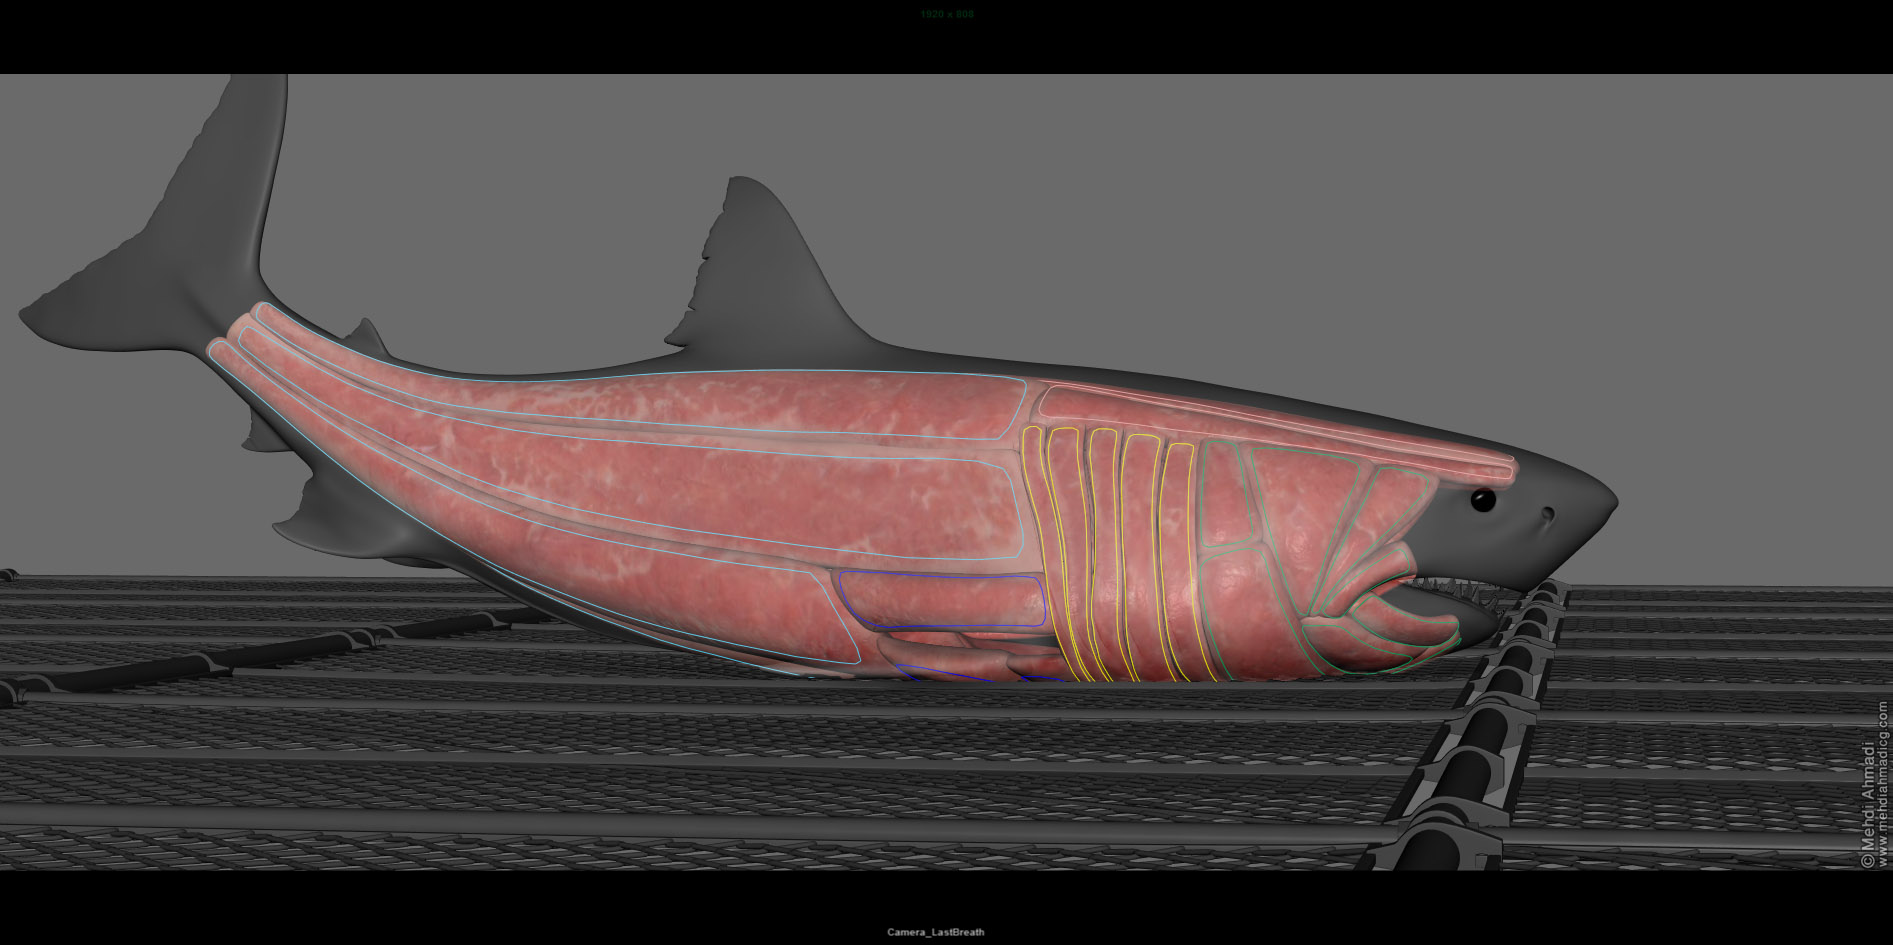
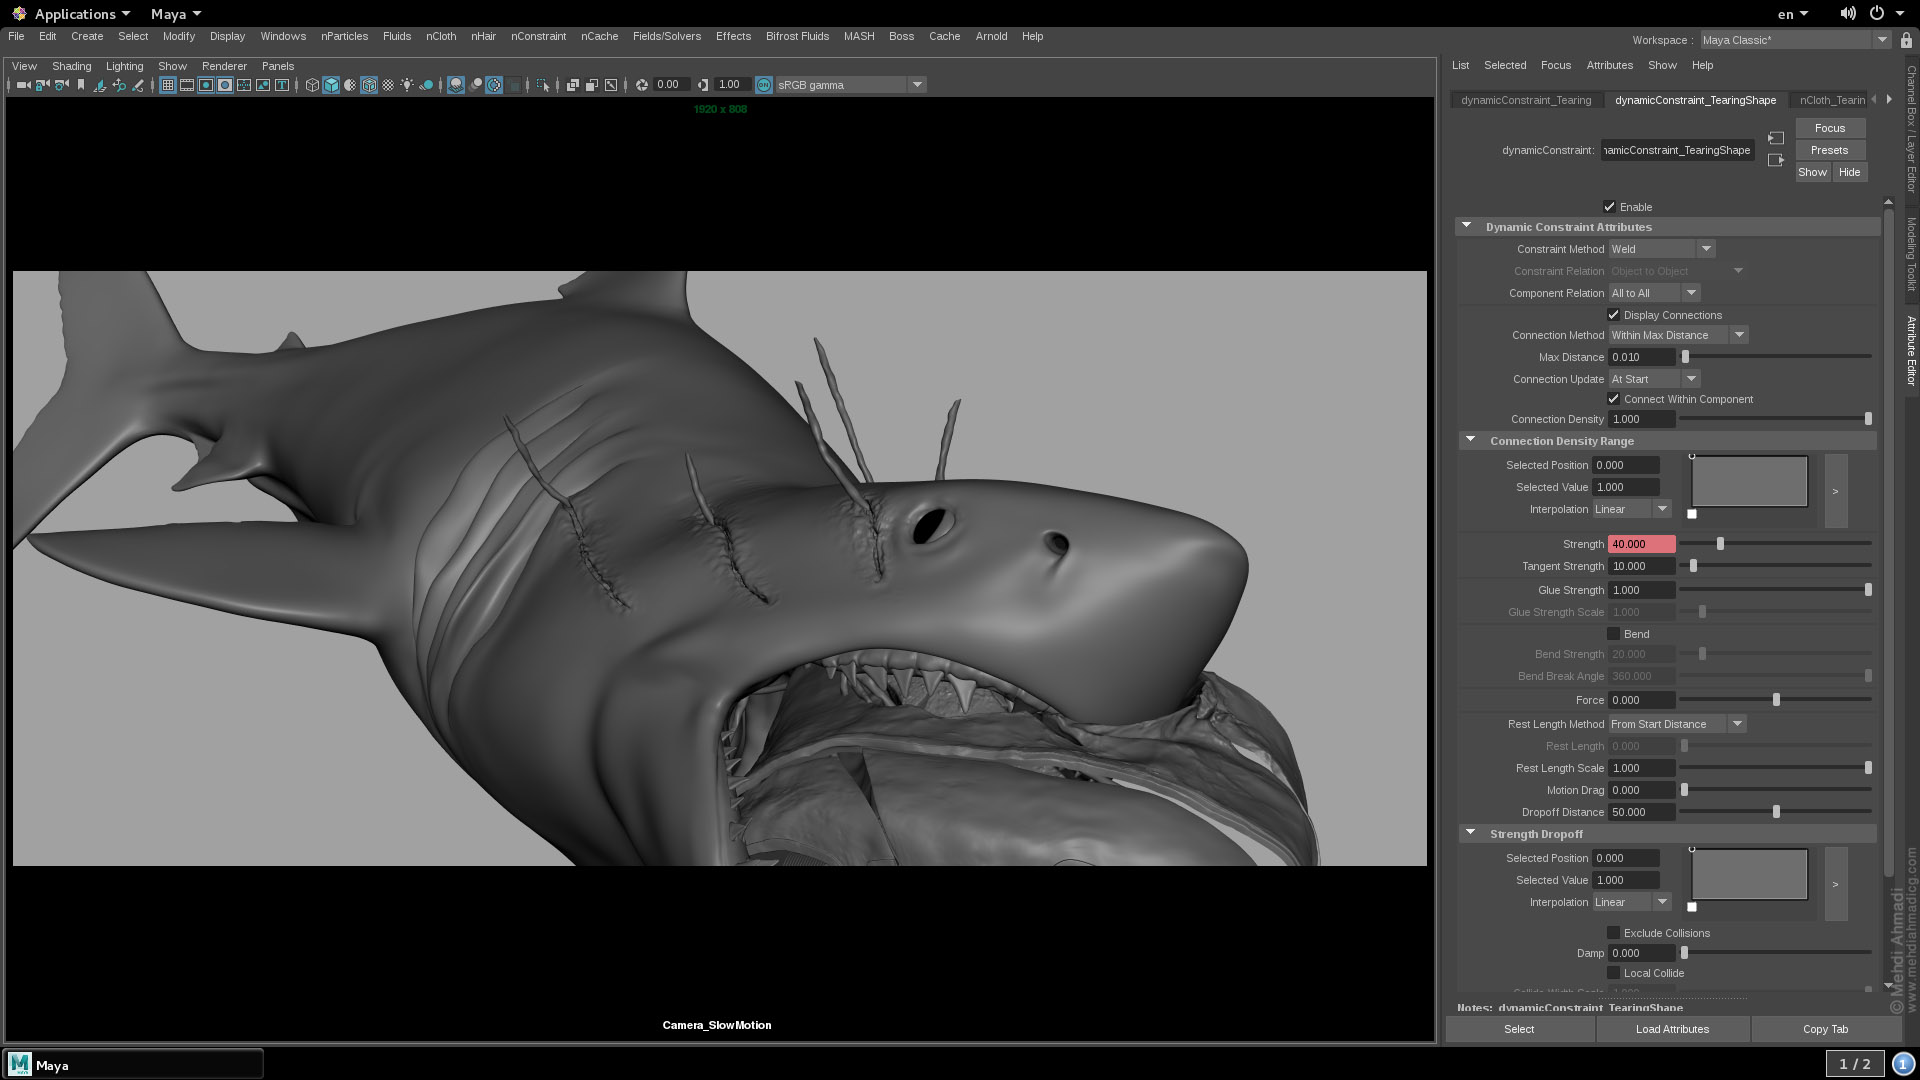
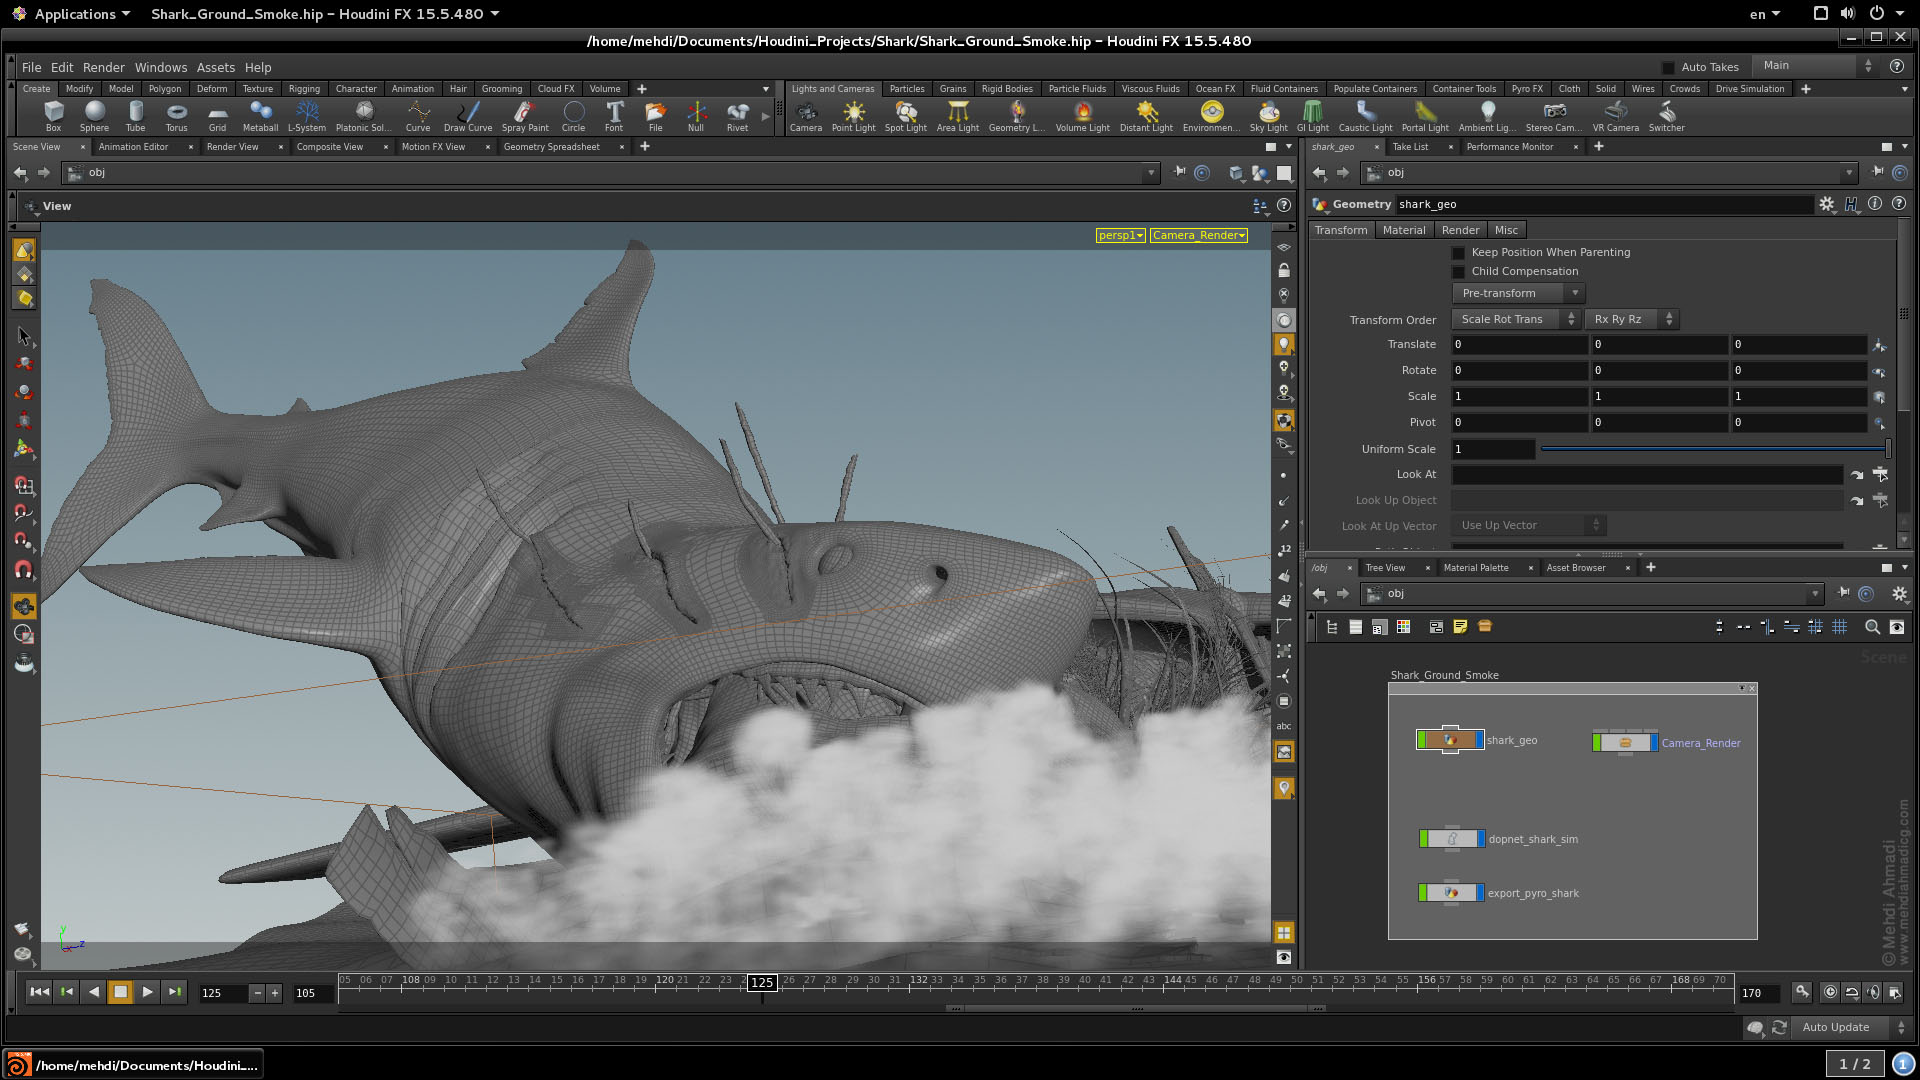
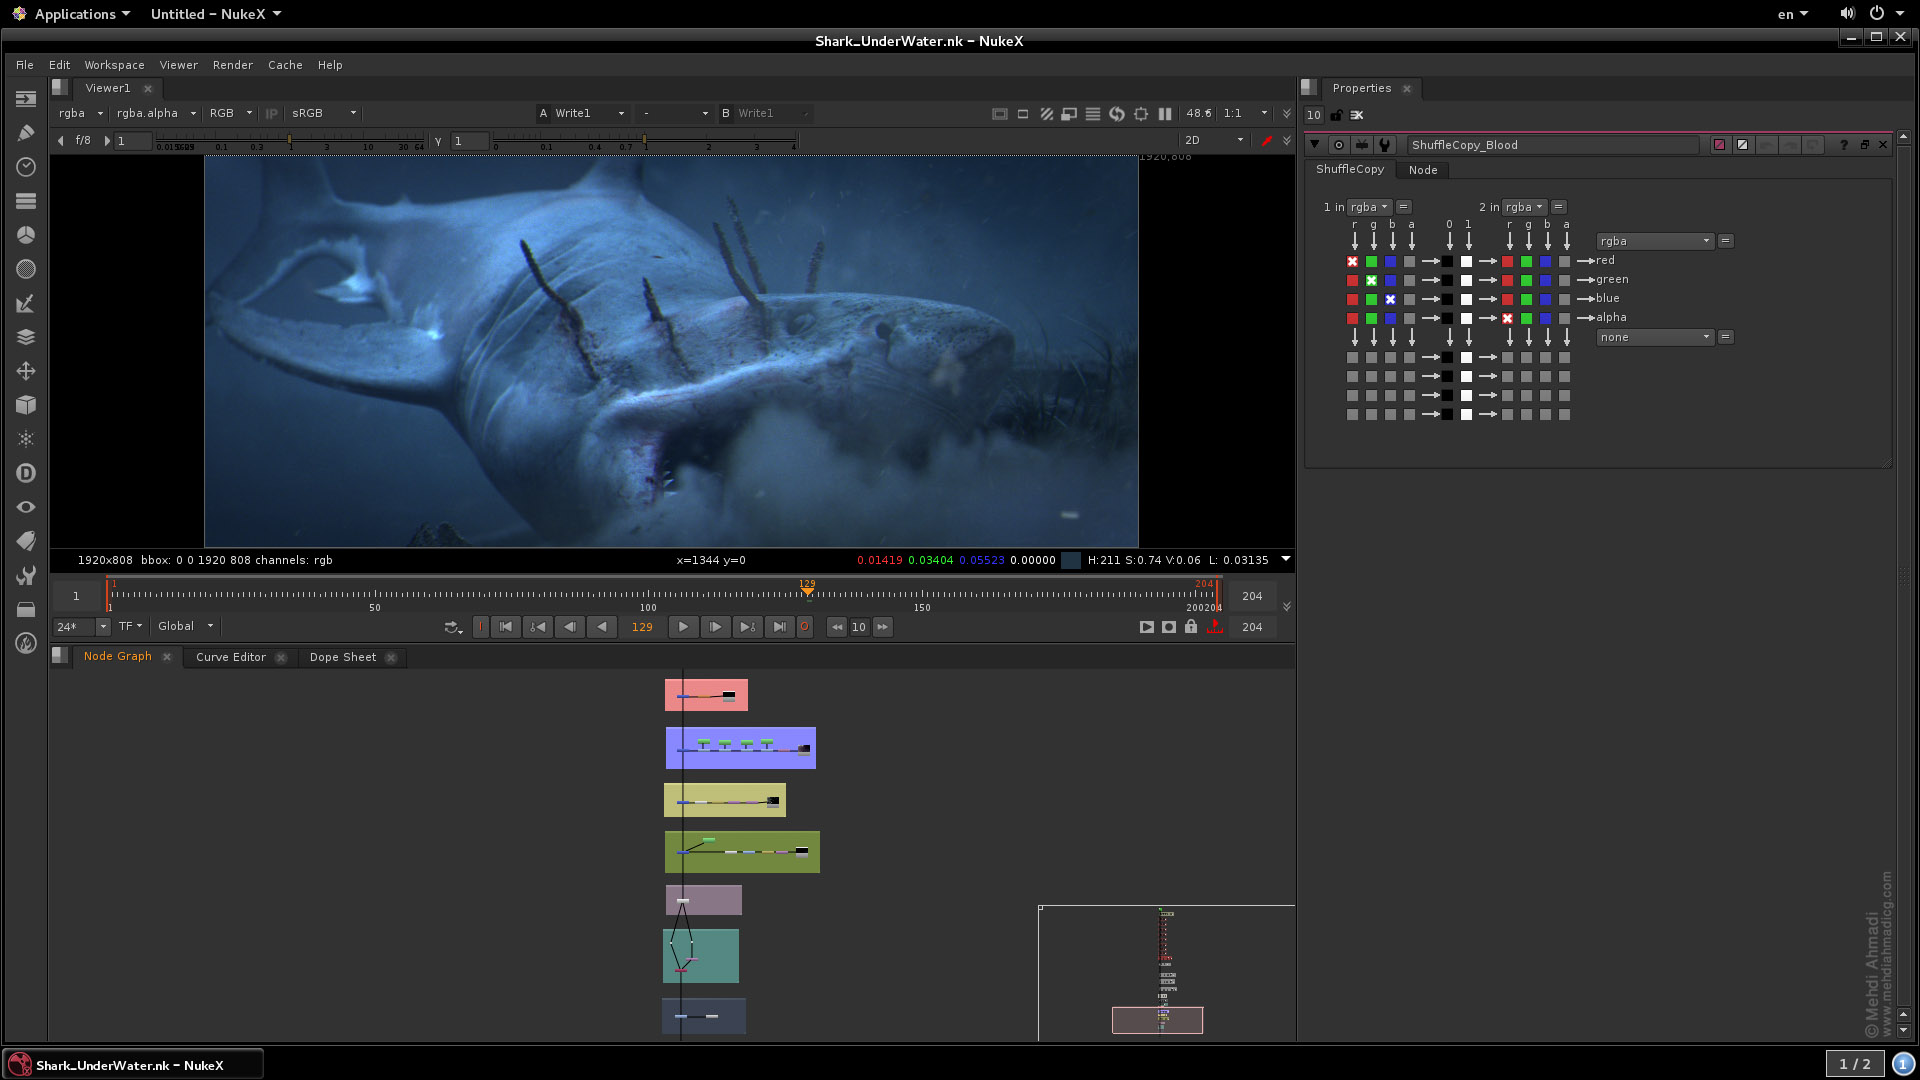
After watching the movies The Shallows and Kon-Tiki which both had beautiful sharks, I decided to create a 3d shark.
My main goal was to create a shark and render it in two different shots.
In the first shot, I wanted the head of the shark to split open due to hitting some bars under the water, and in the second shot, I intended to make the shark struggling for breathing outside the water.
In this project, I built and simulated the shark's muscles and skin with Maya, of course, the muscles' setup was done with some tools which I had already developed them with Python Script.
And I did all the dynamic simulations of this project in Houdini as well.
I was responsible for all aspects of this project from beginning to end and I did all the steps of the work myself.
These steps included:
Gathering the References, Modeling, Texturing, Rigging, Muscle Setup and Simulation, Skin Simulation, Dynamic Simulations, Animation, Shading, Lighting, Rendering, and Compositing.
And for this project, I used Maya, Houdini, ZBrush, Mari, Photoshop, SpeedTree, Arnold, After Effects, and Nuke.
Below you can see some pictures from different steps of my work.

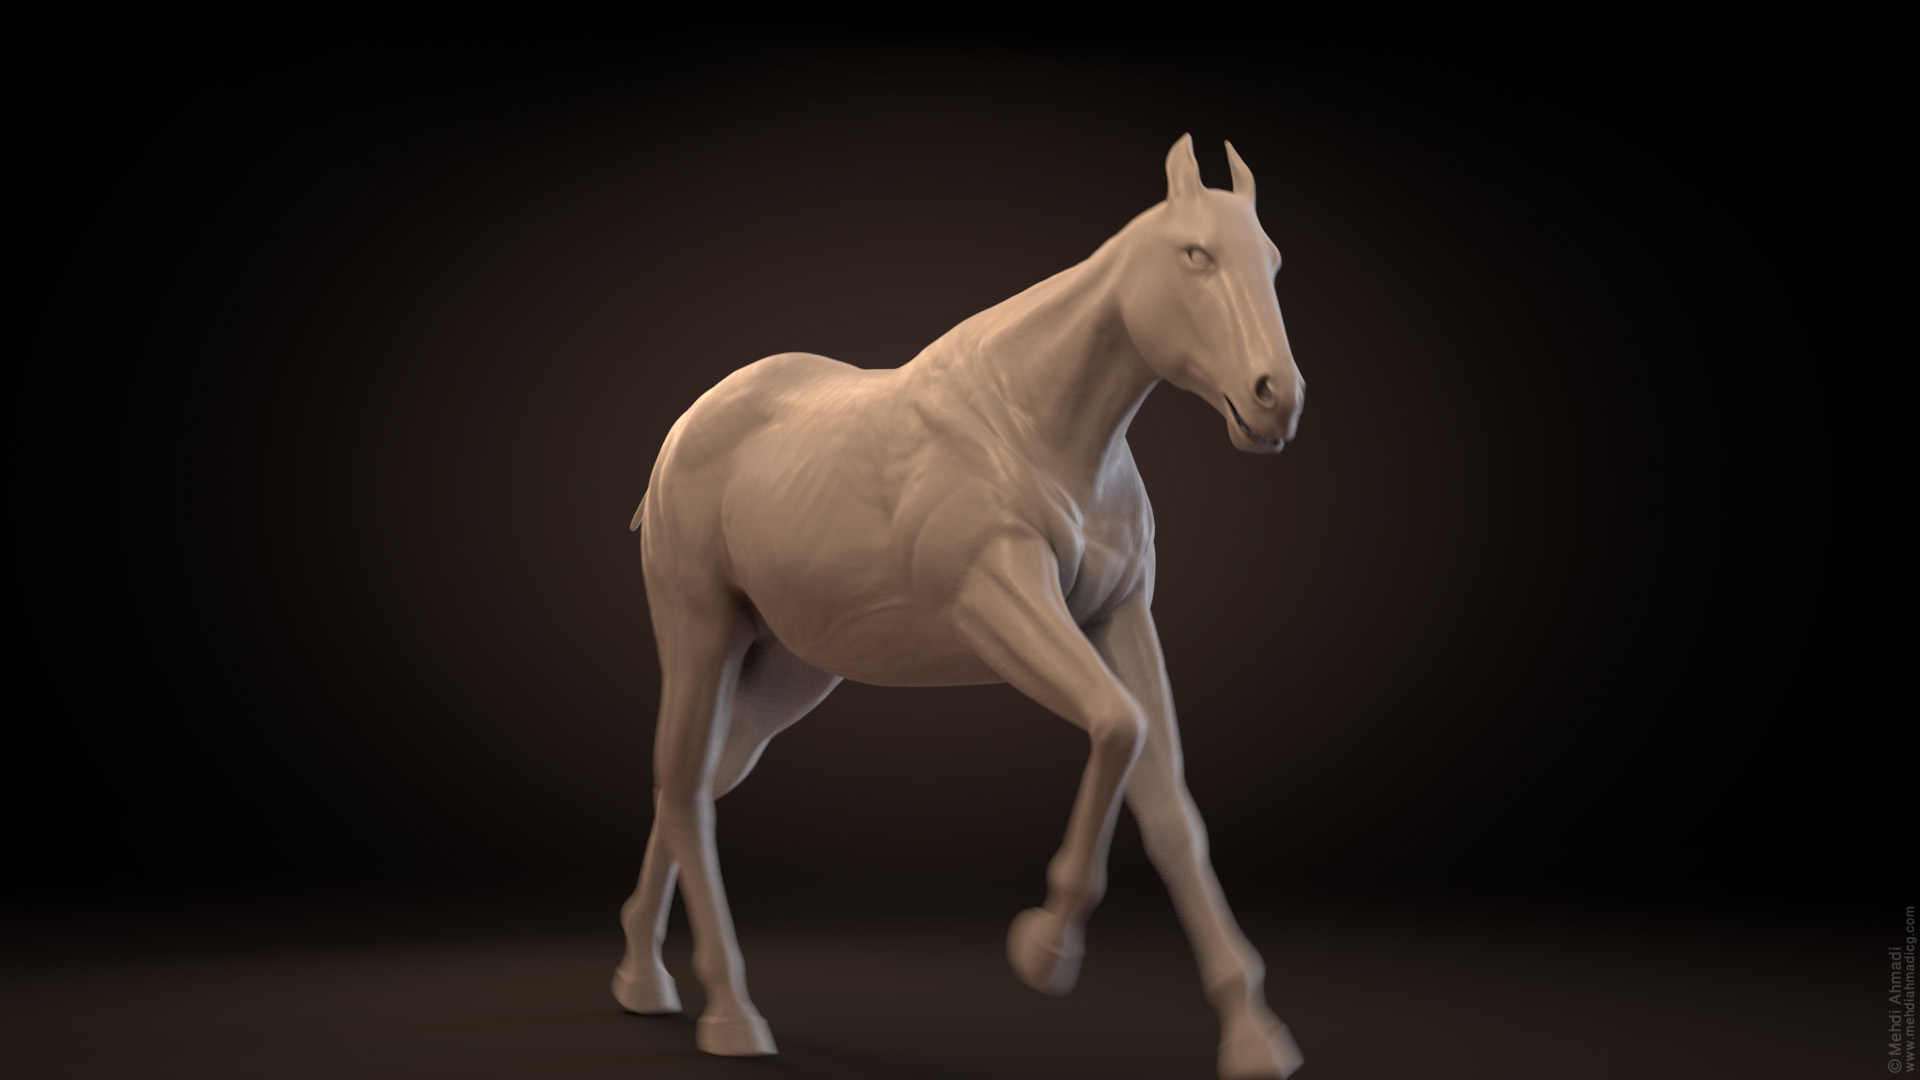
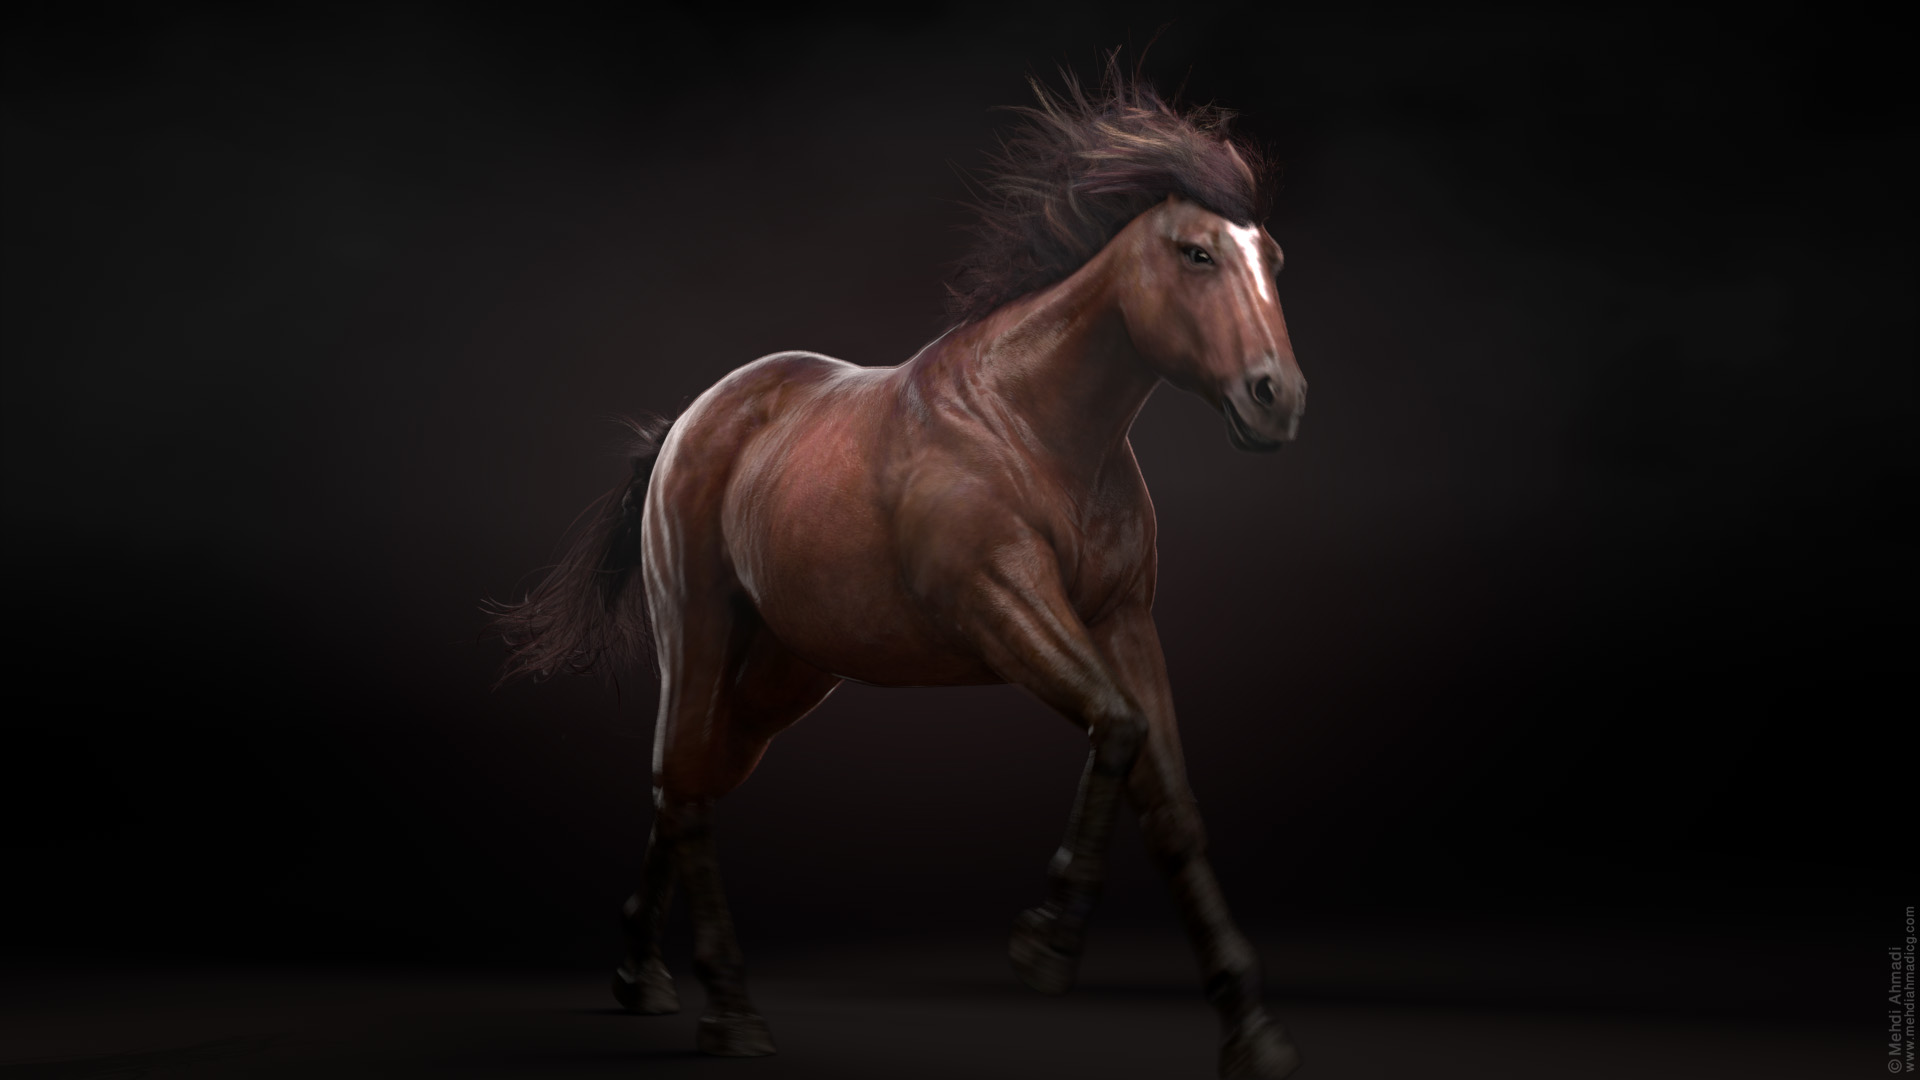
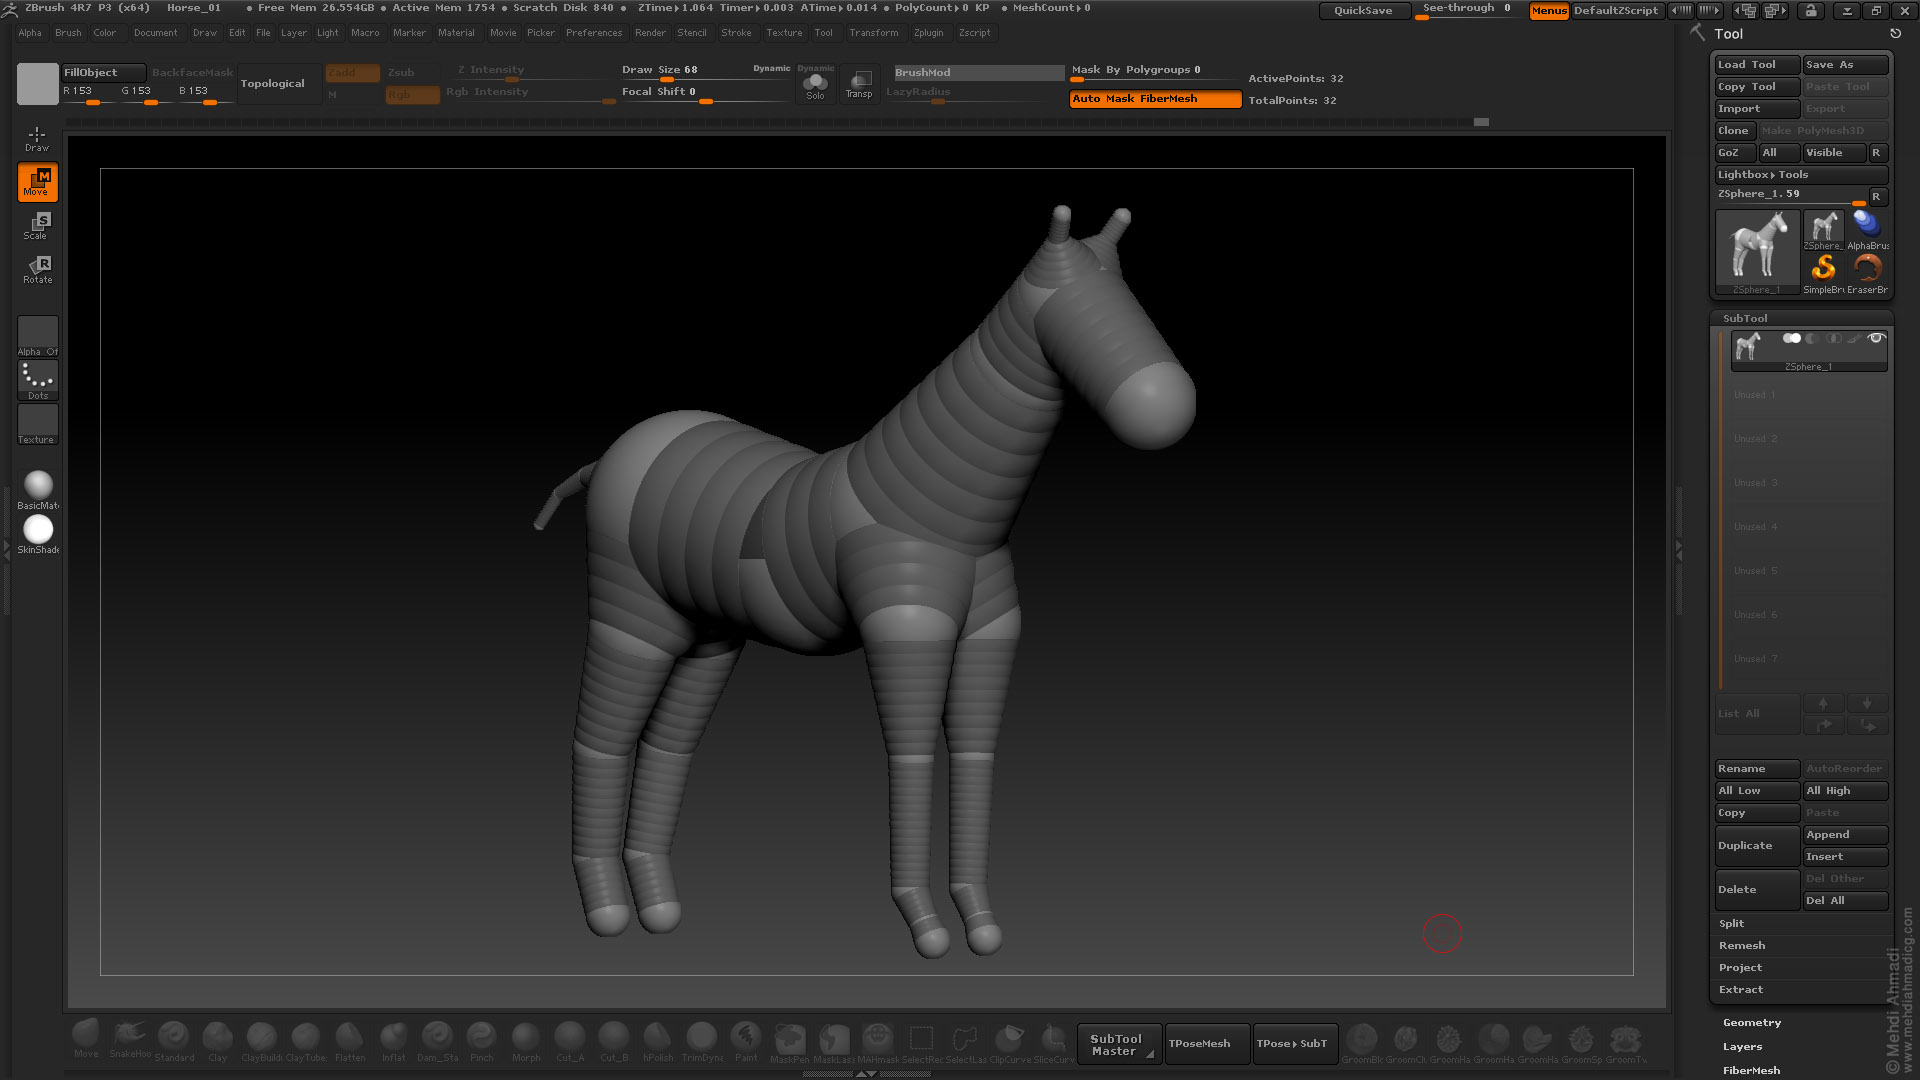
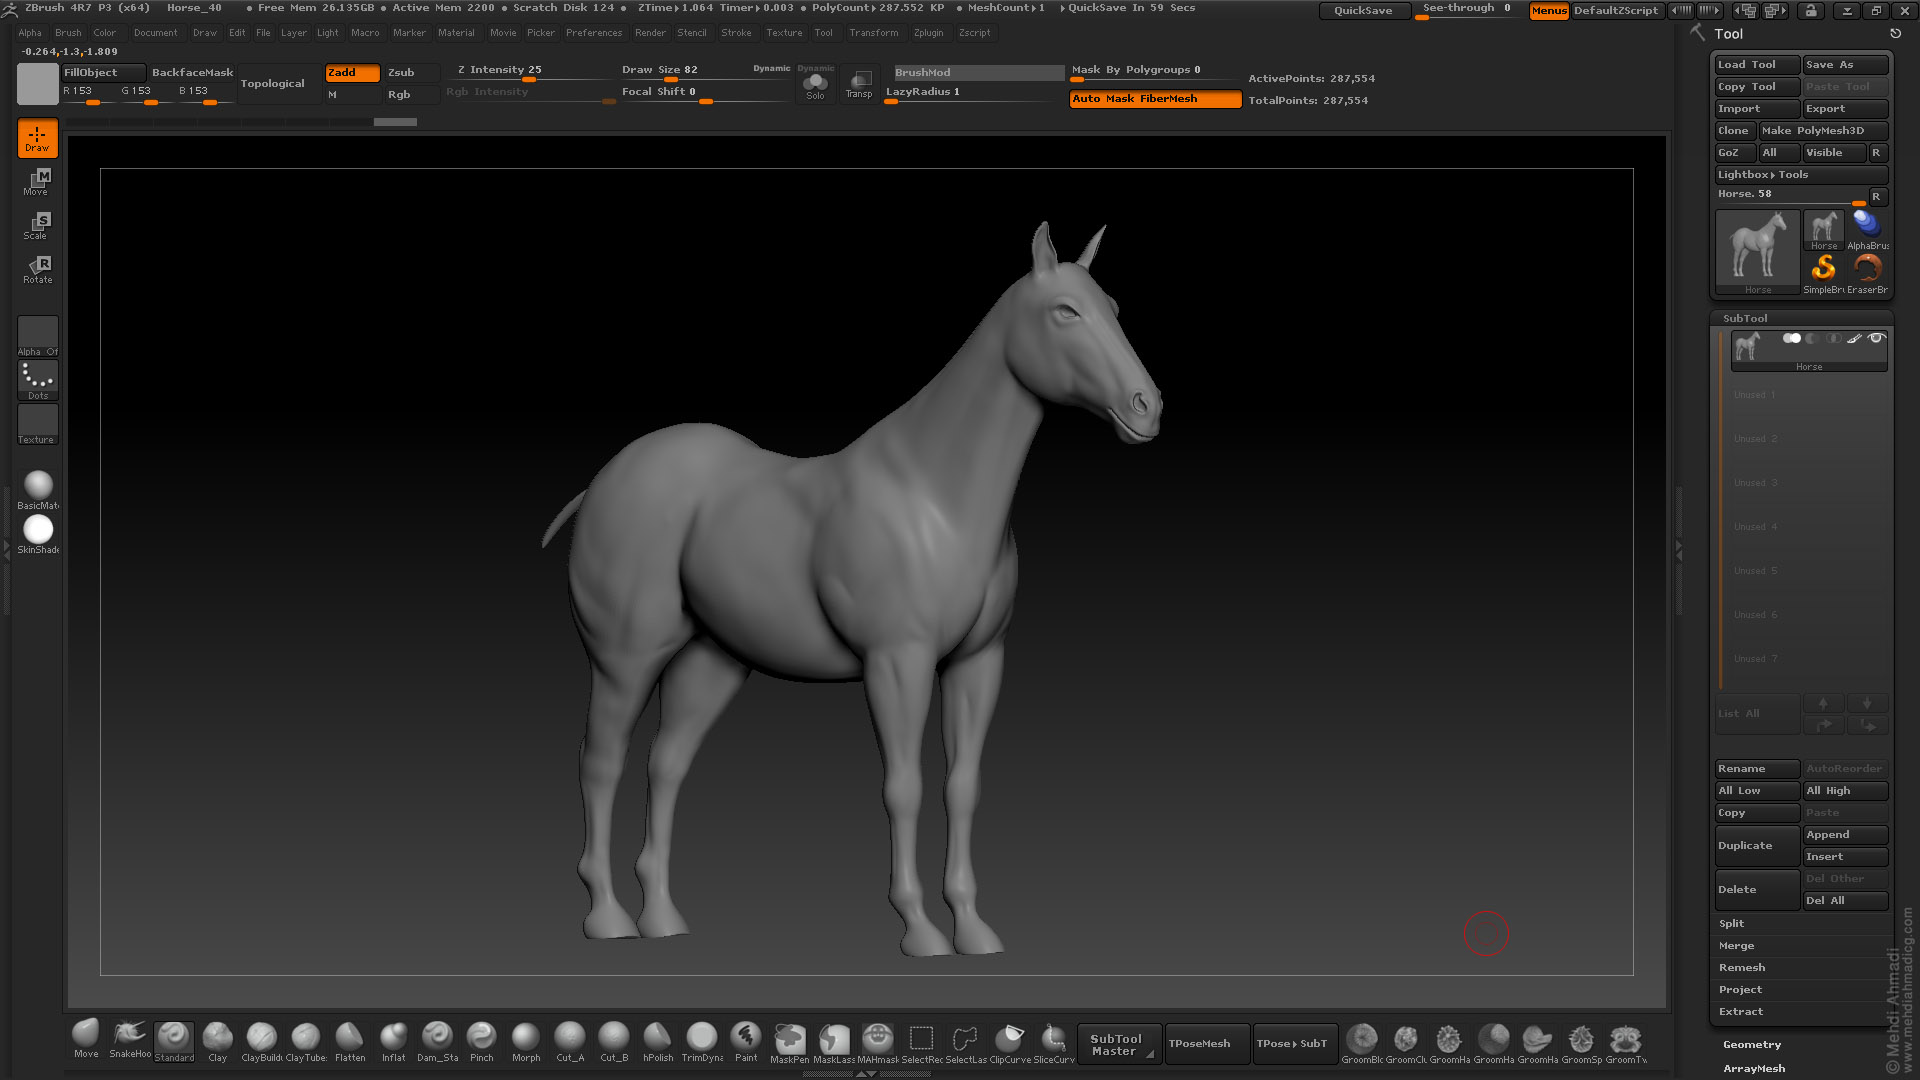
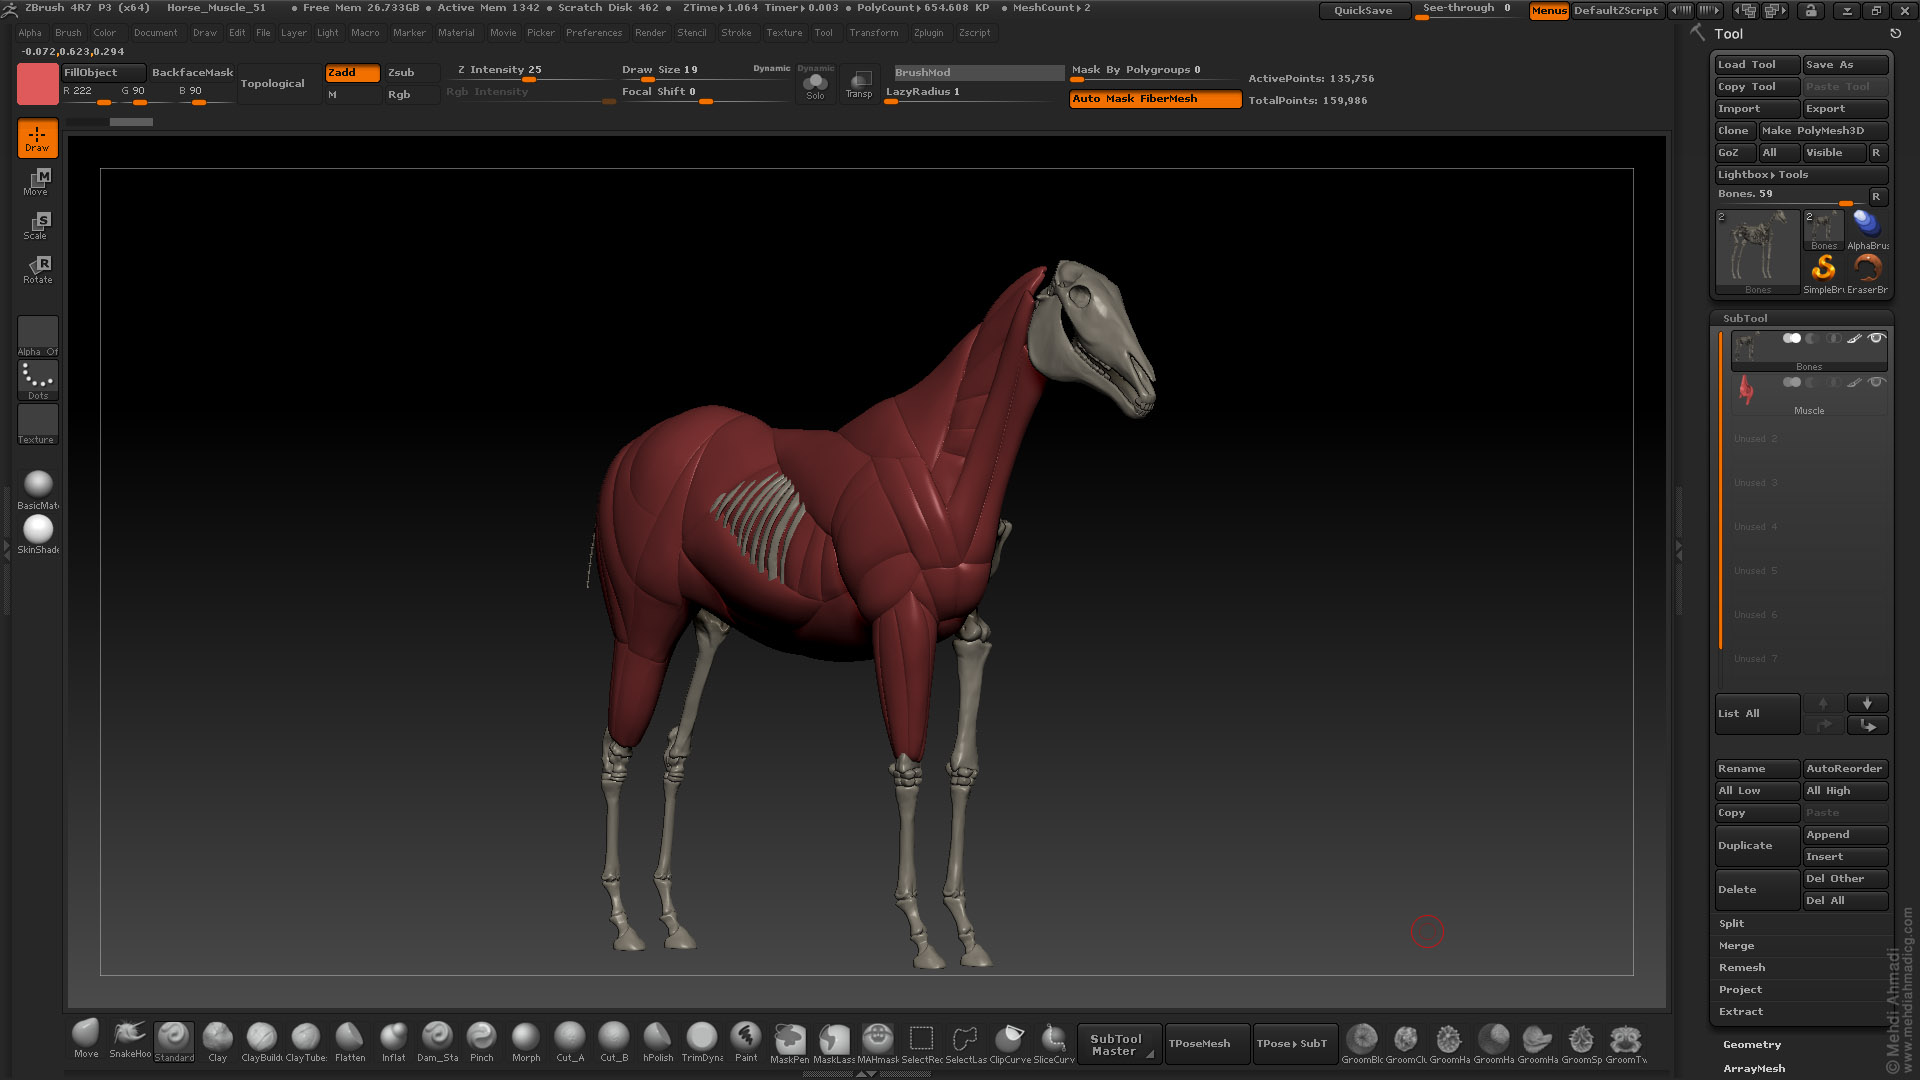
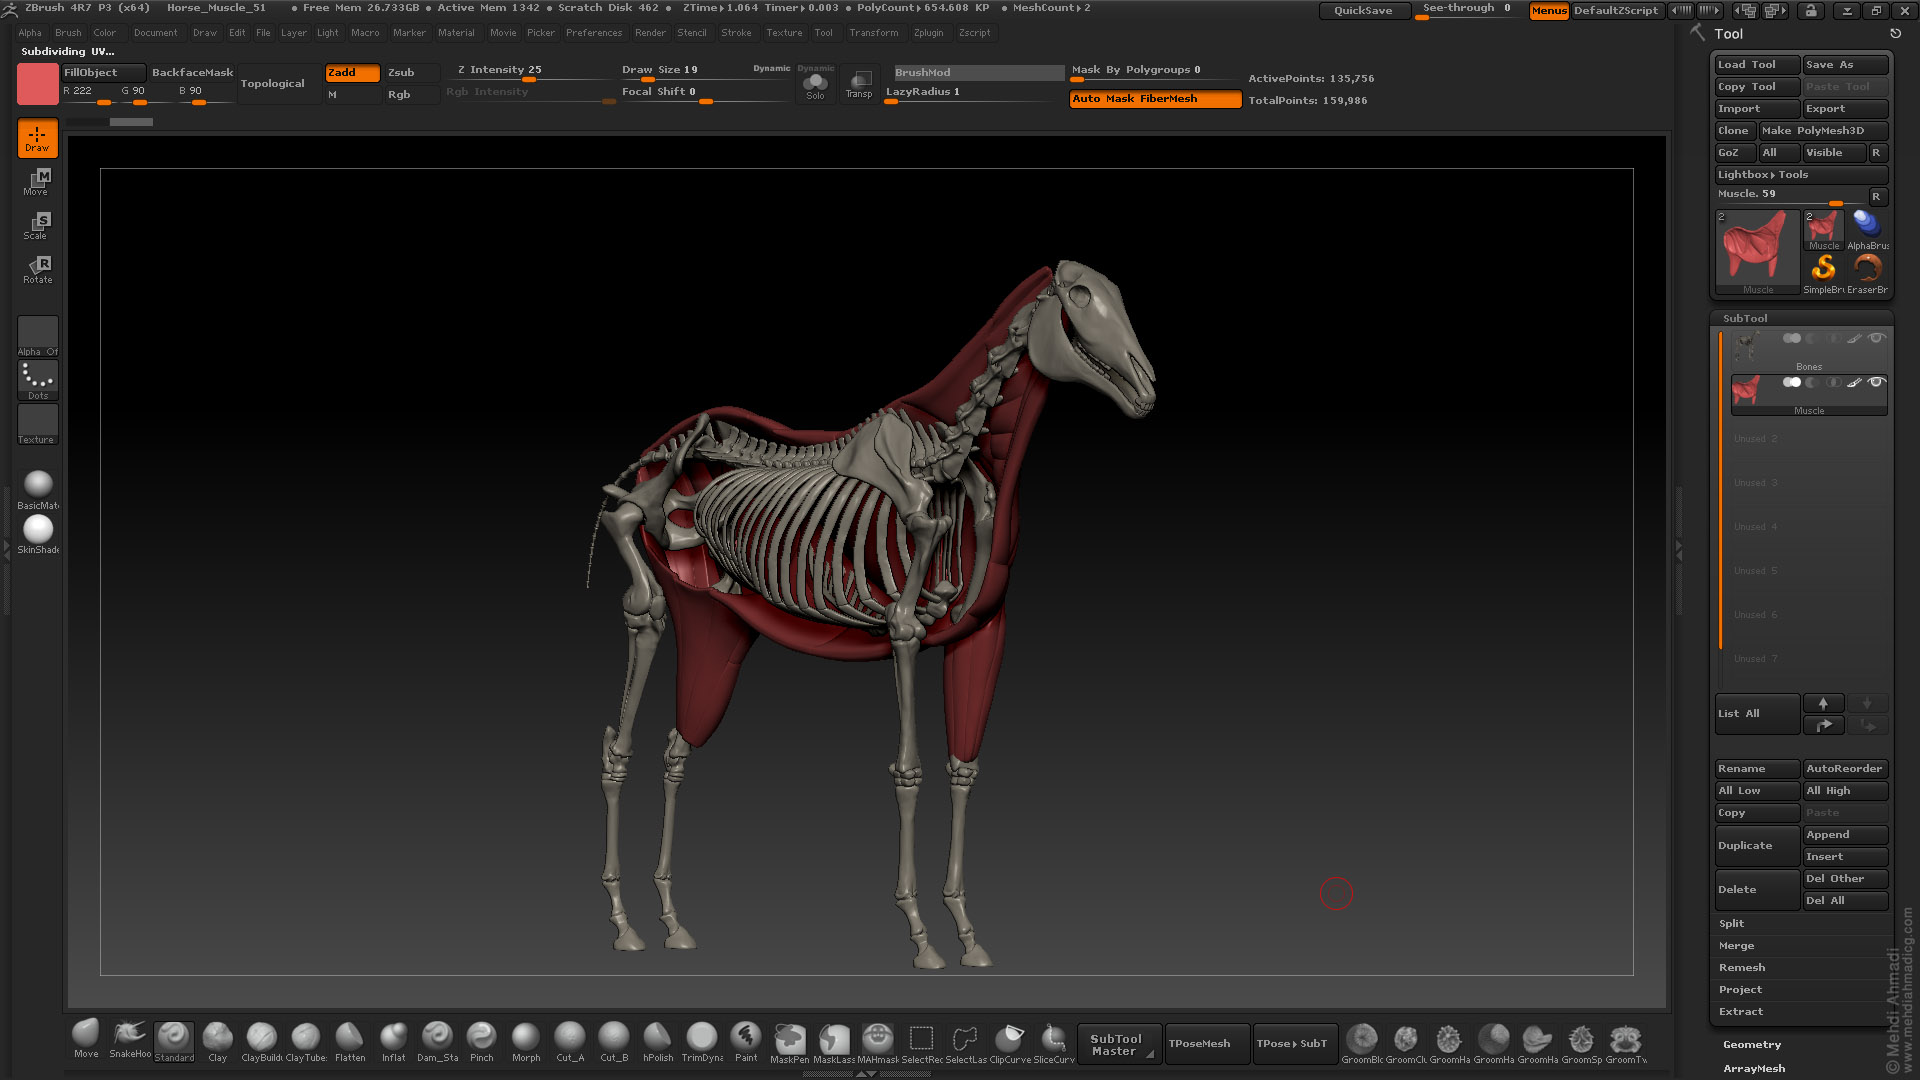
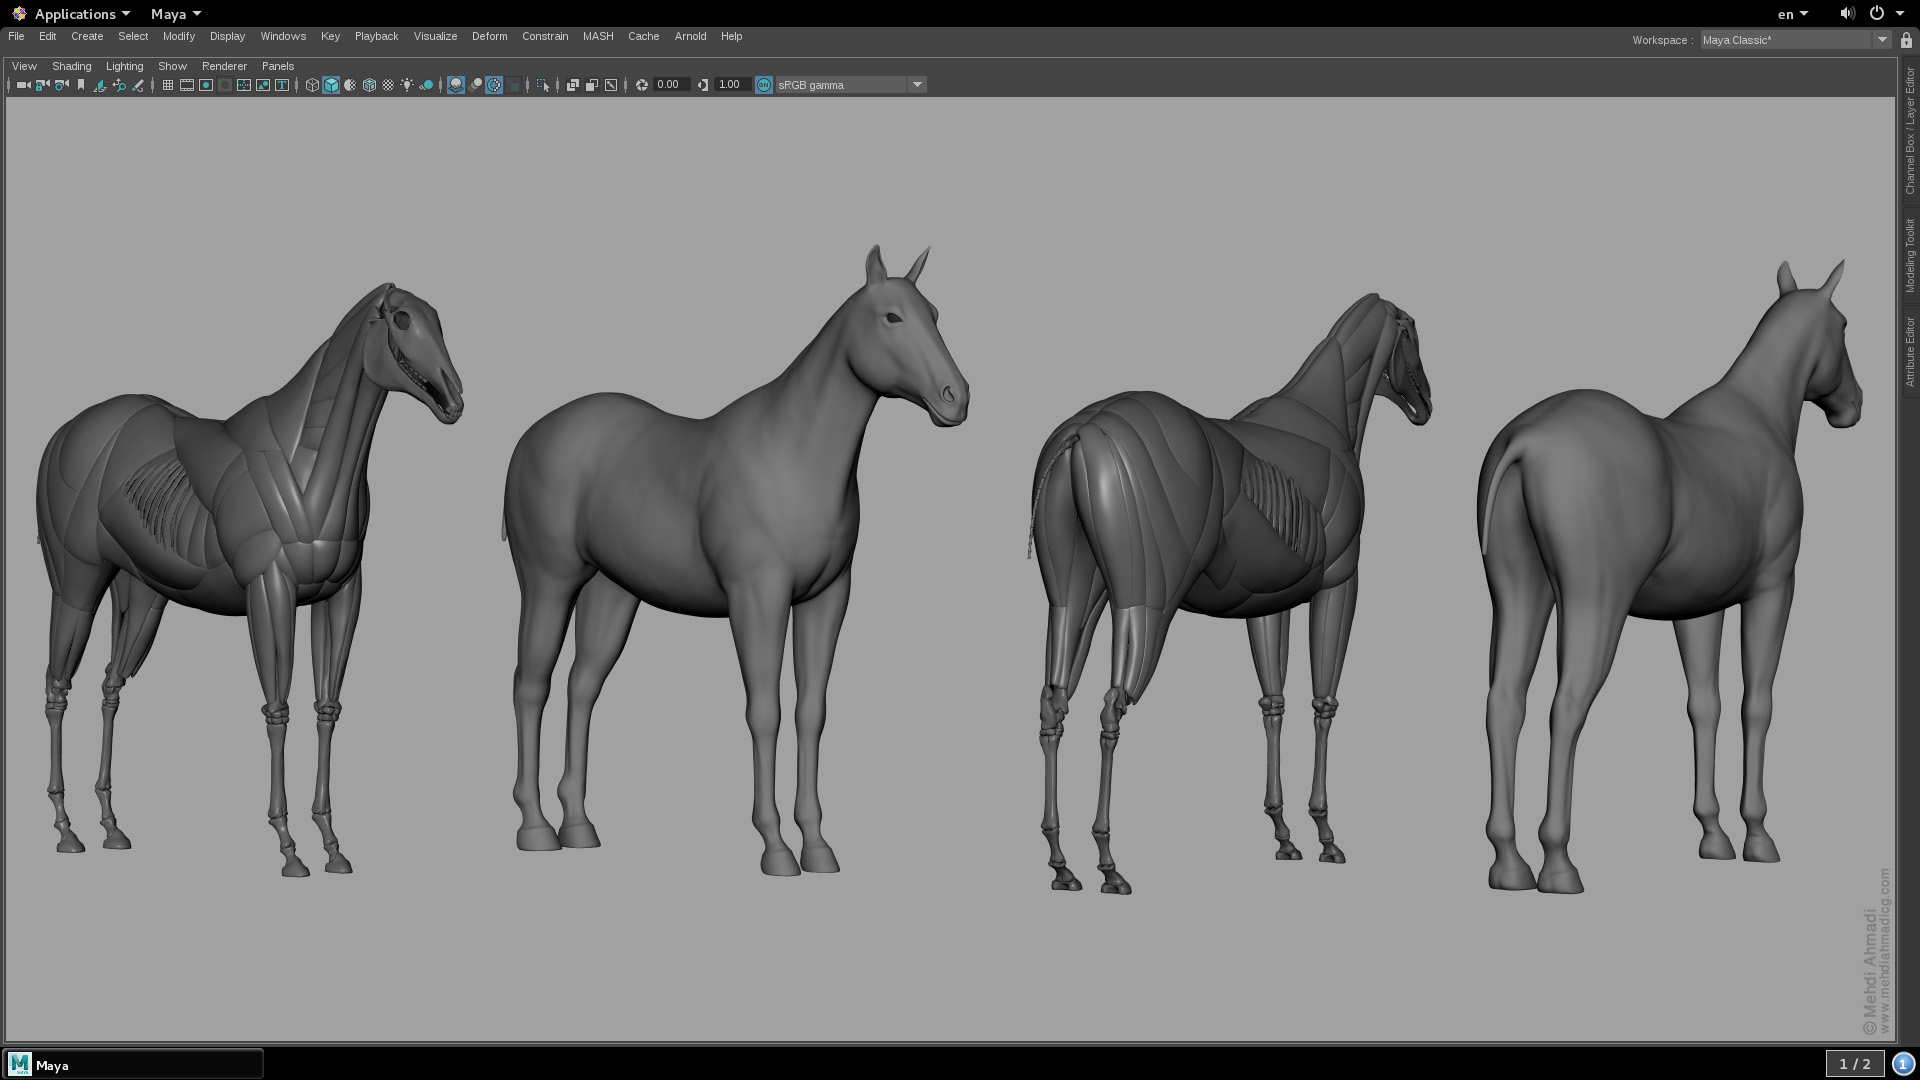
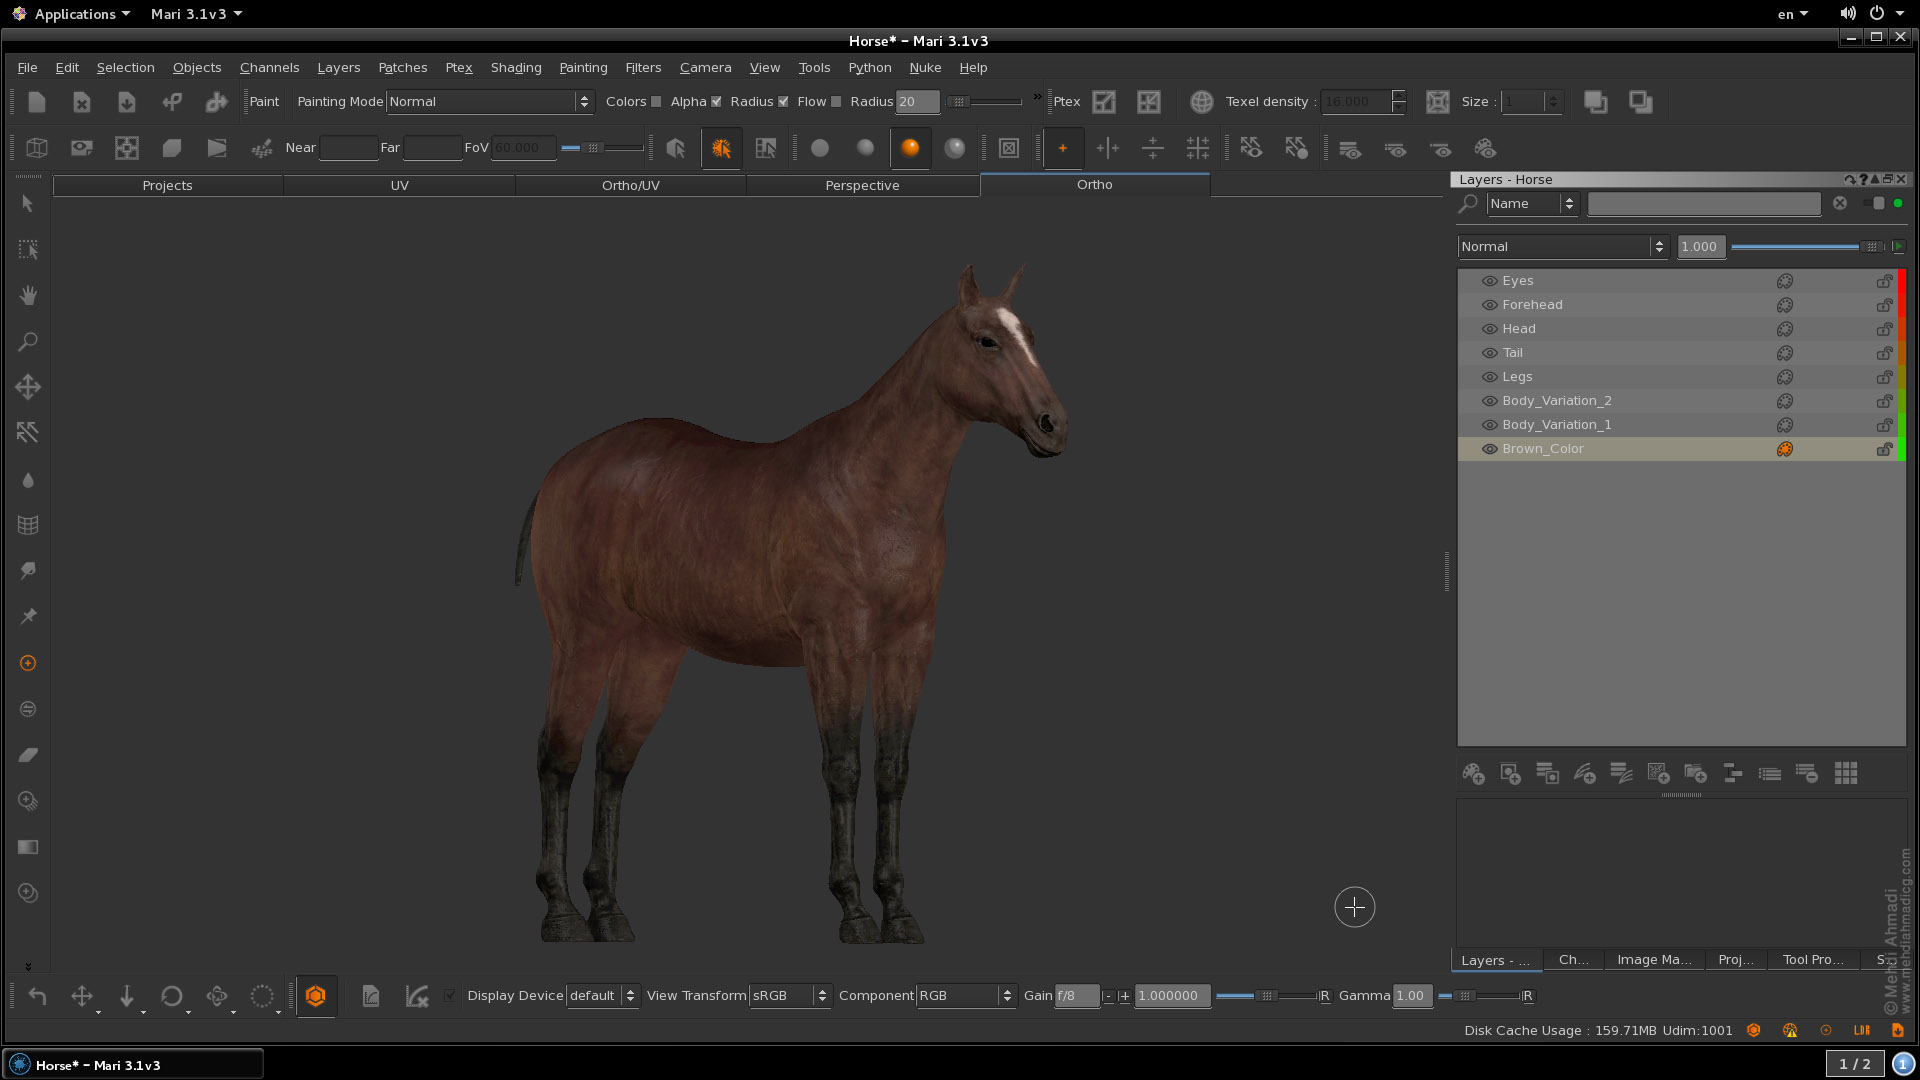
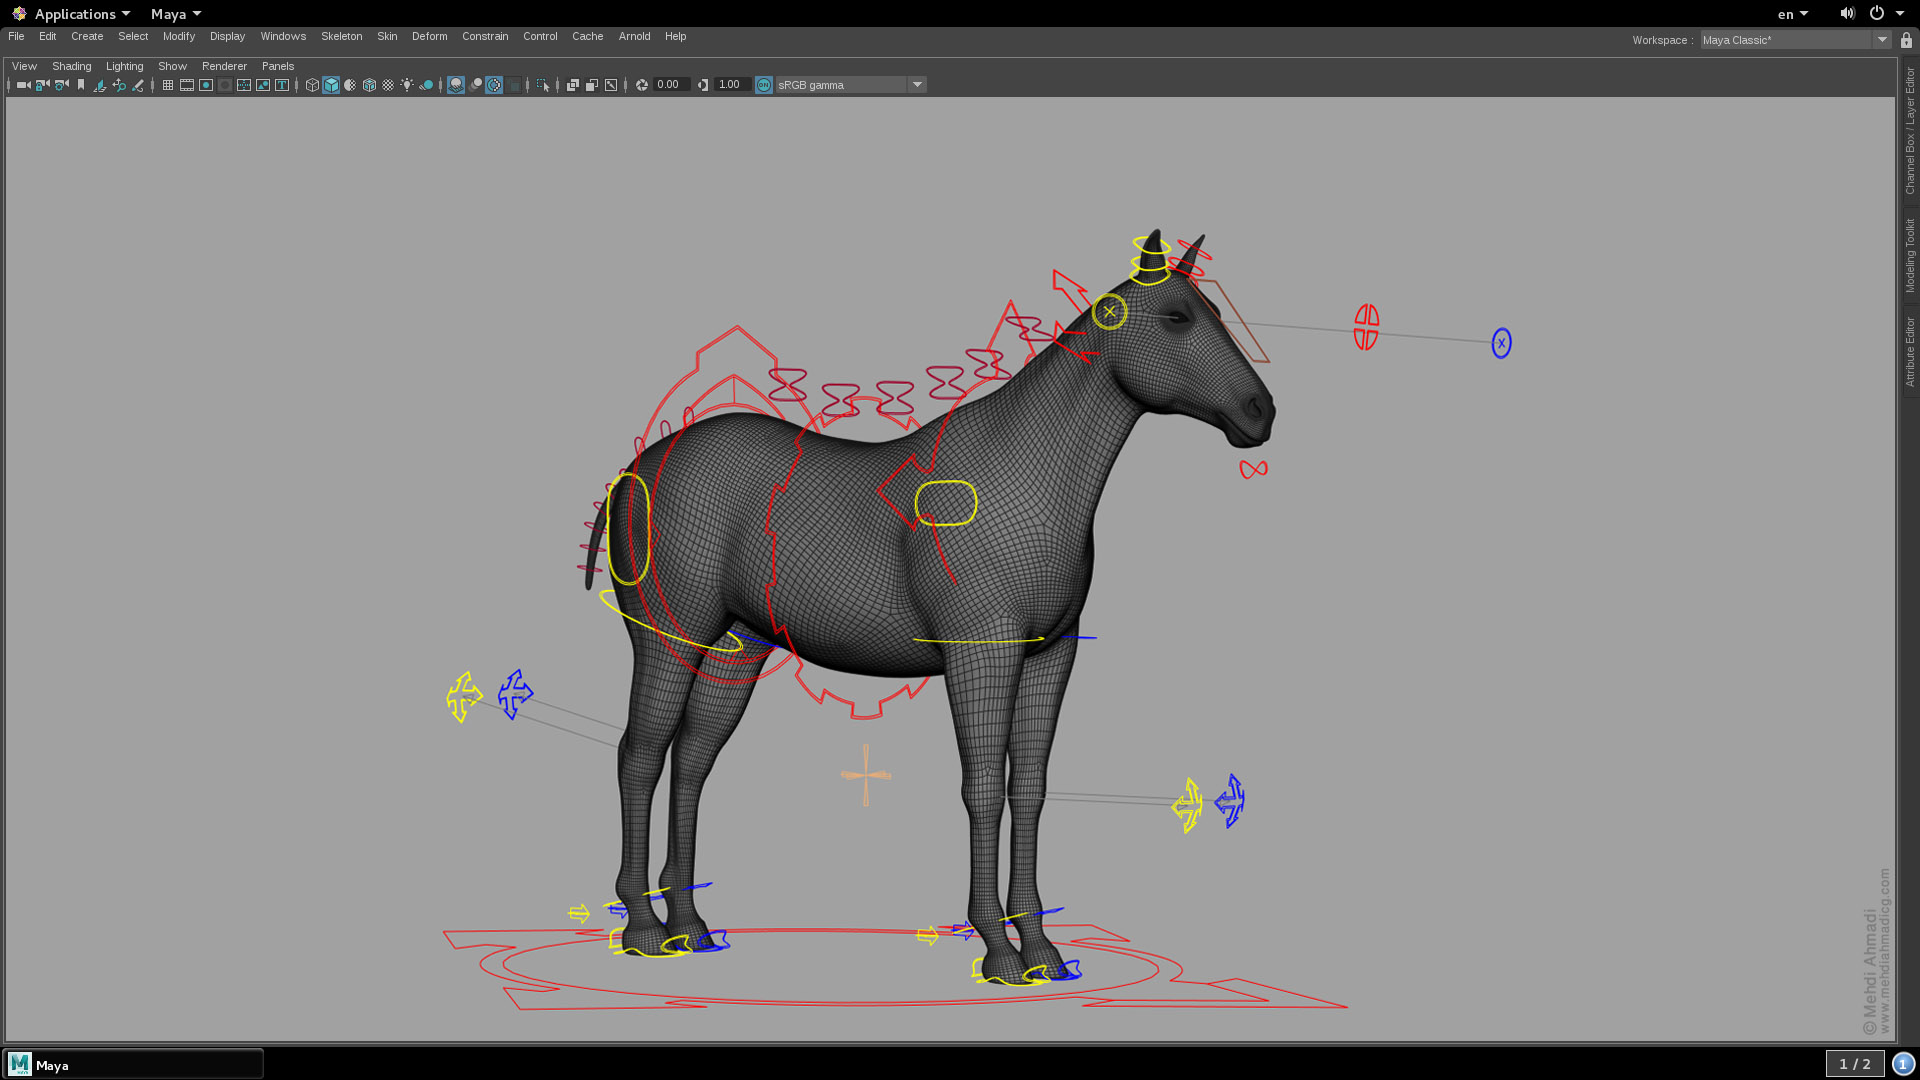
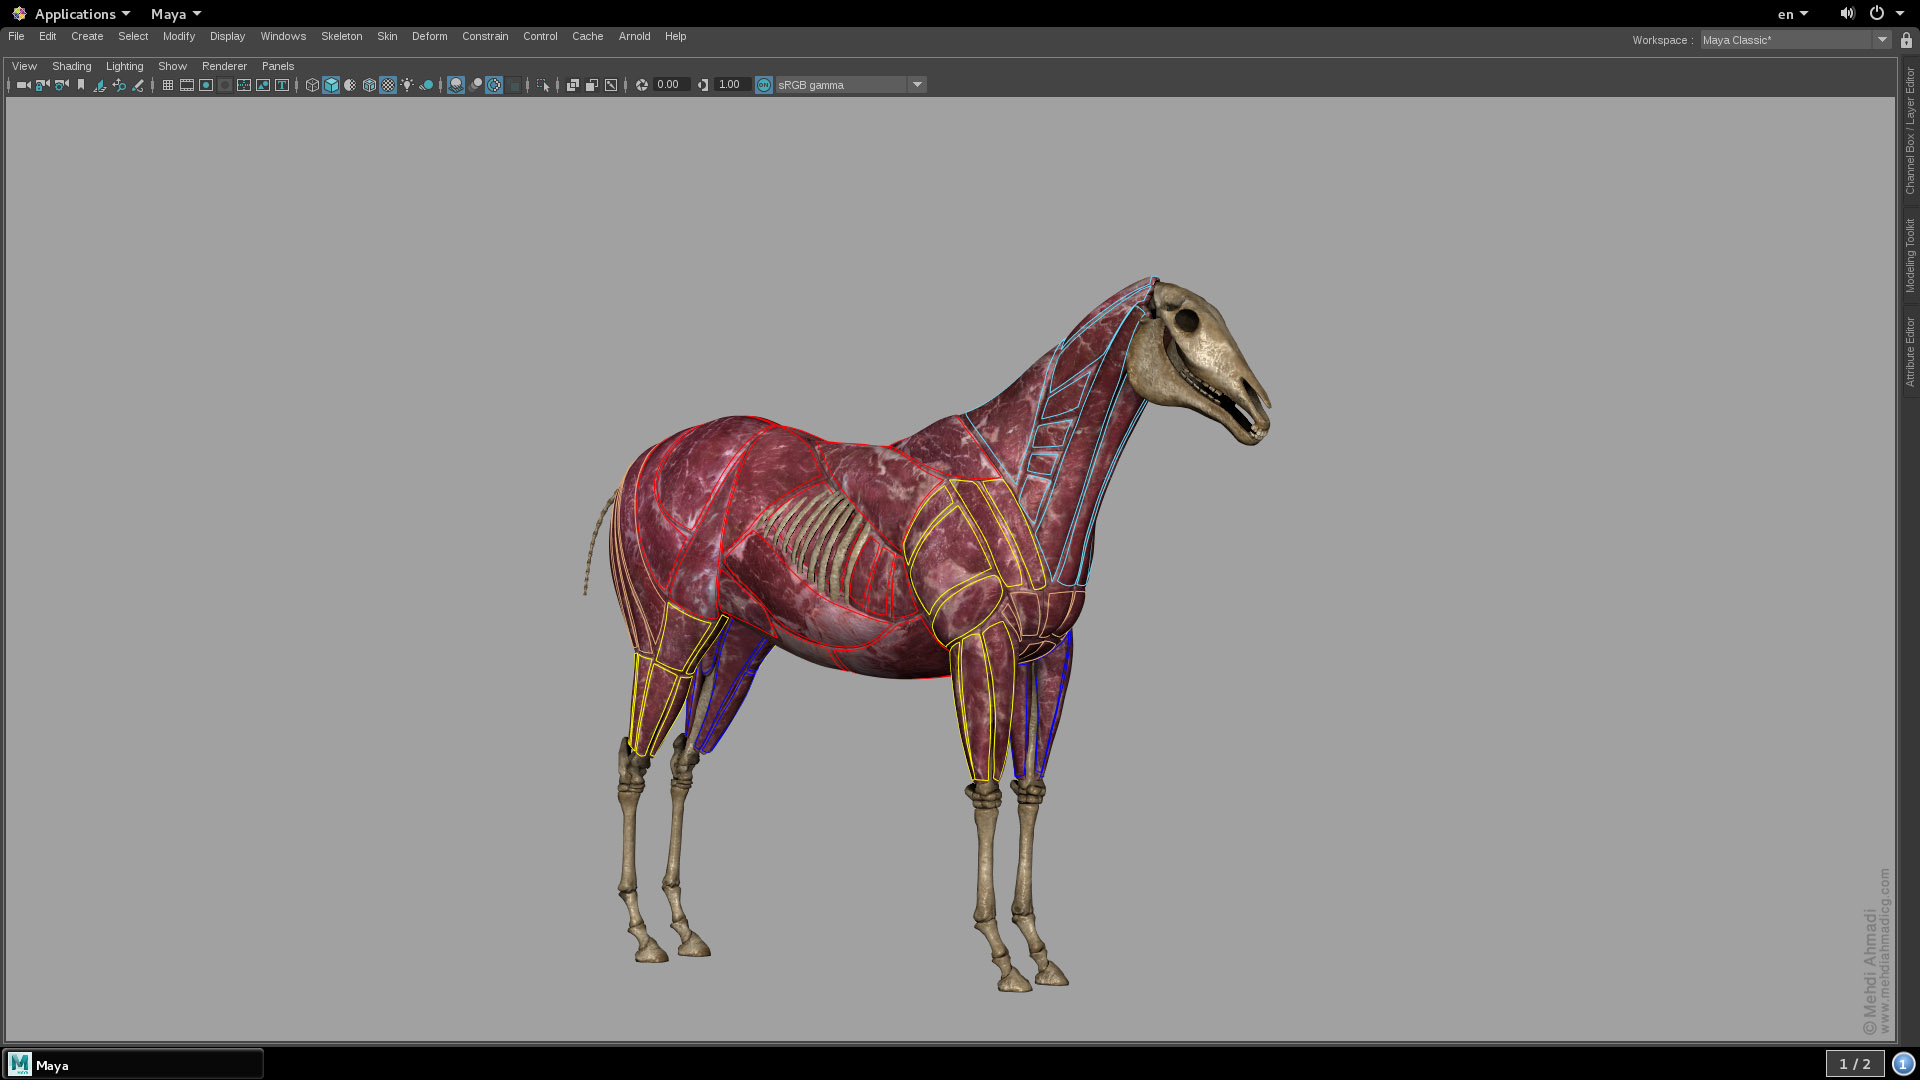
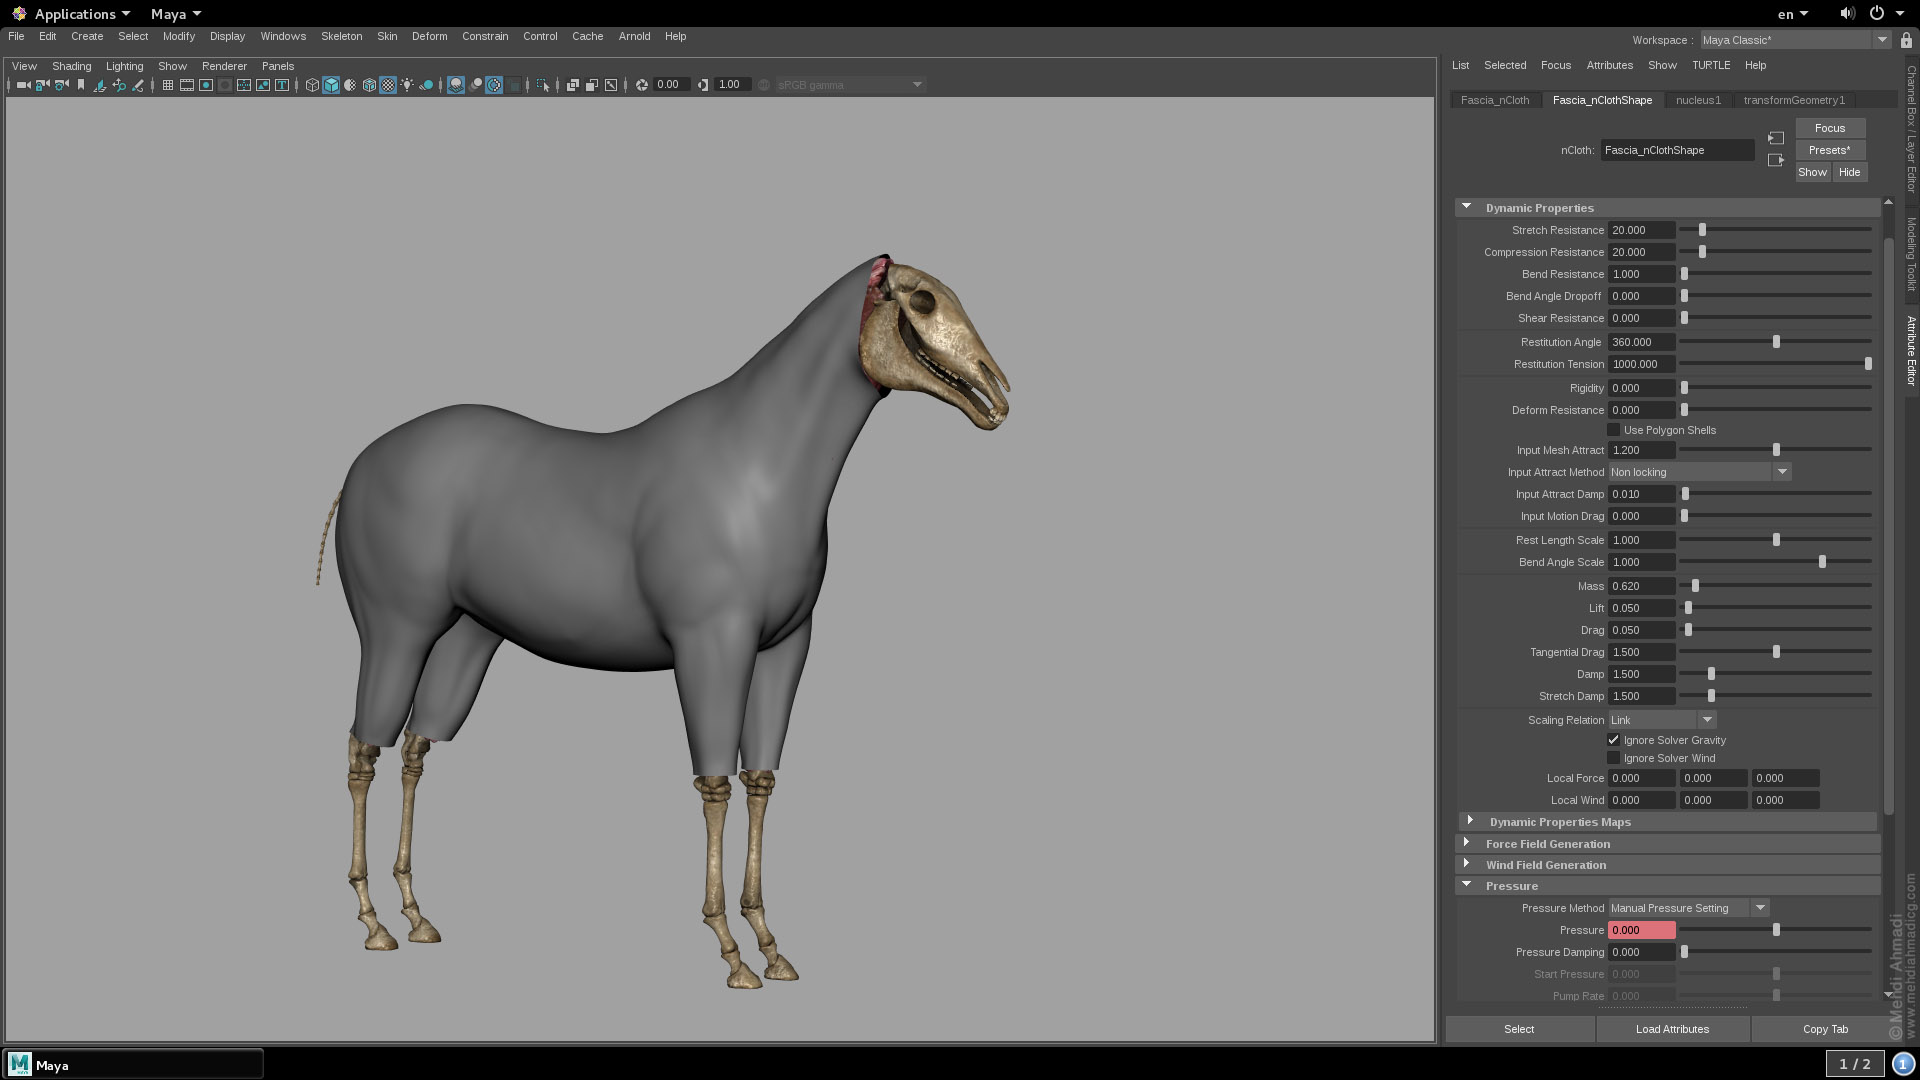
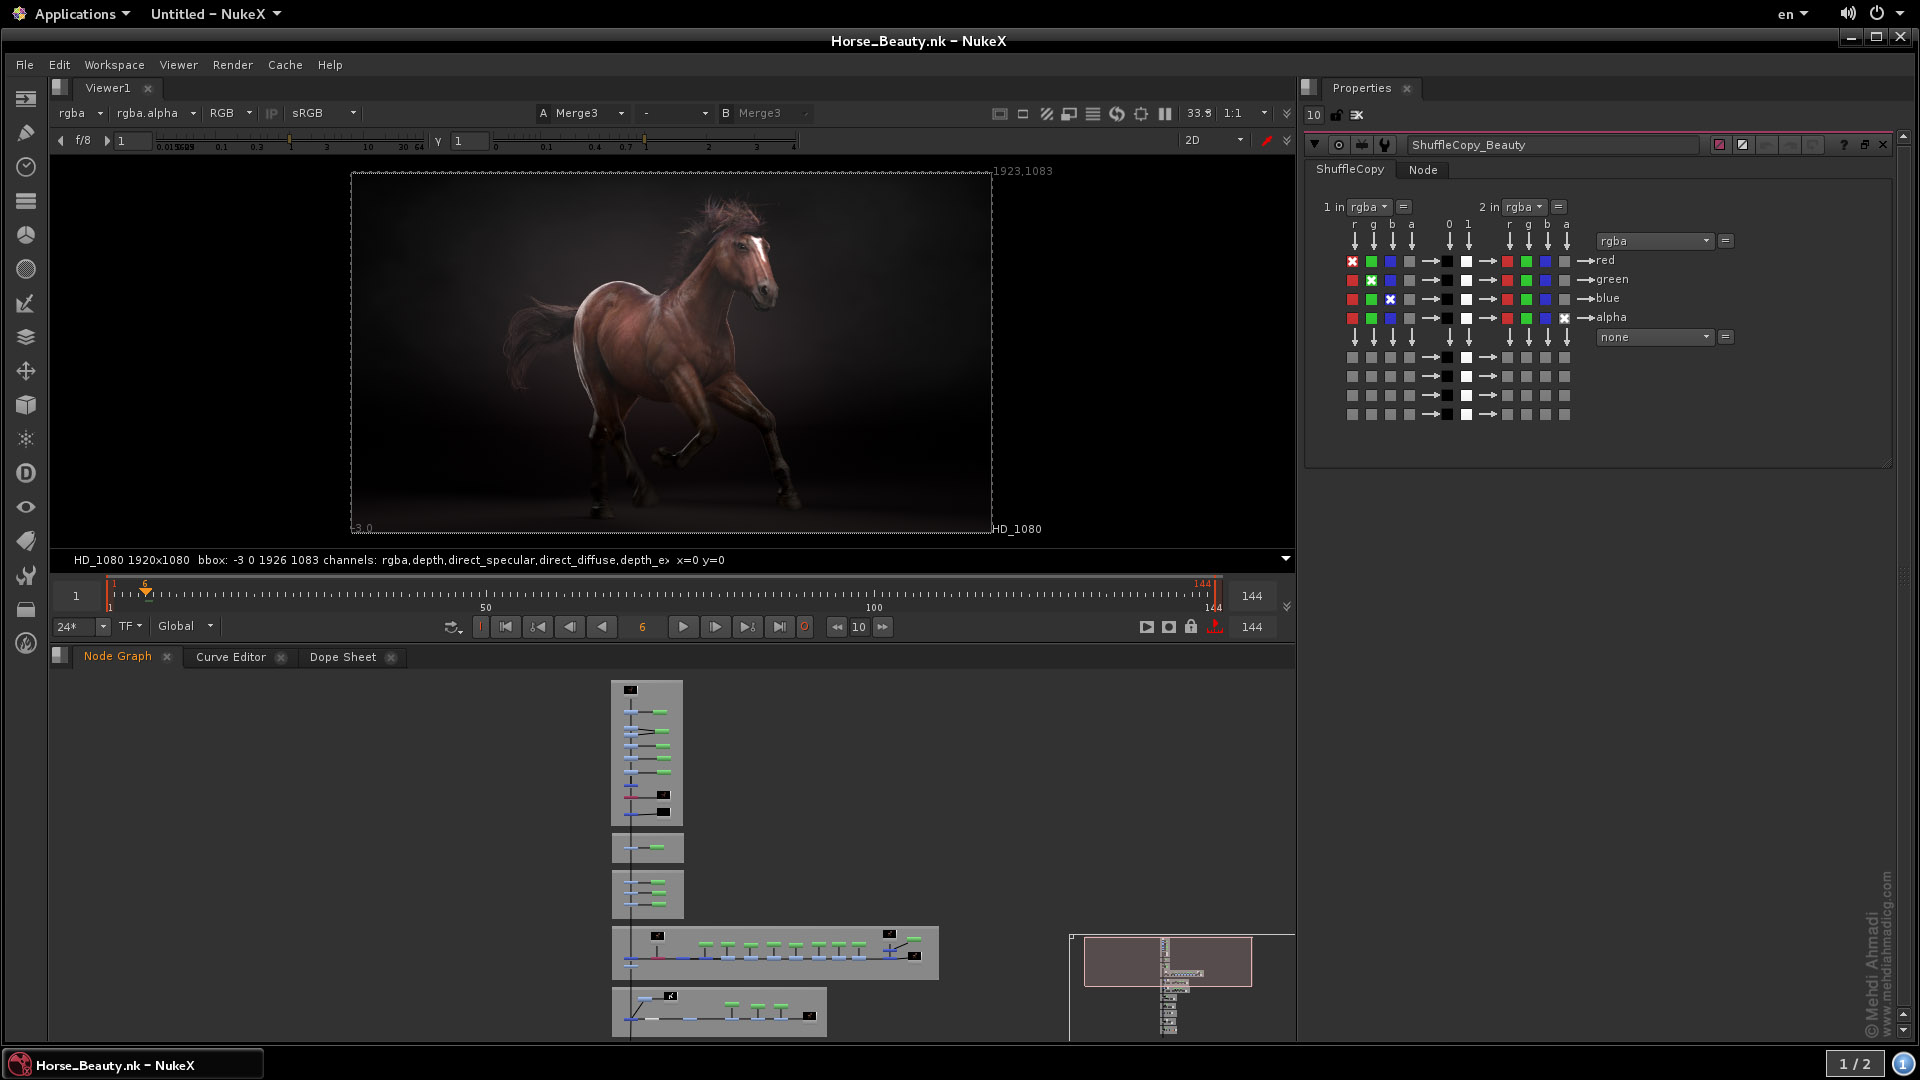
My reason for creating a horse in this project was that I think among all animals, creating a 3d horse is one of the most challenging job, because most people are familiar with the movements and the appearance of a horse, and every mistake in creating a horse is easily detected by viewers, so before creating the horse, I read a lot about its anatomy and watched a lot of videos about horse movements and running.
I was responsible for all aspects of this project from beginning to end and I did all the steps of the work myself.
These steps included:
Gathering the References, Modeling, Texturing, Grooming, Rigging, Muscle Setup and Simulation, Skin Simulation, Animation, Shading, Lighting, Rendering, and Compositing.
And for this project, I used Maya, ZBrush, Mari, Photoshop, Yeti, Arnold, and Nuke.
Below you can see some pictures from different steps of my work.


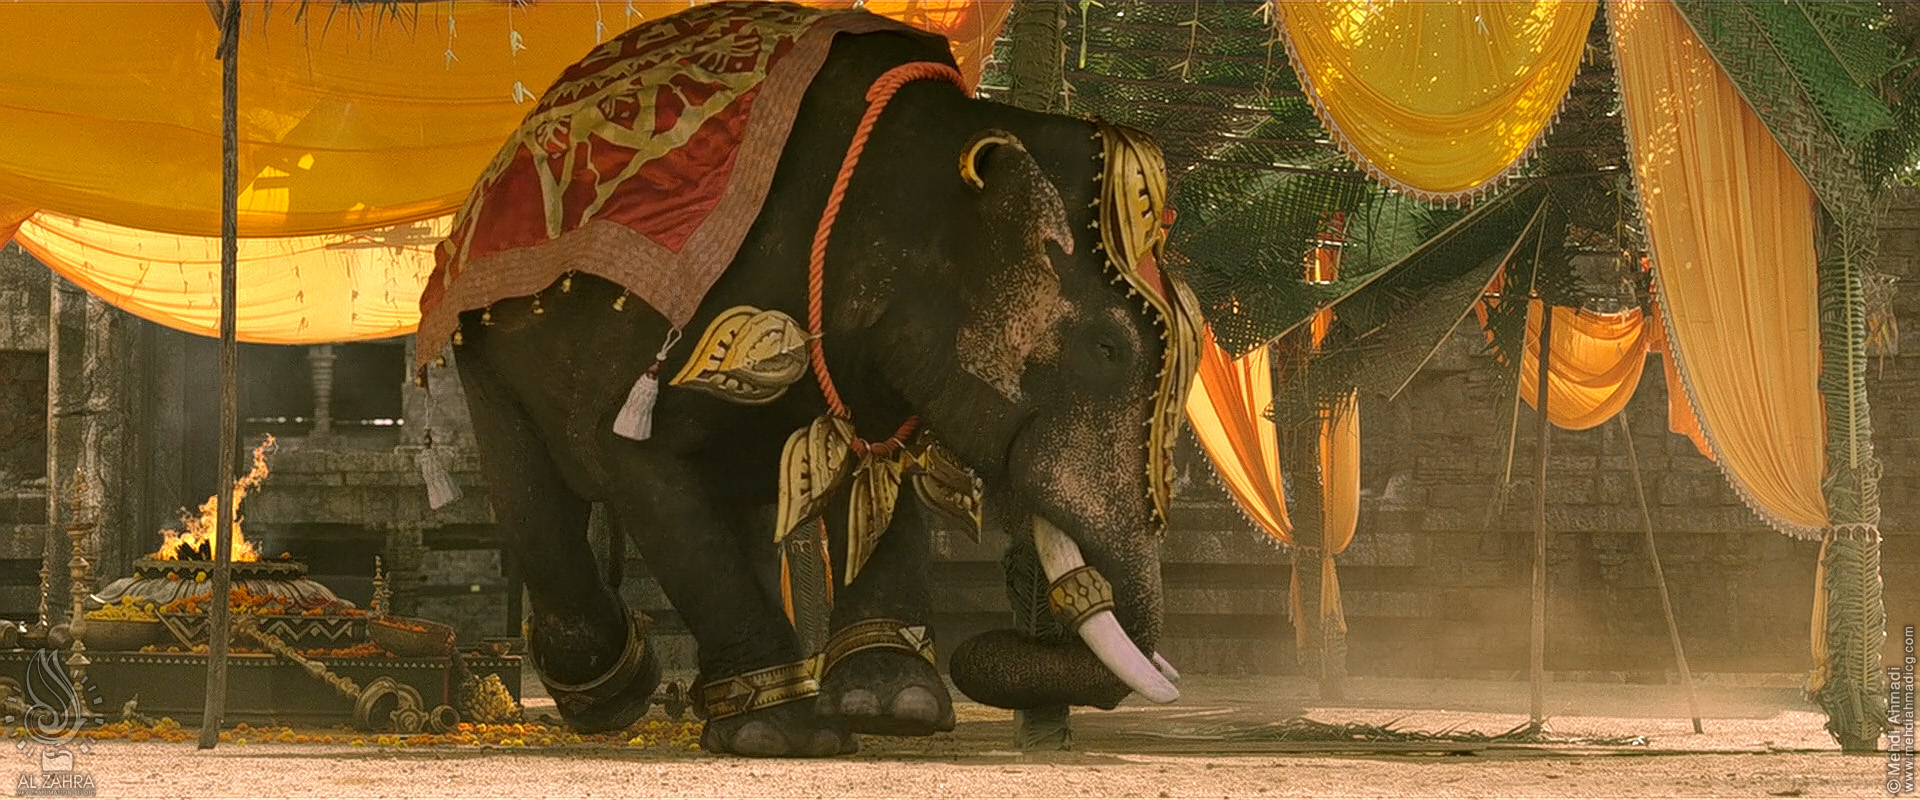
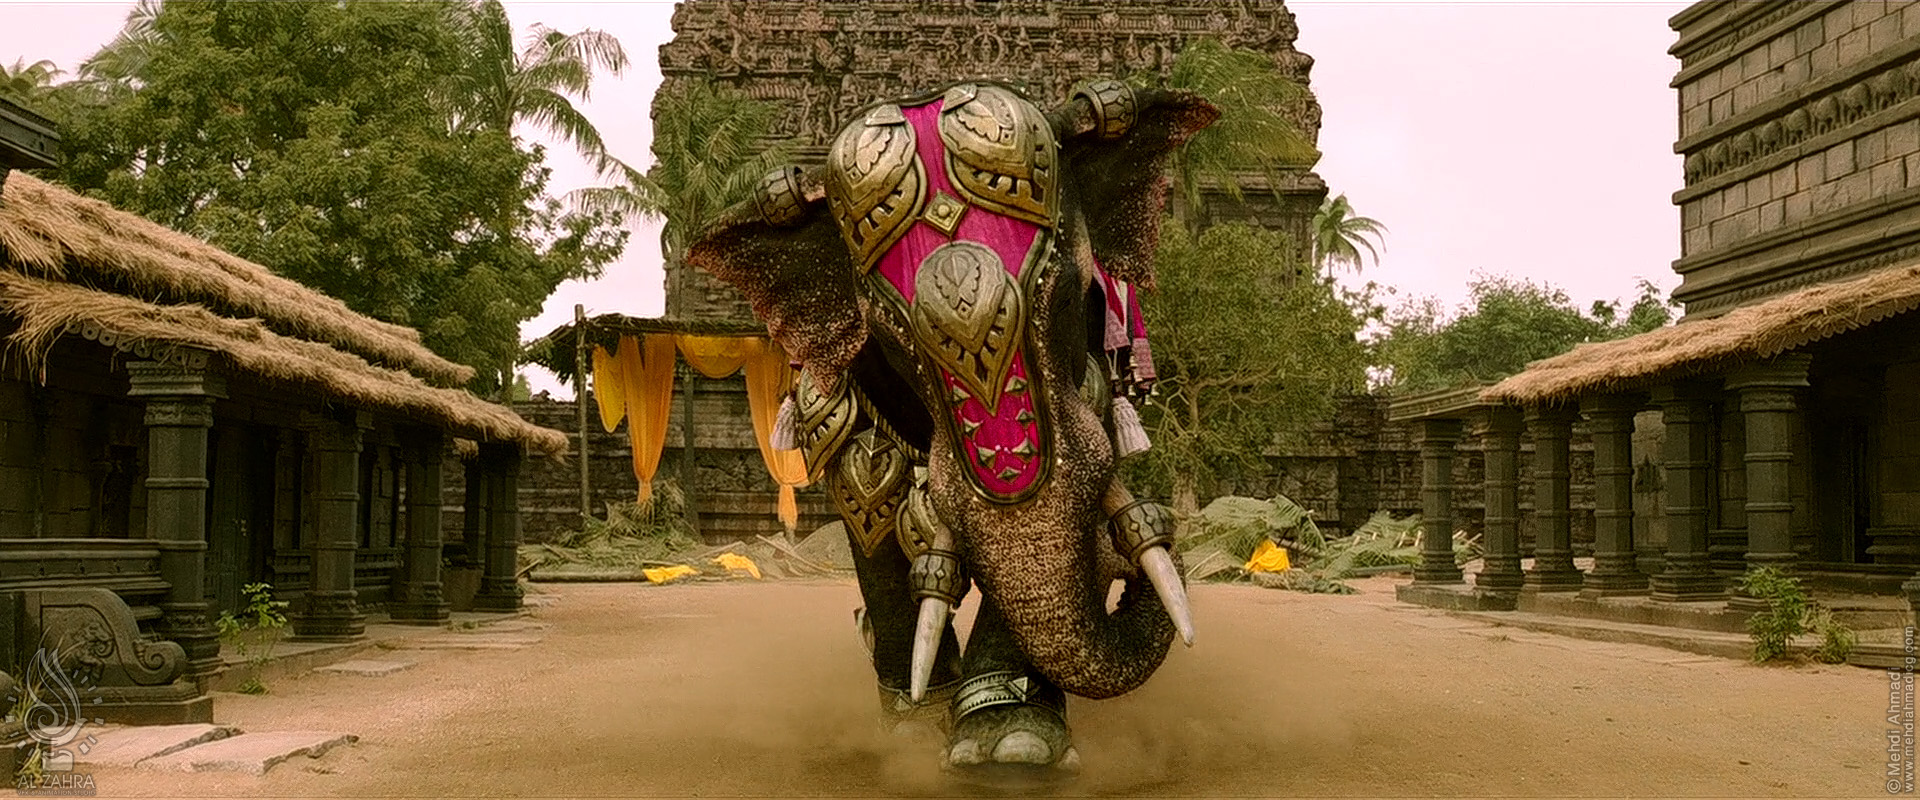
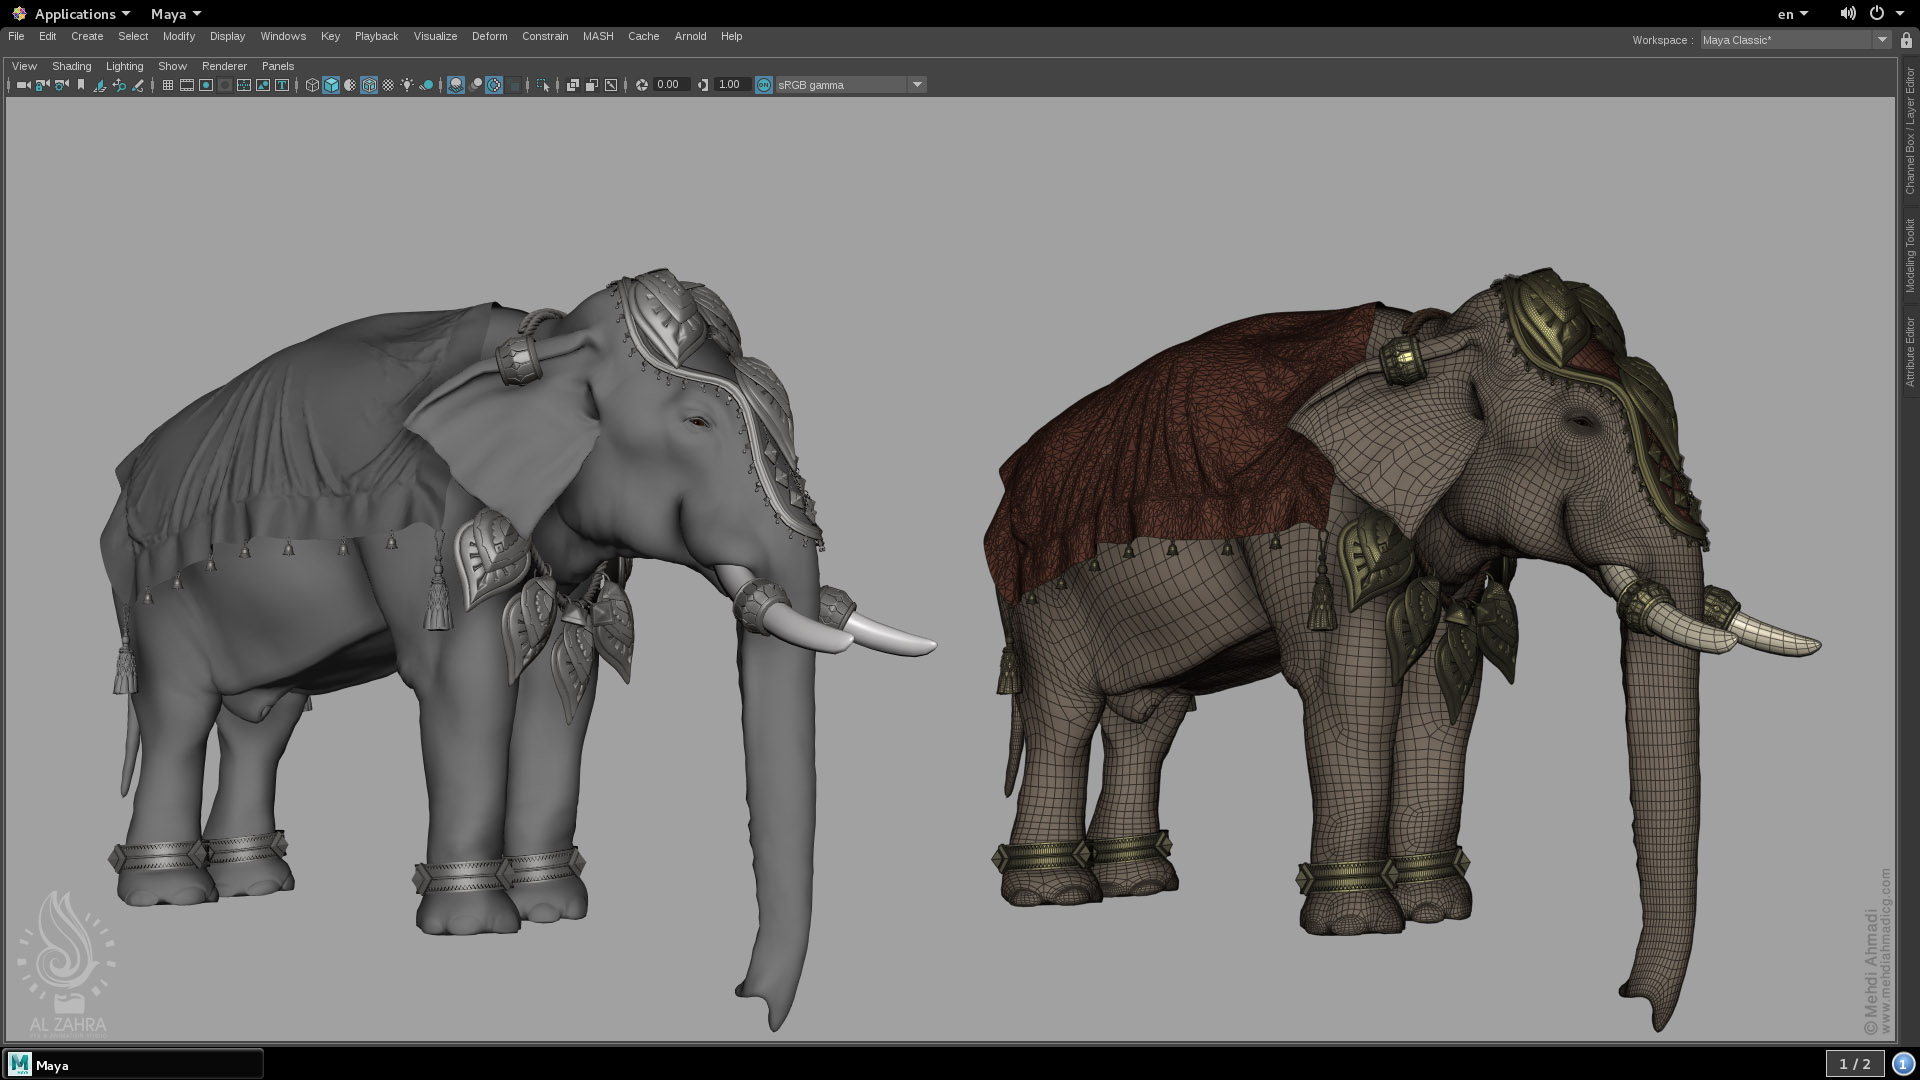
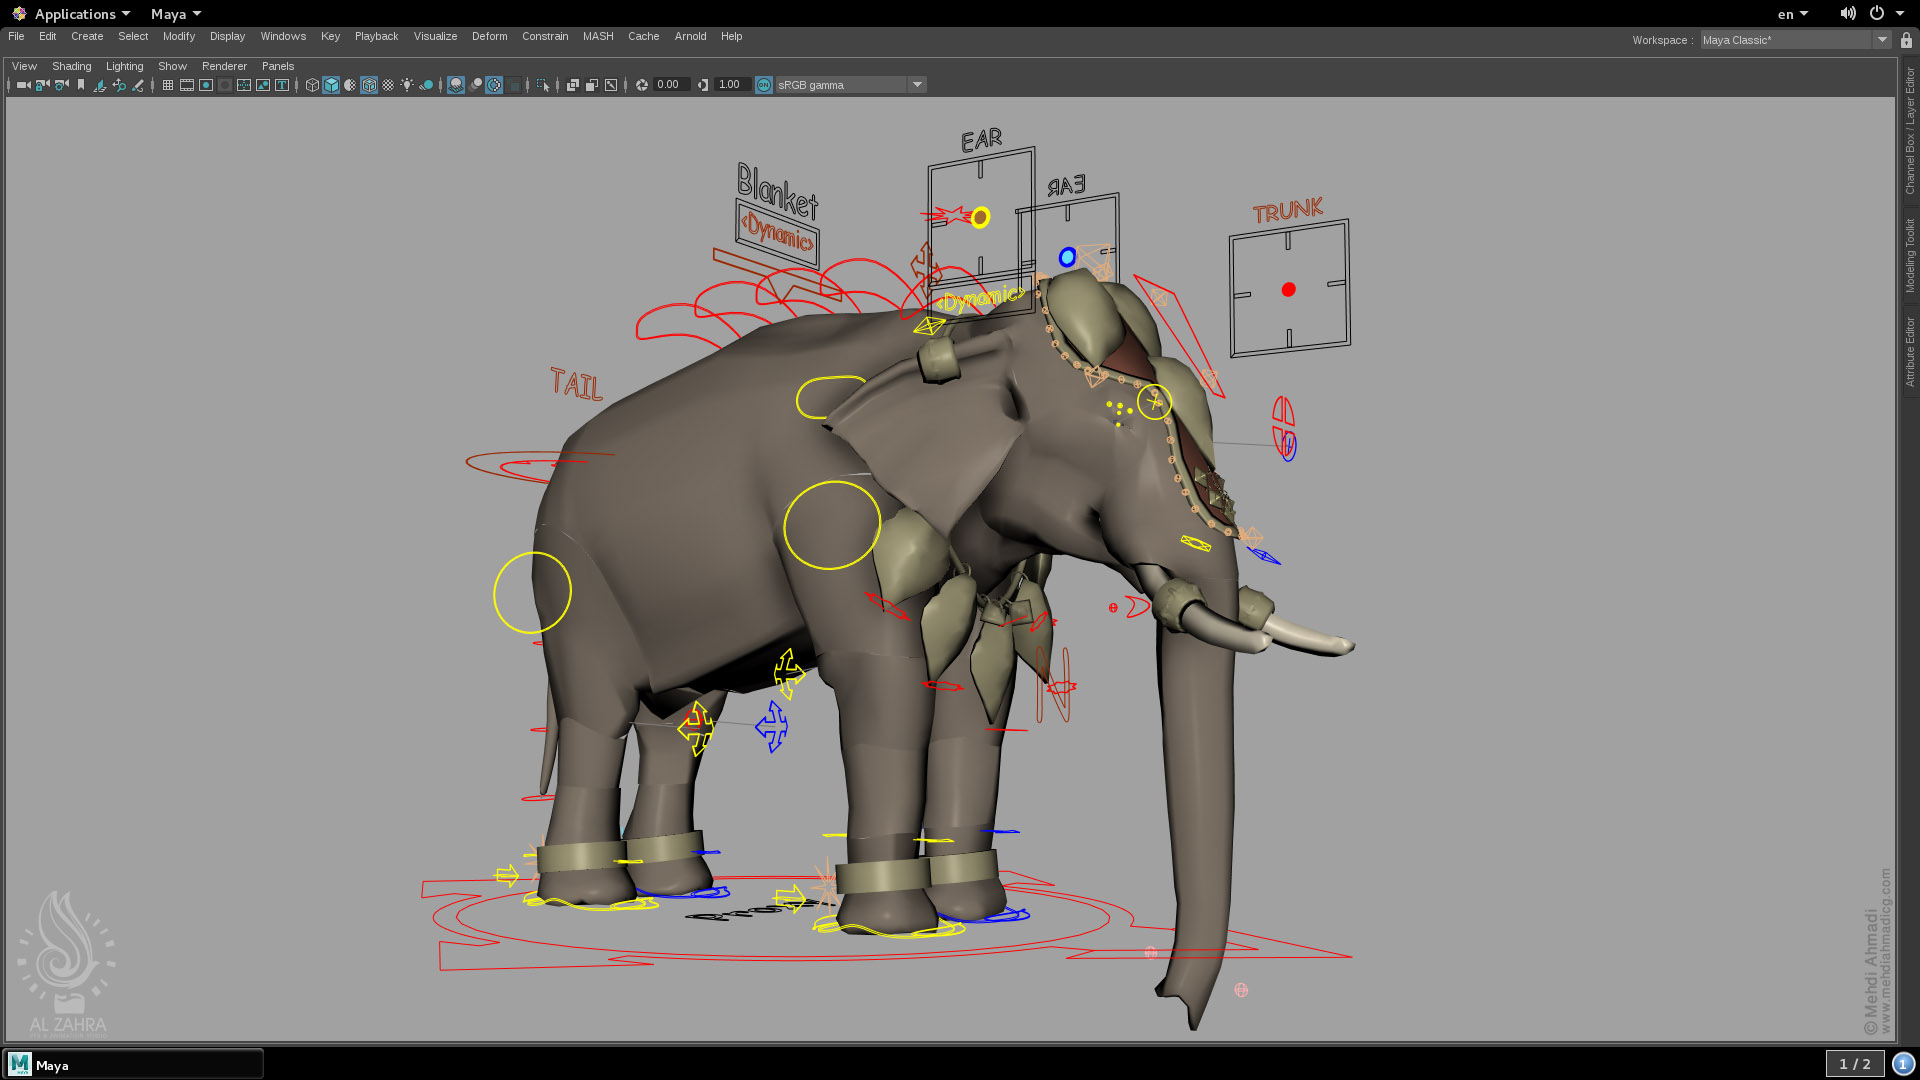
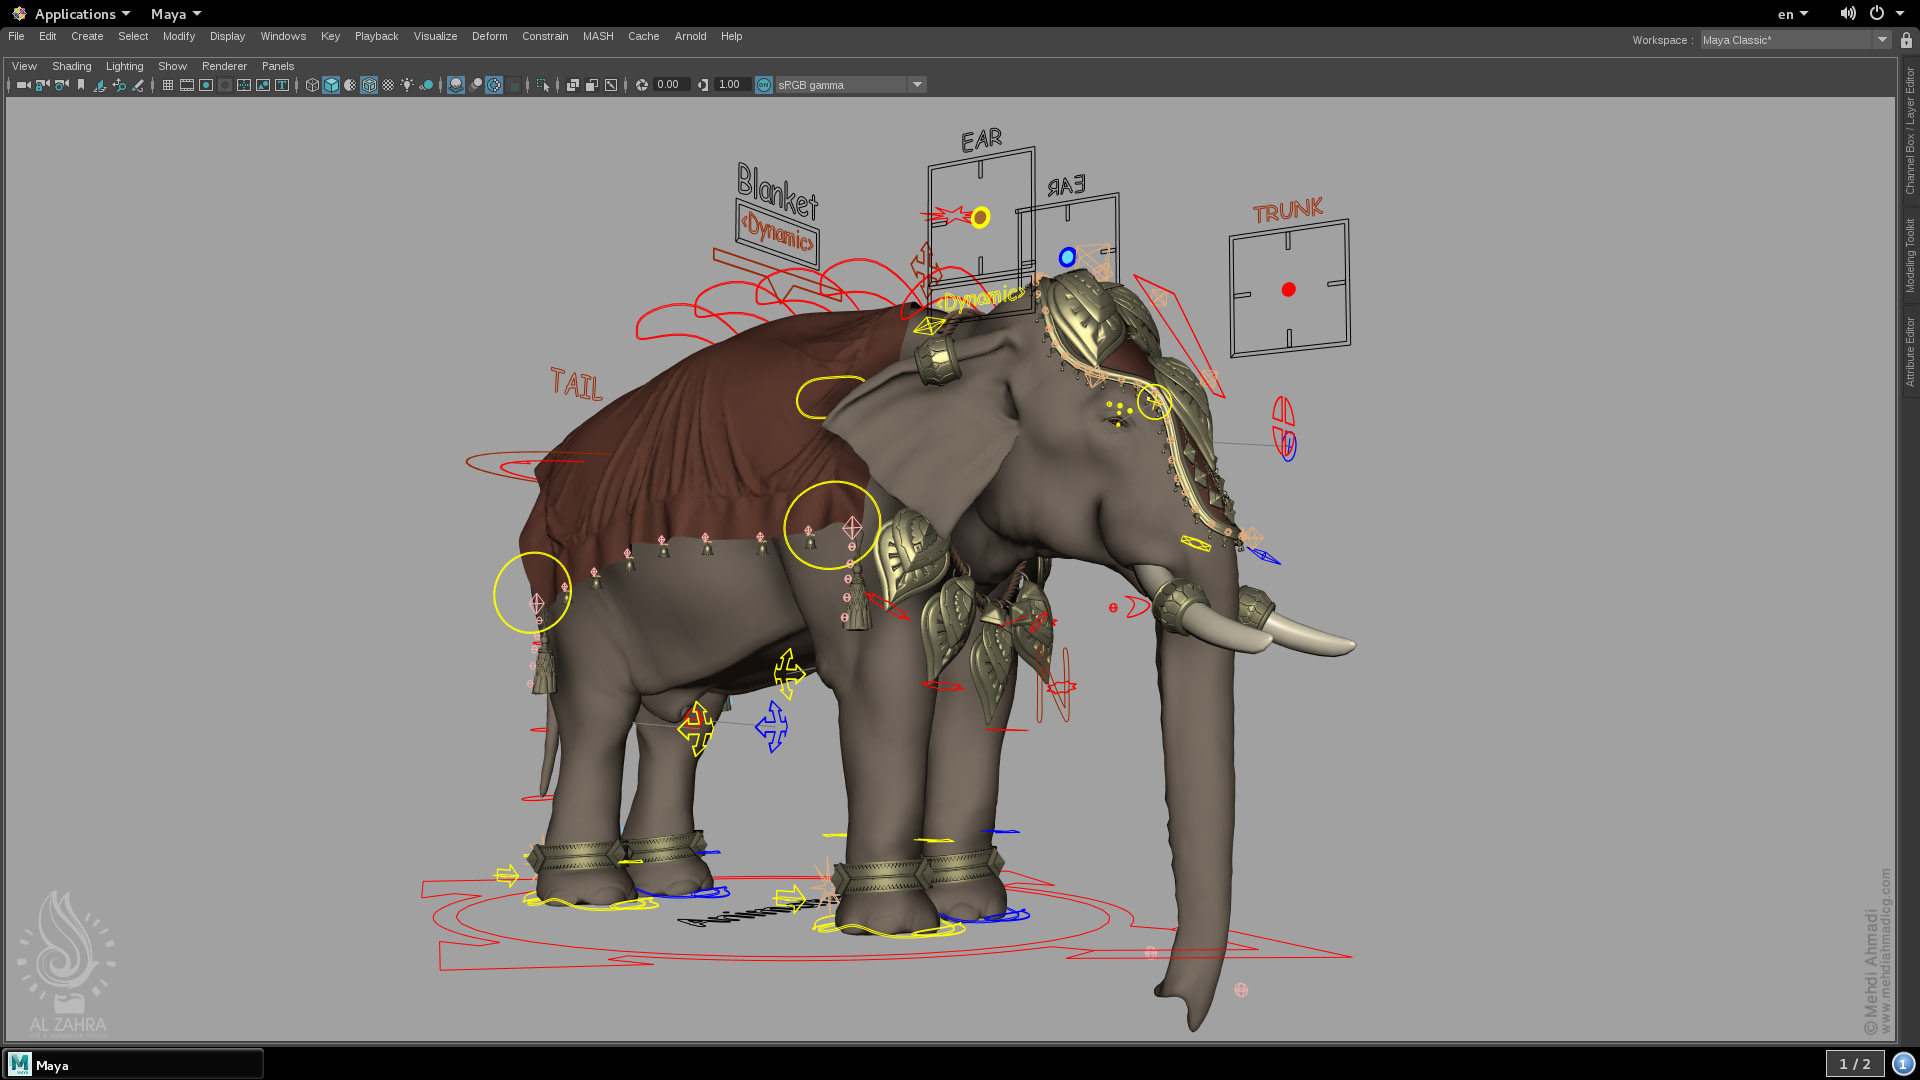
Baahubali 2: The Conclusion is a 2017 Indian epic action film directed by S. S. Rajamouli, that some parts of its visual effects have been created by the Alzahra VFX & Animation studio.
I setup an elephant in this movie and what made the setup of this elephant different for me was that the body of the elephant which I setup had completely the dynamic and the automatic collision detection features.
And the body of the elephant could detect the collision with itself and the other objects in the environment quite well.
I worked as a Lead Creature TD in this project and I was responsible for Rigging, Skinning, Muscle Setup and Simulation, and Skin Simulation of the elephant in Baahubali 2 The Conclusion movie.
And for this project, I used Maya and ZBrush.
Below you can see some pictures from different steps of my work.
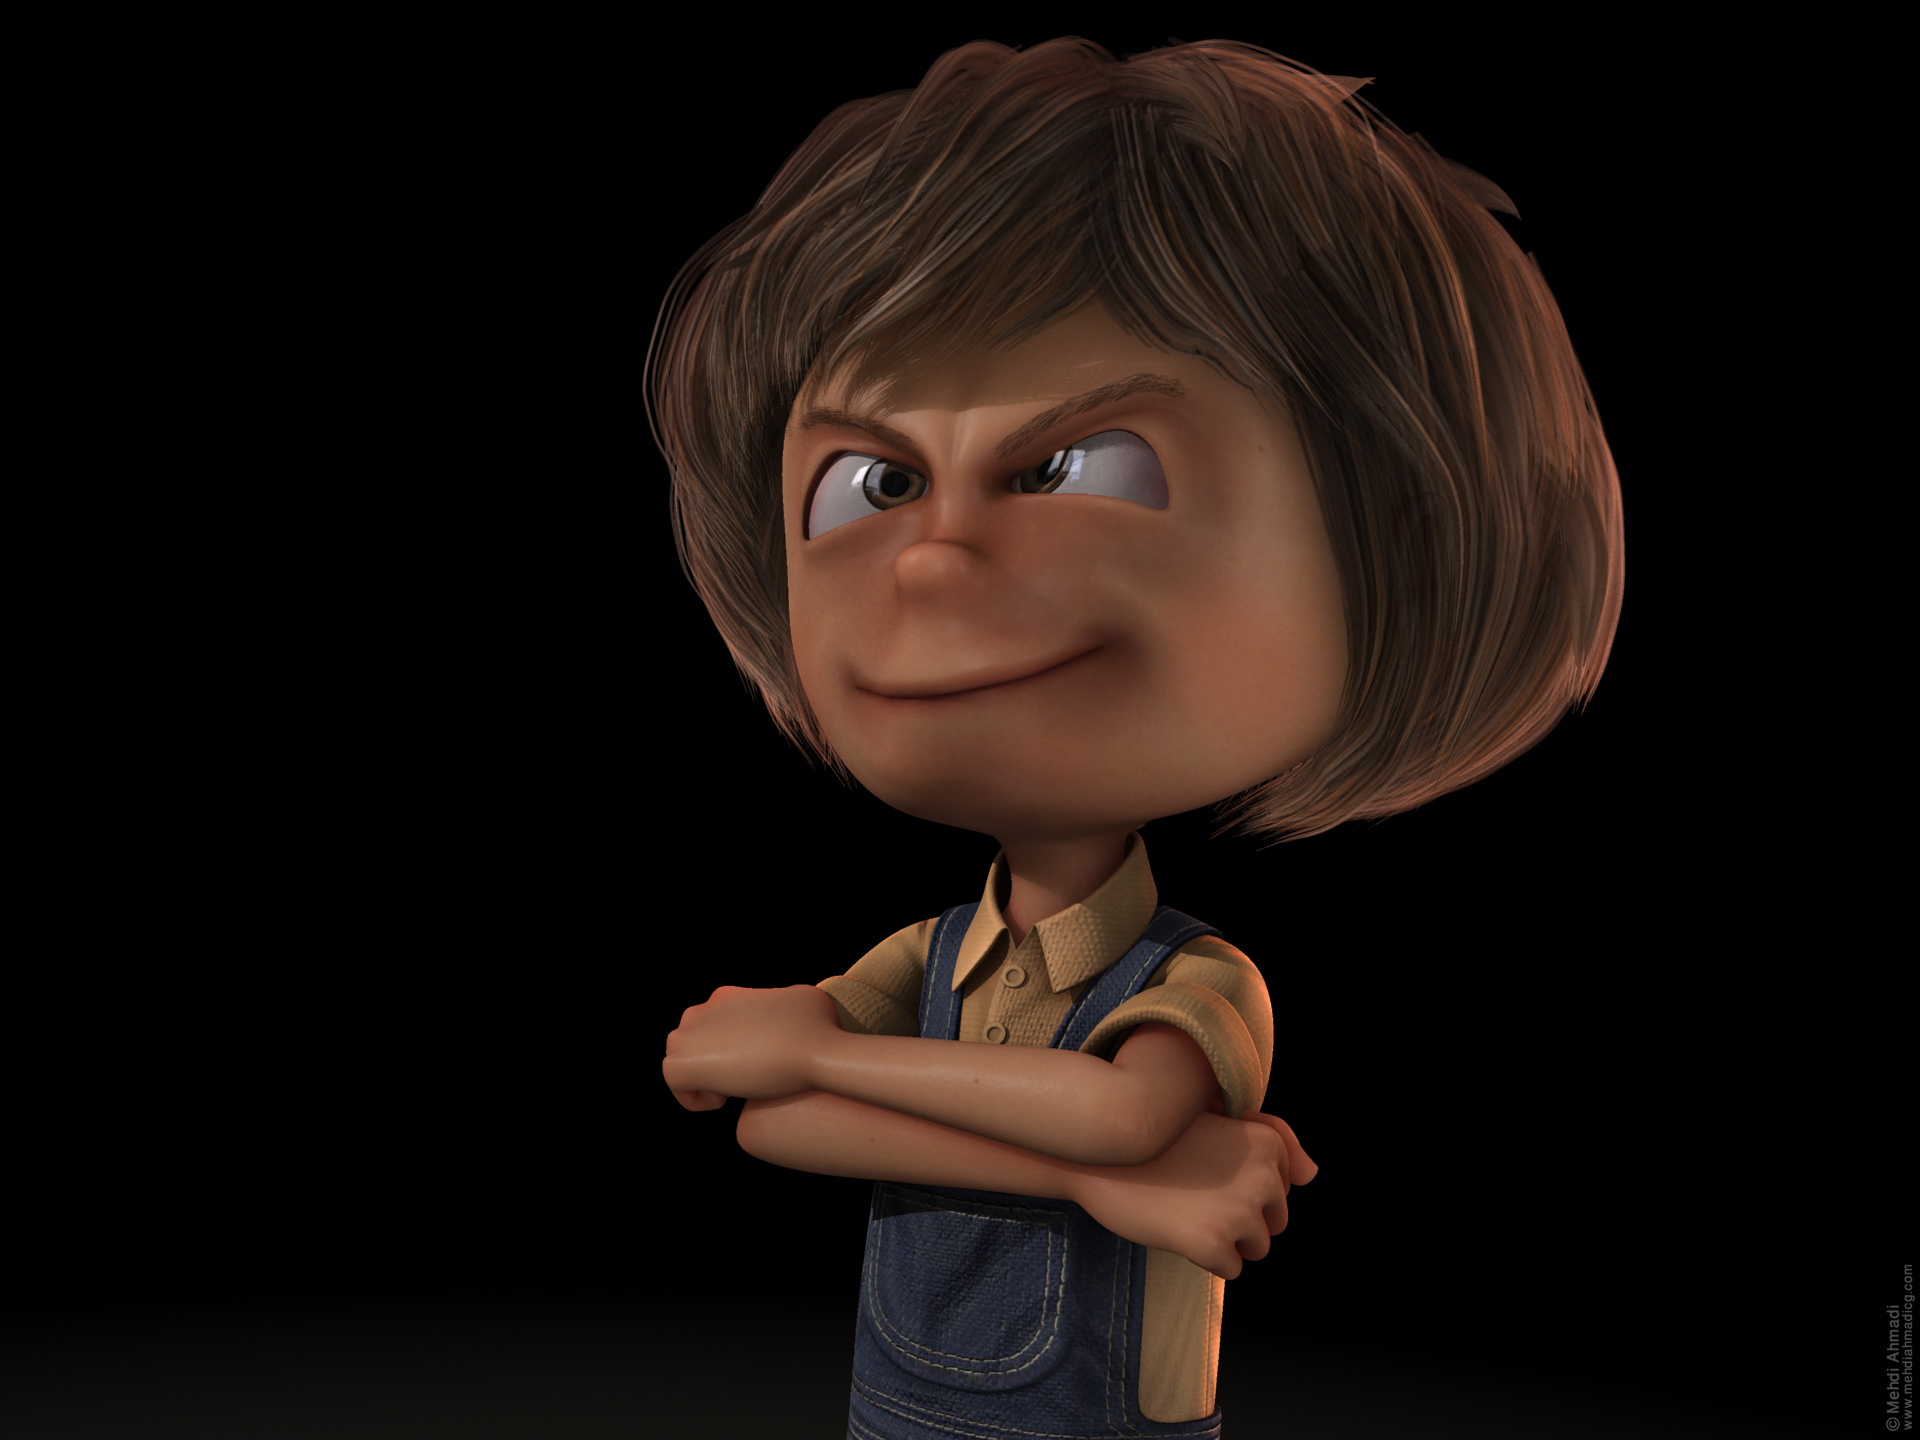
I have always been interested in rigging the transforming characters because I know when a character is going to be transformed into another character or object, the steps to setup these types of characters will have particular complexity.
In this project, my main goal was to transform a Robot into a Helicopter, and one of the most challenging parts of this work was adjusting, breaking, and separating models into new pieces and preparing them for transformation.
In this project I was responsible for all aspects except for modeling, and I did all the other steps by myself.
These steps included:
Gathering the References, Preparing & Breaking & Separating Models, Texturing, Rigging, Animation, Shading, Lighting, Tool Development.
And for this project, I used Maya, Substance Painter, Photoshop, and Qt Designer.
Below you can see some pictures from different steps of my work.
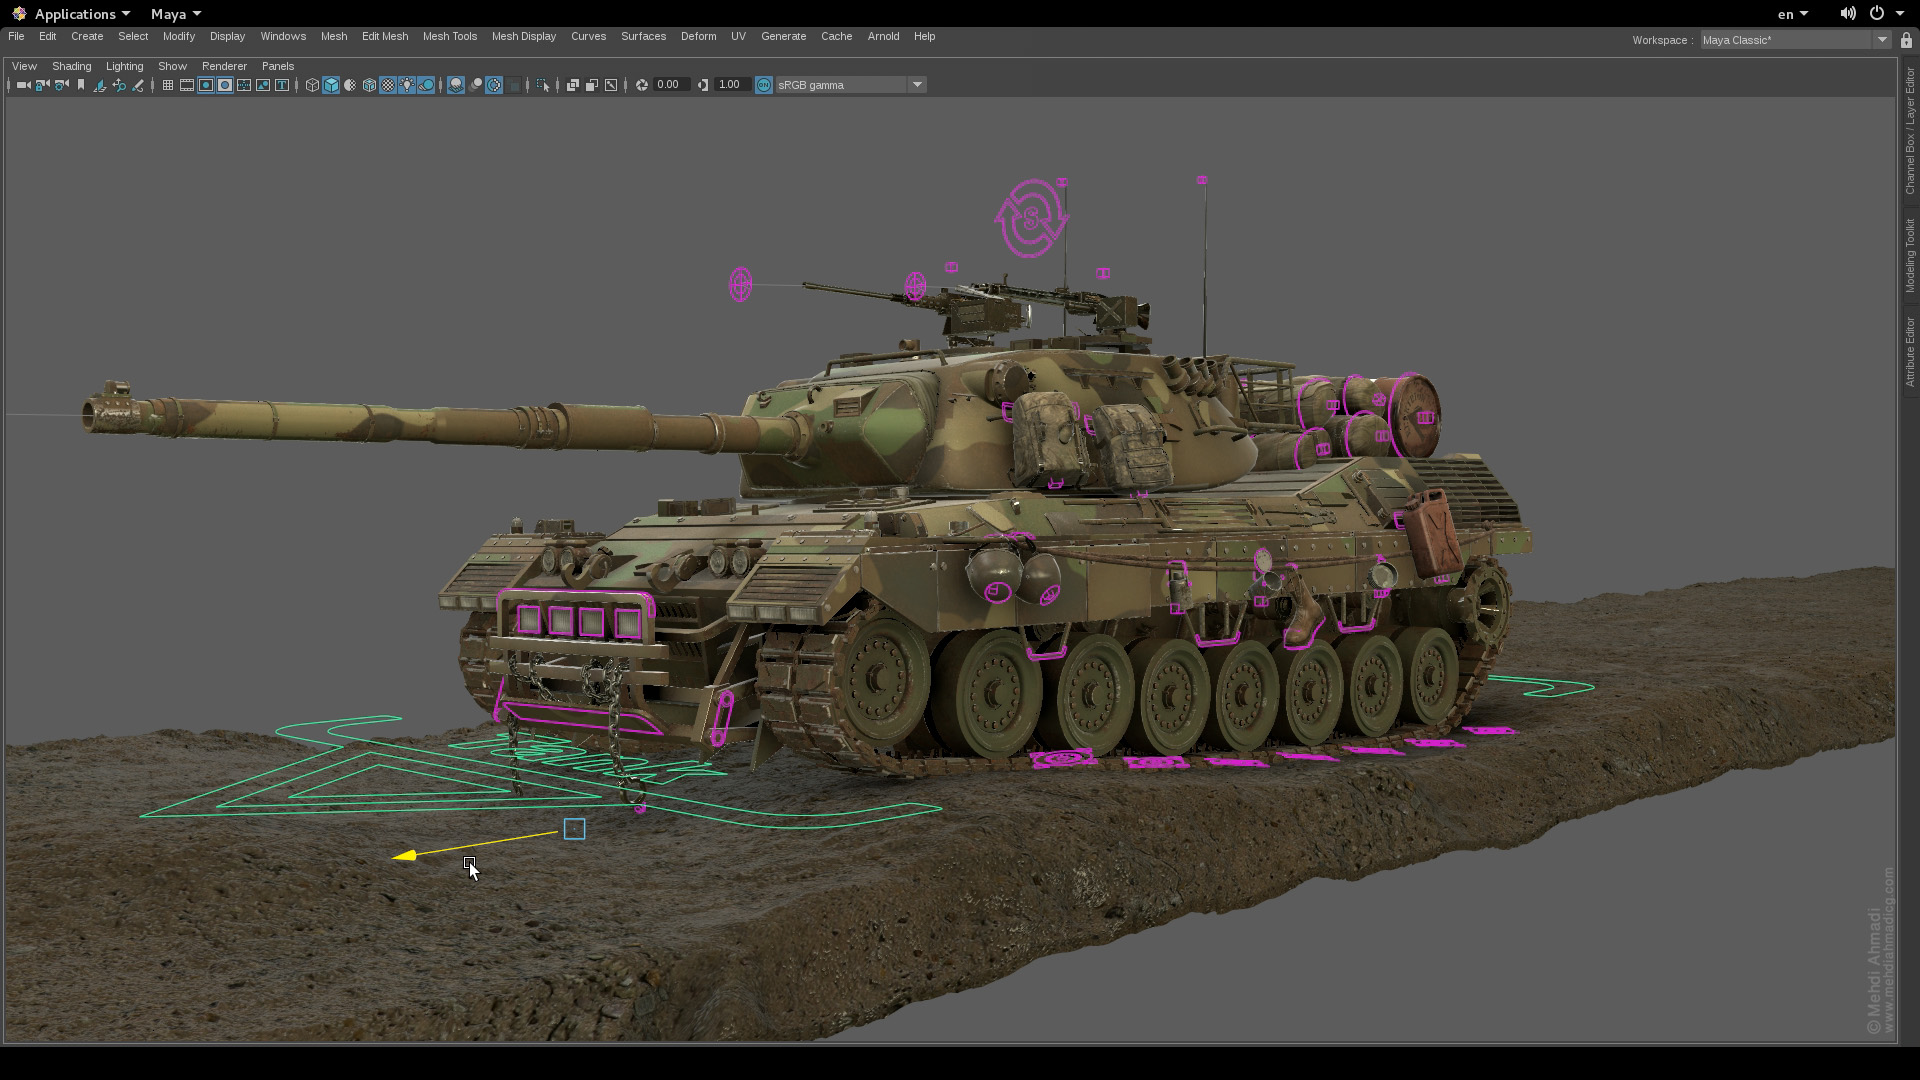
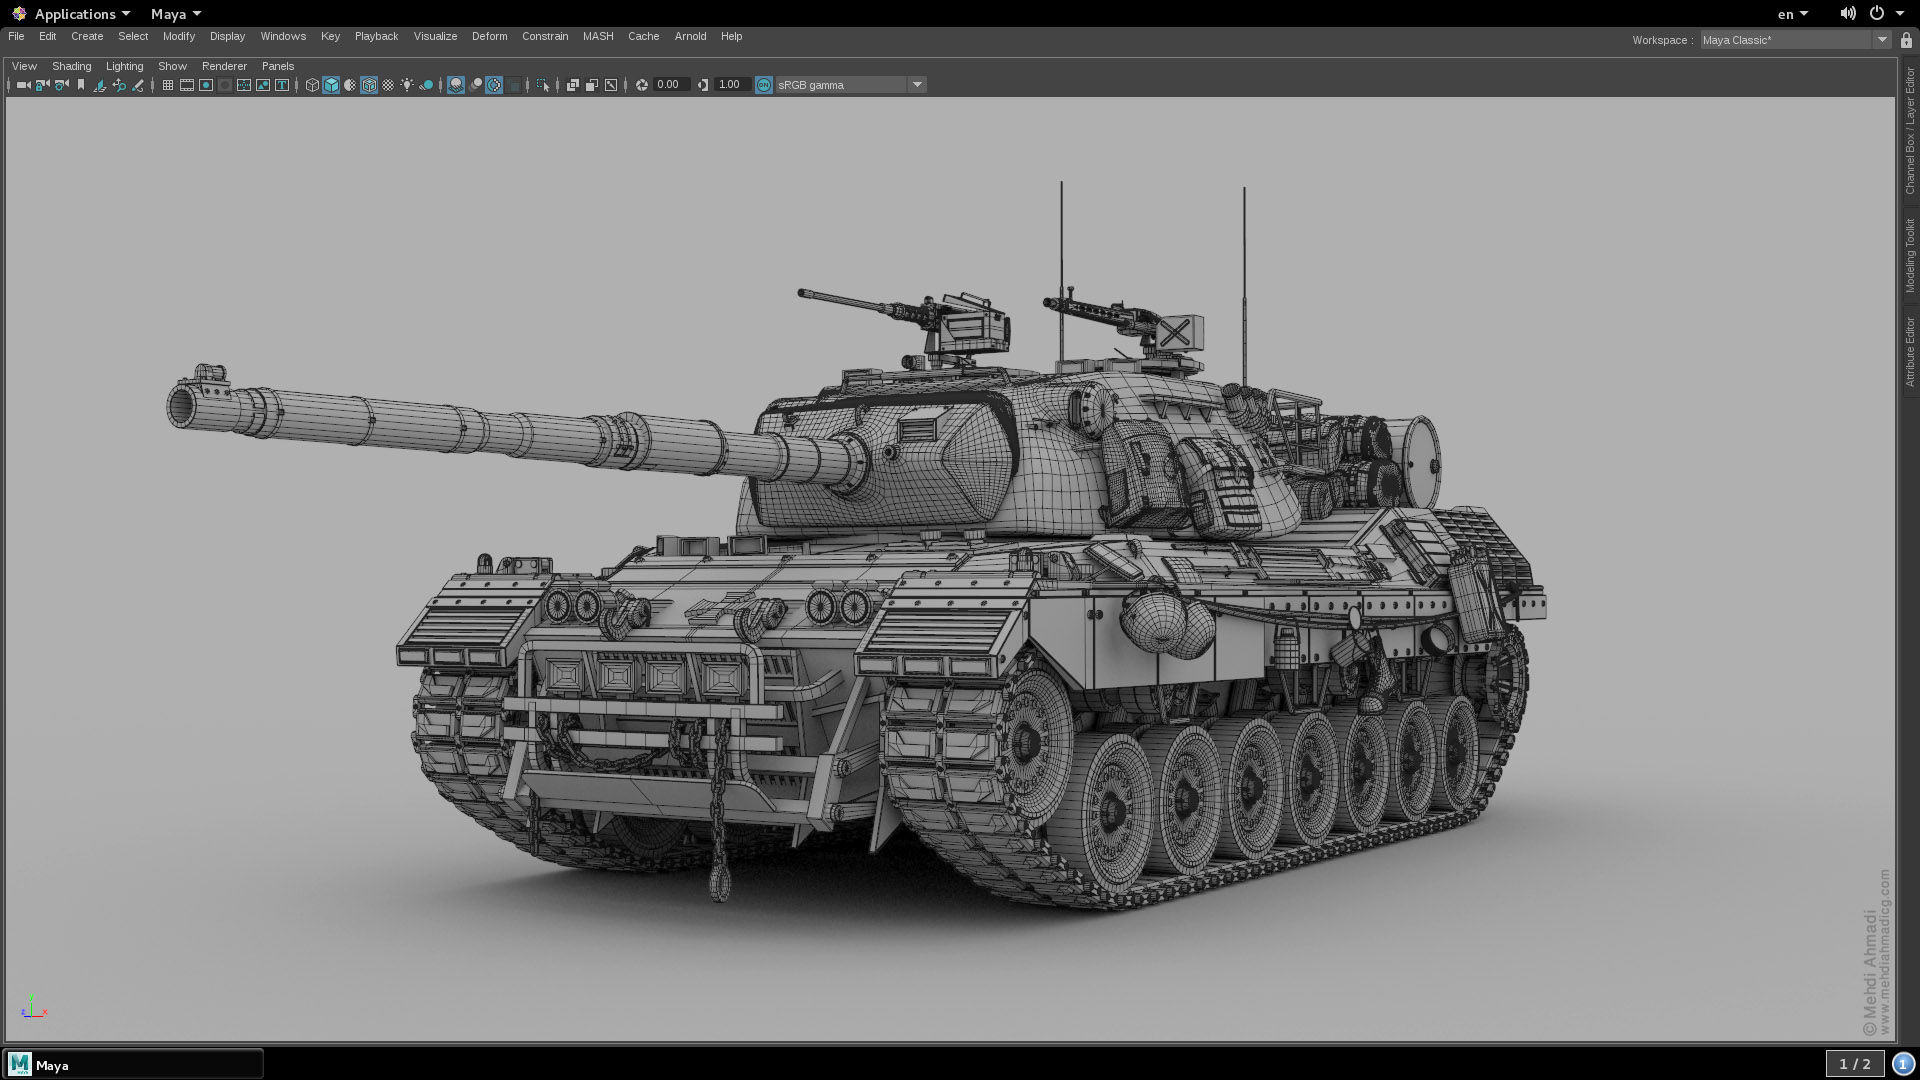
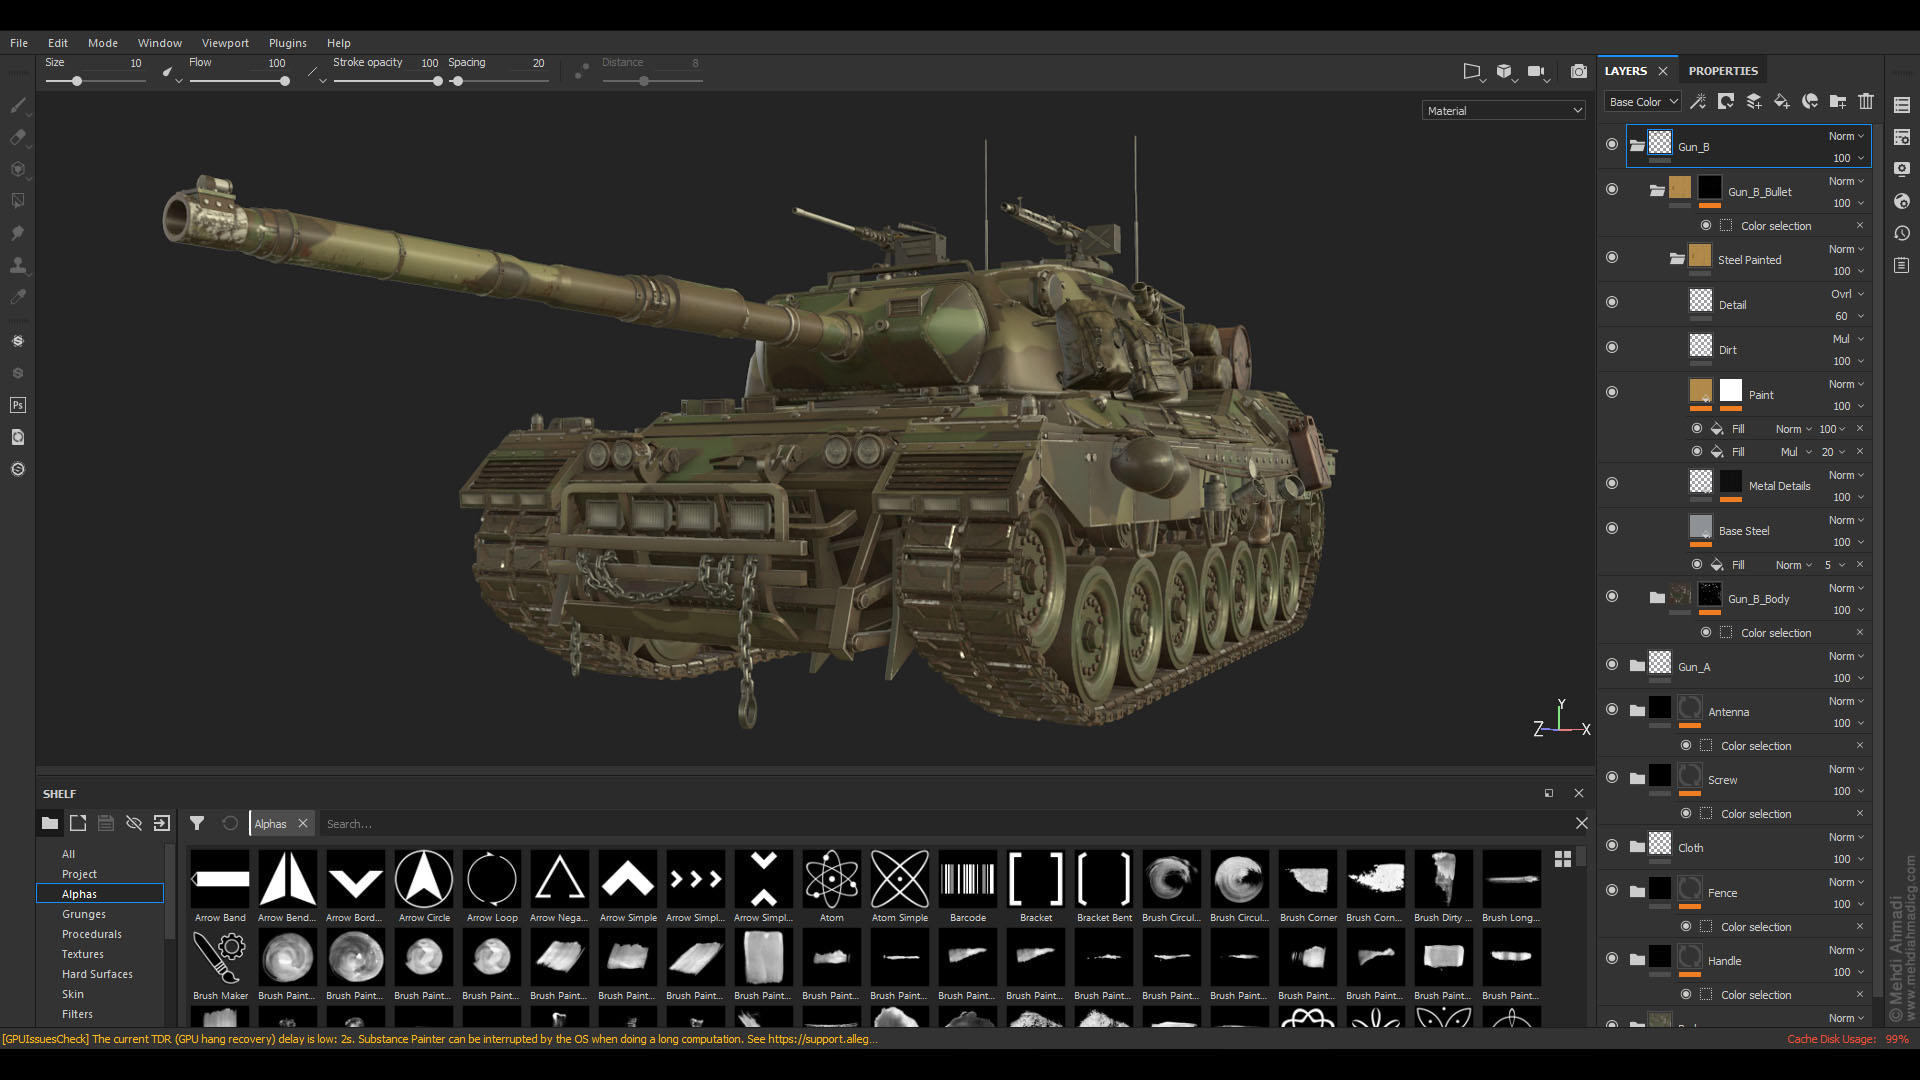
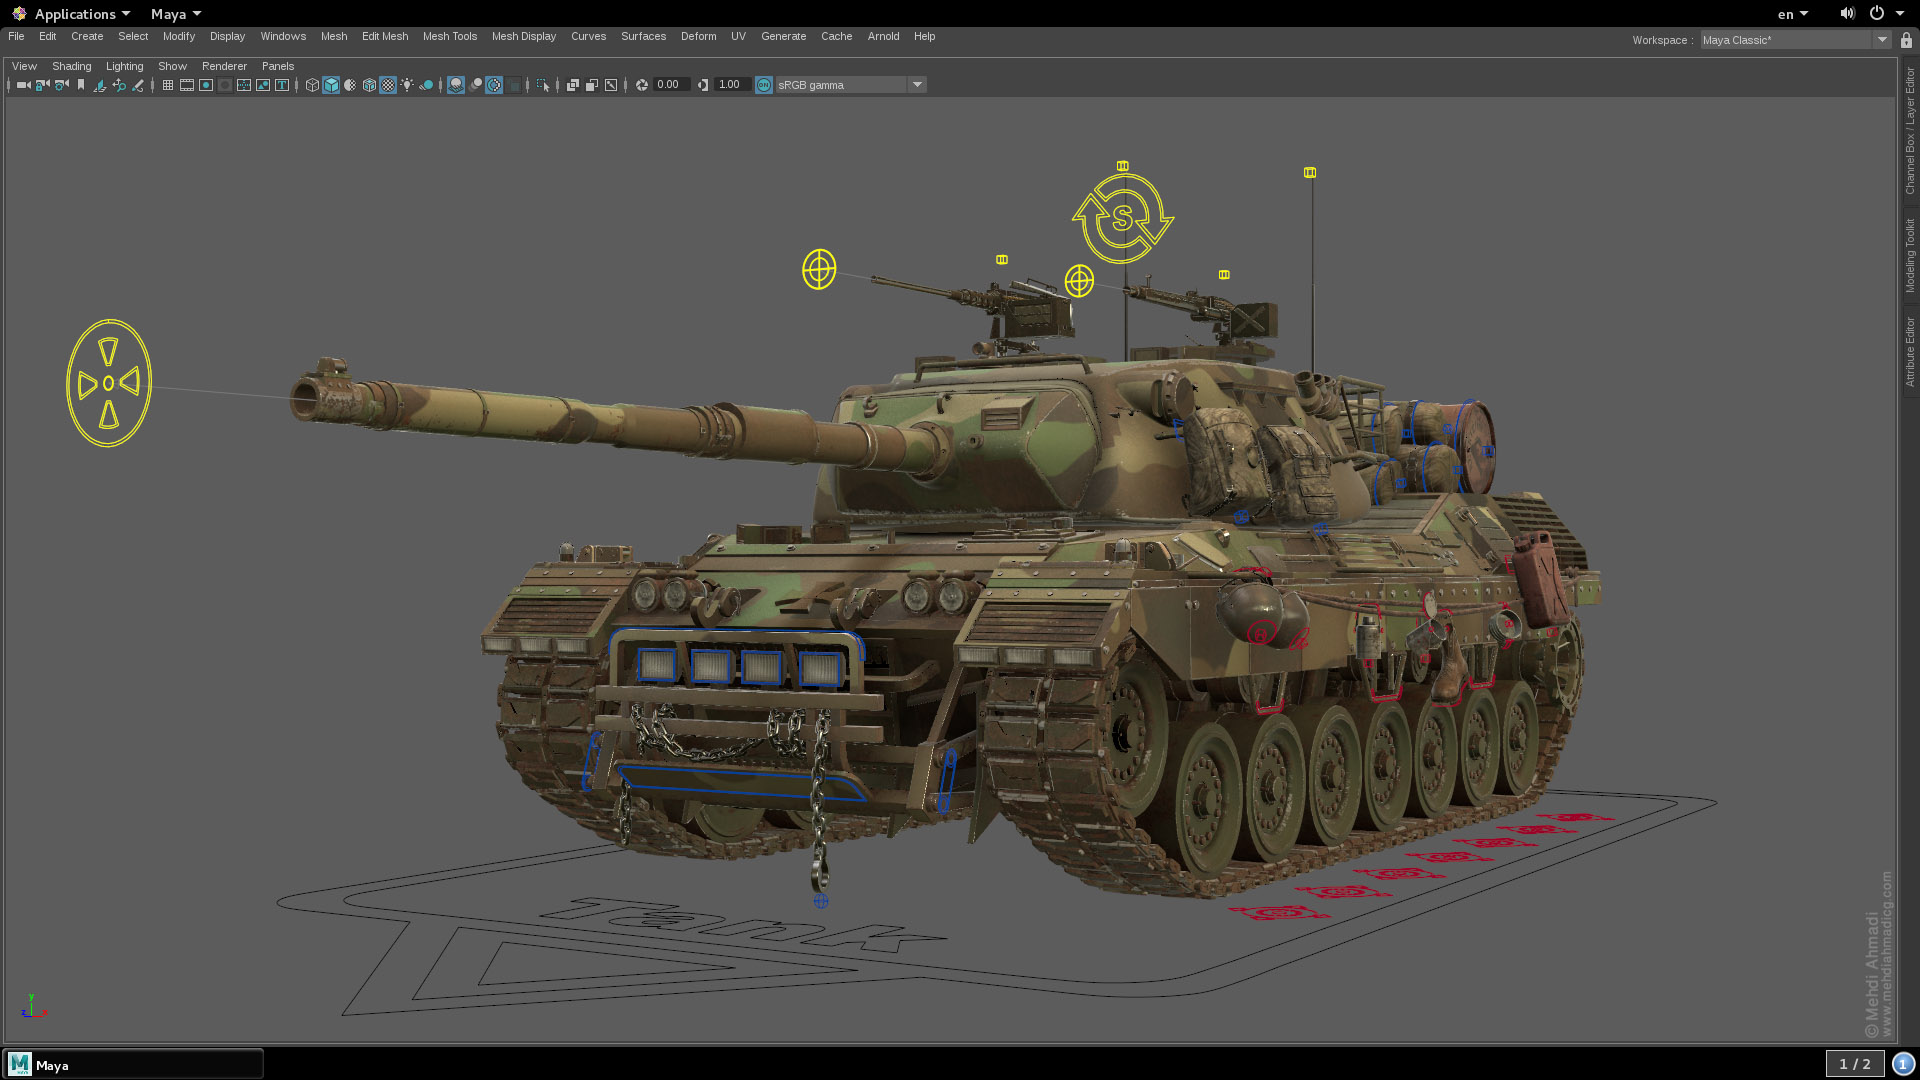
In this project, at first, I drew a concept art from a tank that I had in my mind, and then I created the Tank model in Maya and Textured it in Substance Painter.
The point about the Rigging of this tank is that the movements of the treads, and all the objects dangling from the tank, and the recoil of the tank while shooting, run in real time and fully operate interactively, only with the use of Maya's nodes, and no expression or simulation has been used for their movements.
I was responsible for all aspects of this project from beginning to end and I did all the steps of the work myself.
These steps included:
Concept Art, Modeling, Texturing, Rigging, and Animation.
And for this project, I used Maya, Substance Painter, and Photoshop.
Below you can see some pictures from different steps of my work.


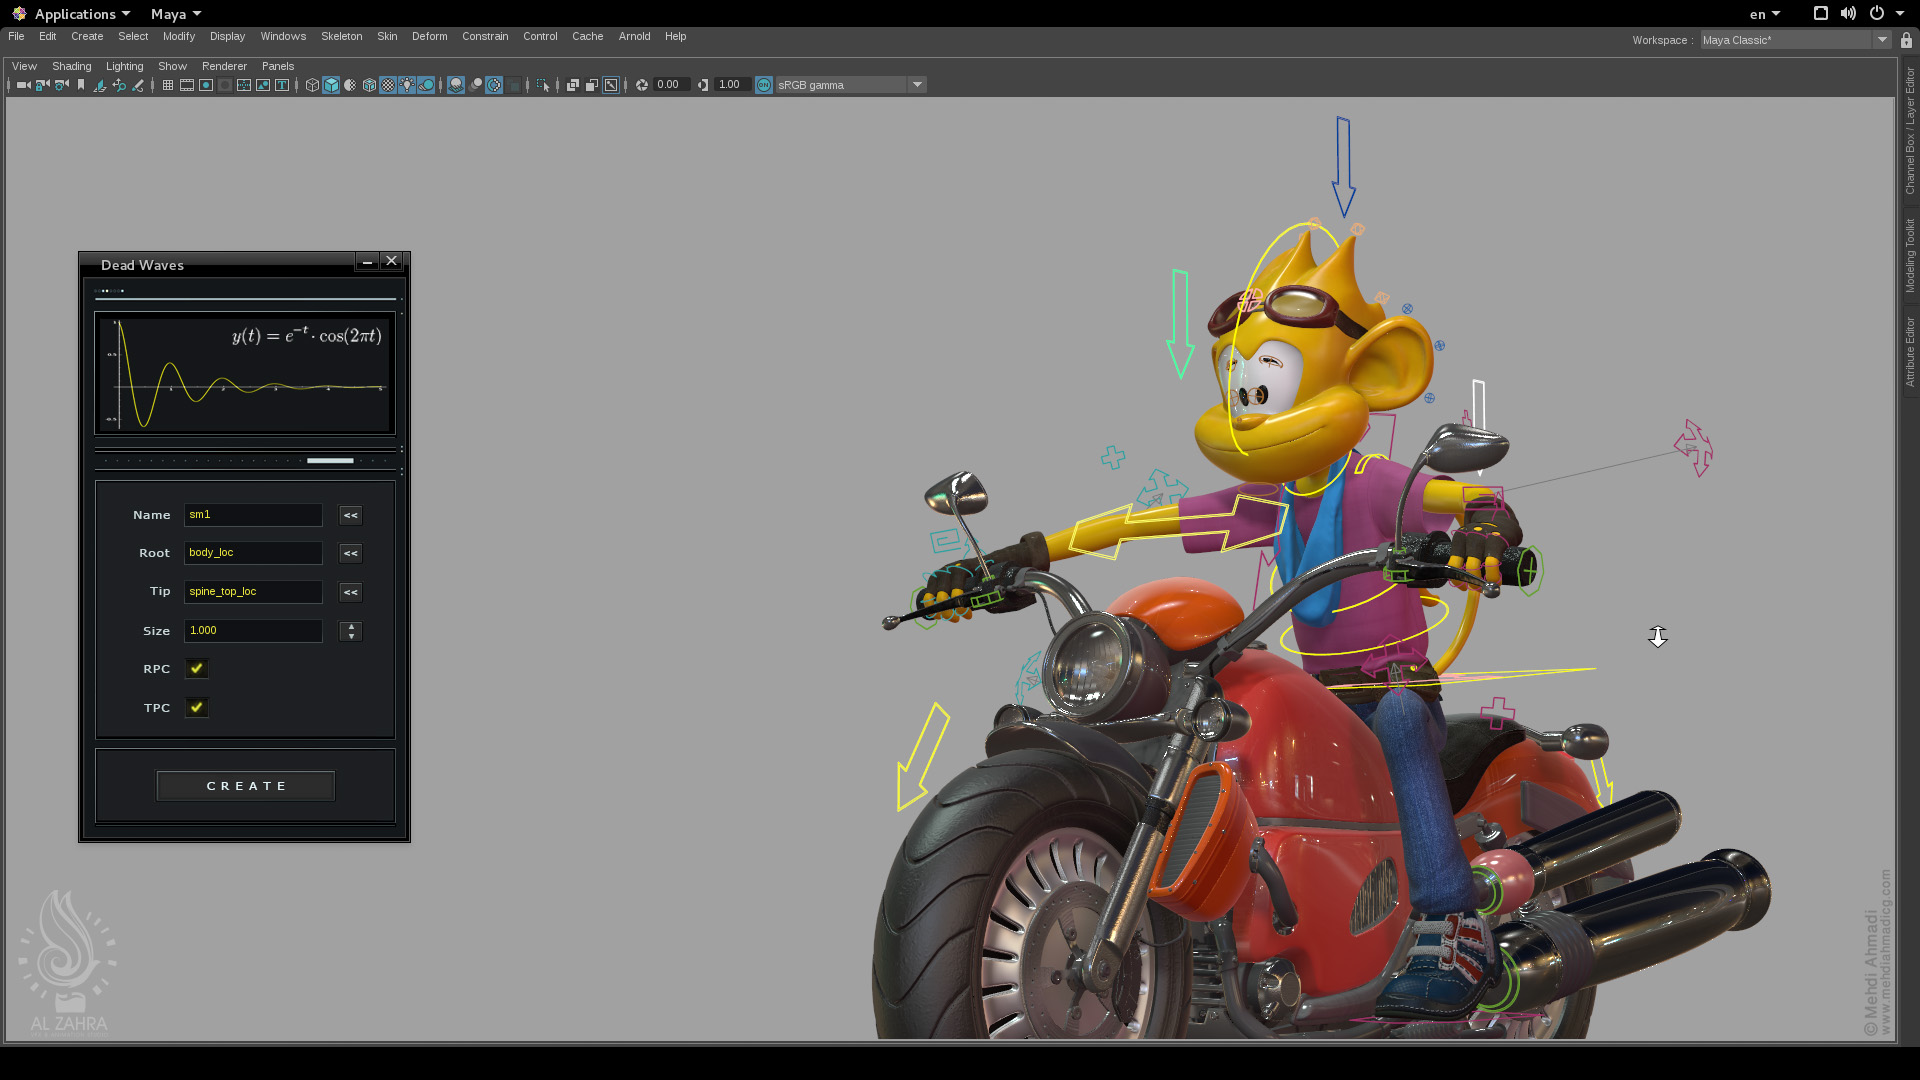
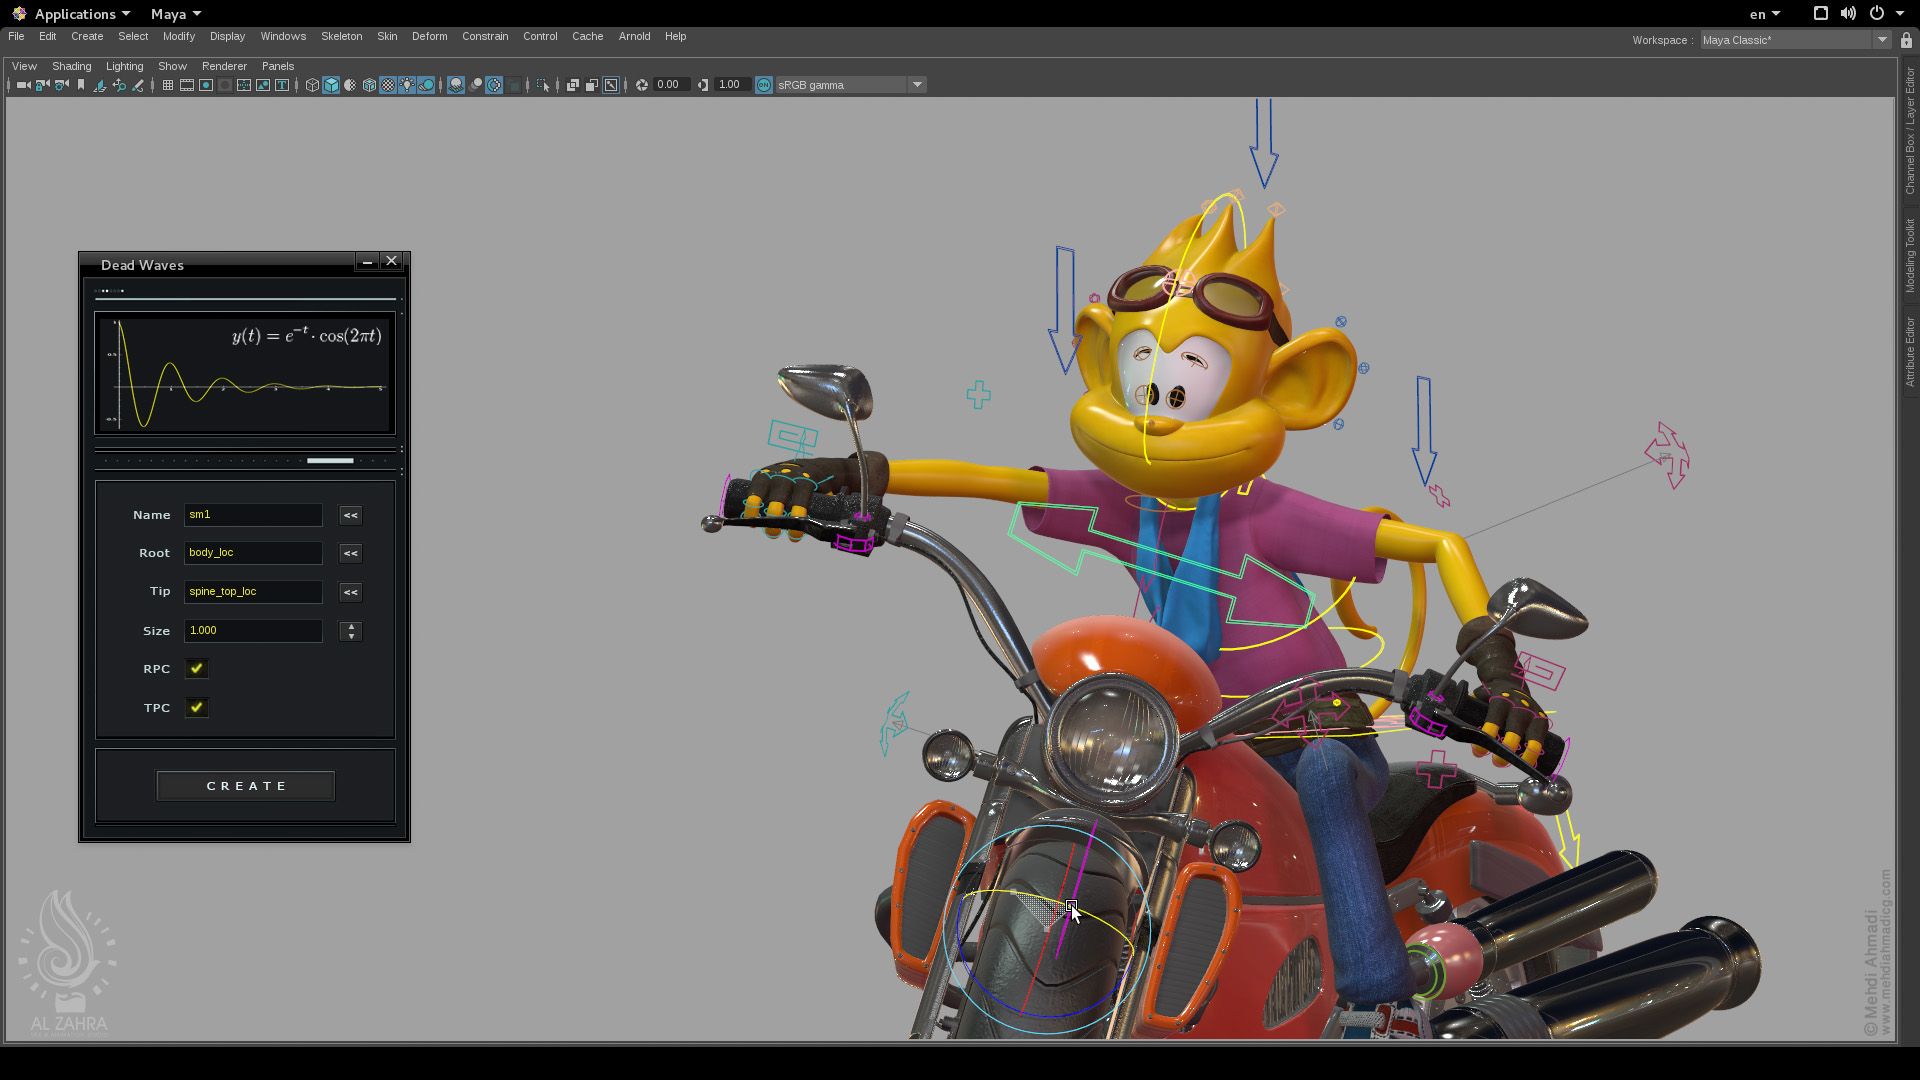
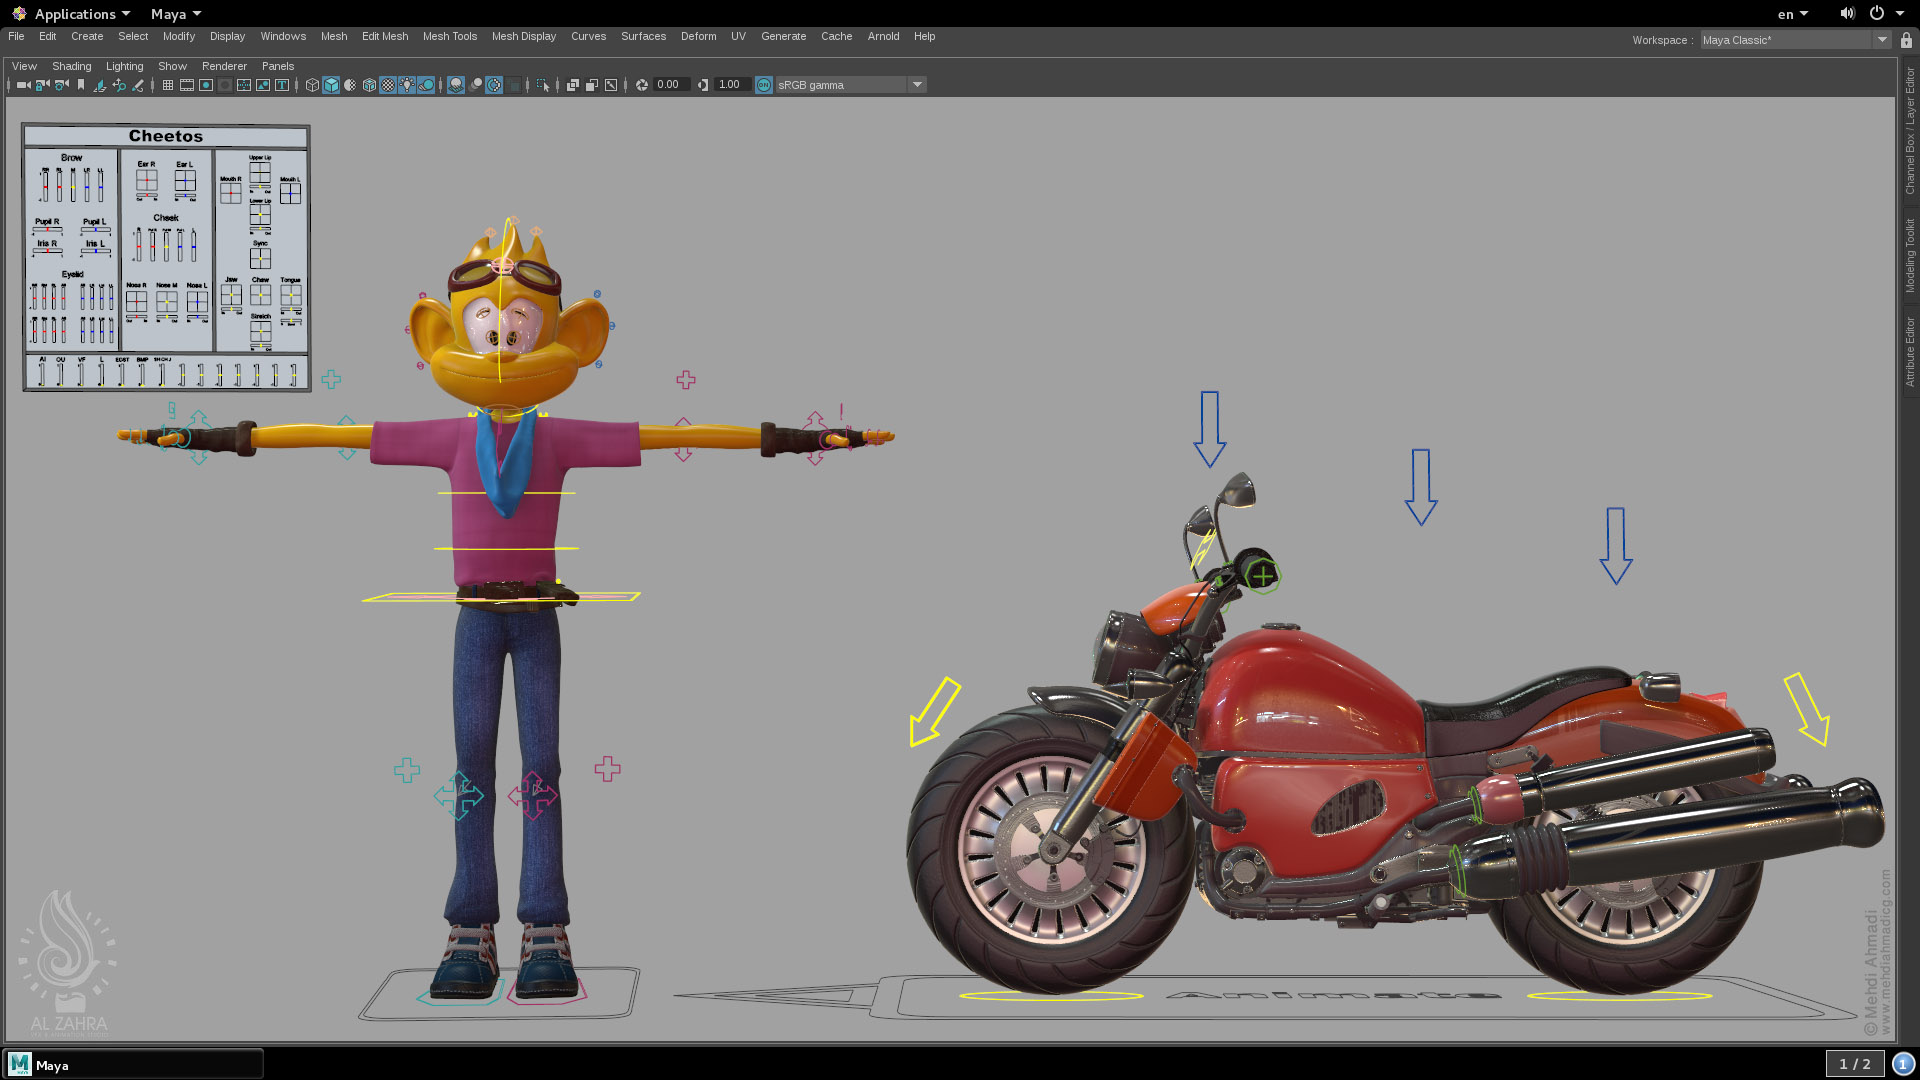
Cheetos was a 2015 TV commercial that was created by the Alzahra VFX & Animation studio.
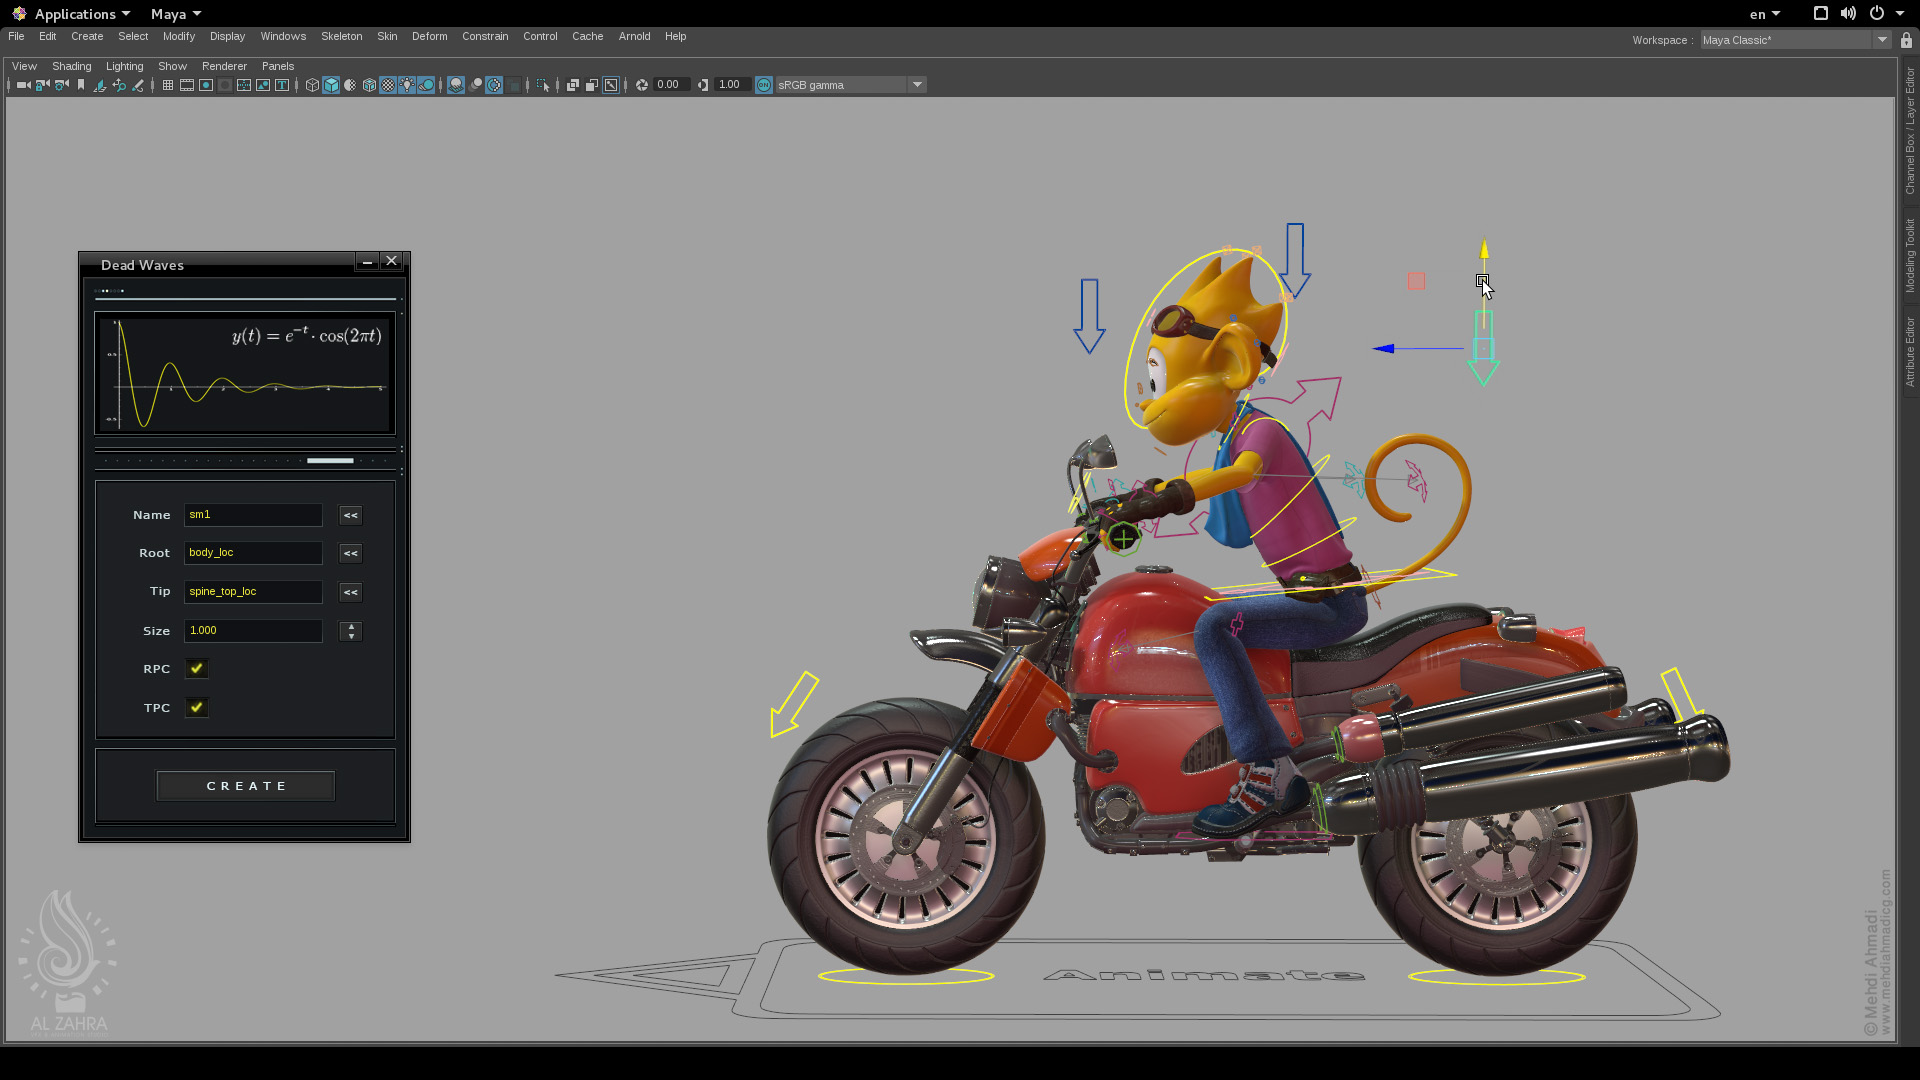
In this project, I was working as a lead rigging TD, and it was necessary to calculate the movements of the motorcycle shock absorber and the main character's secondary motions who was sitting on the motorcycle, fully interactive and in real time, based on the initial motion which the animator creates so that it won't be necessary for the animator to do something extra for animating the secondary motion of the motorcycle and the main character.
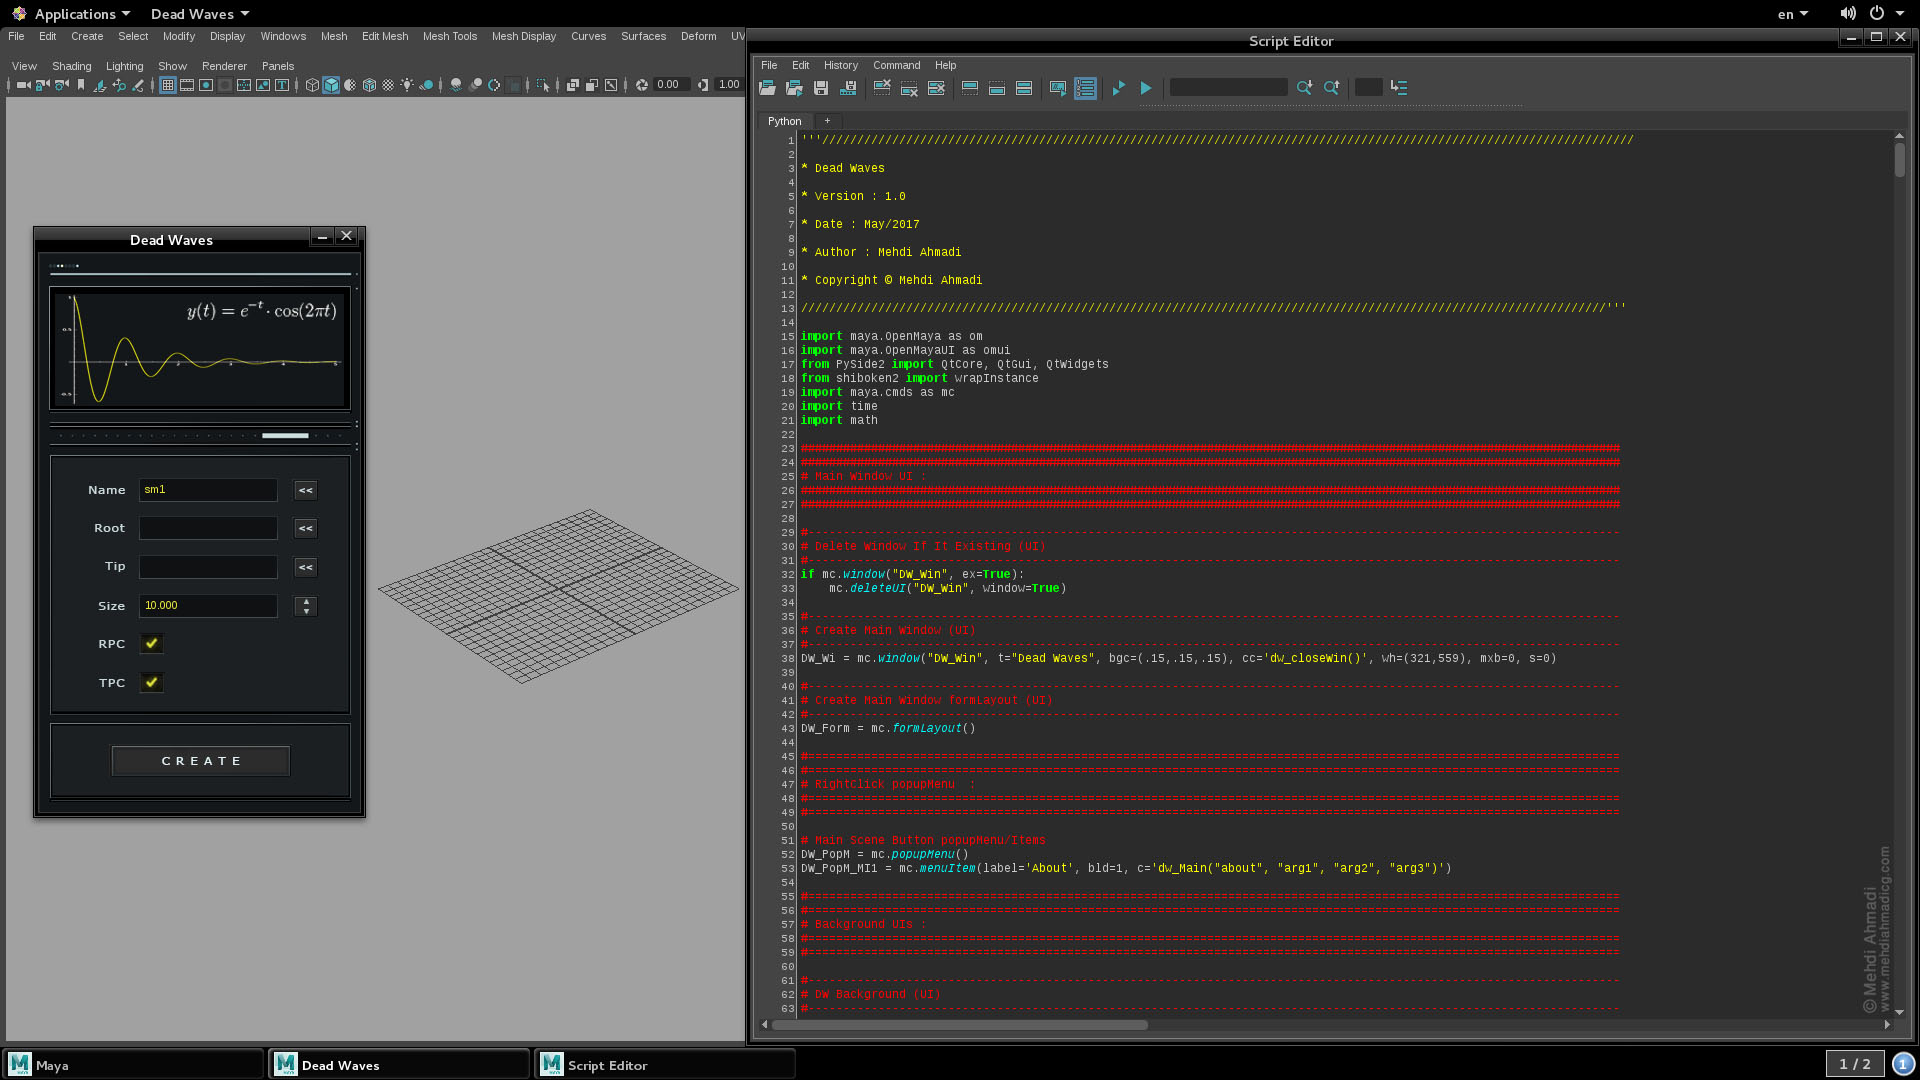
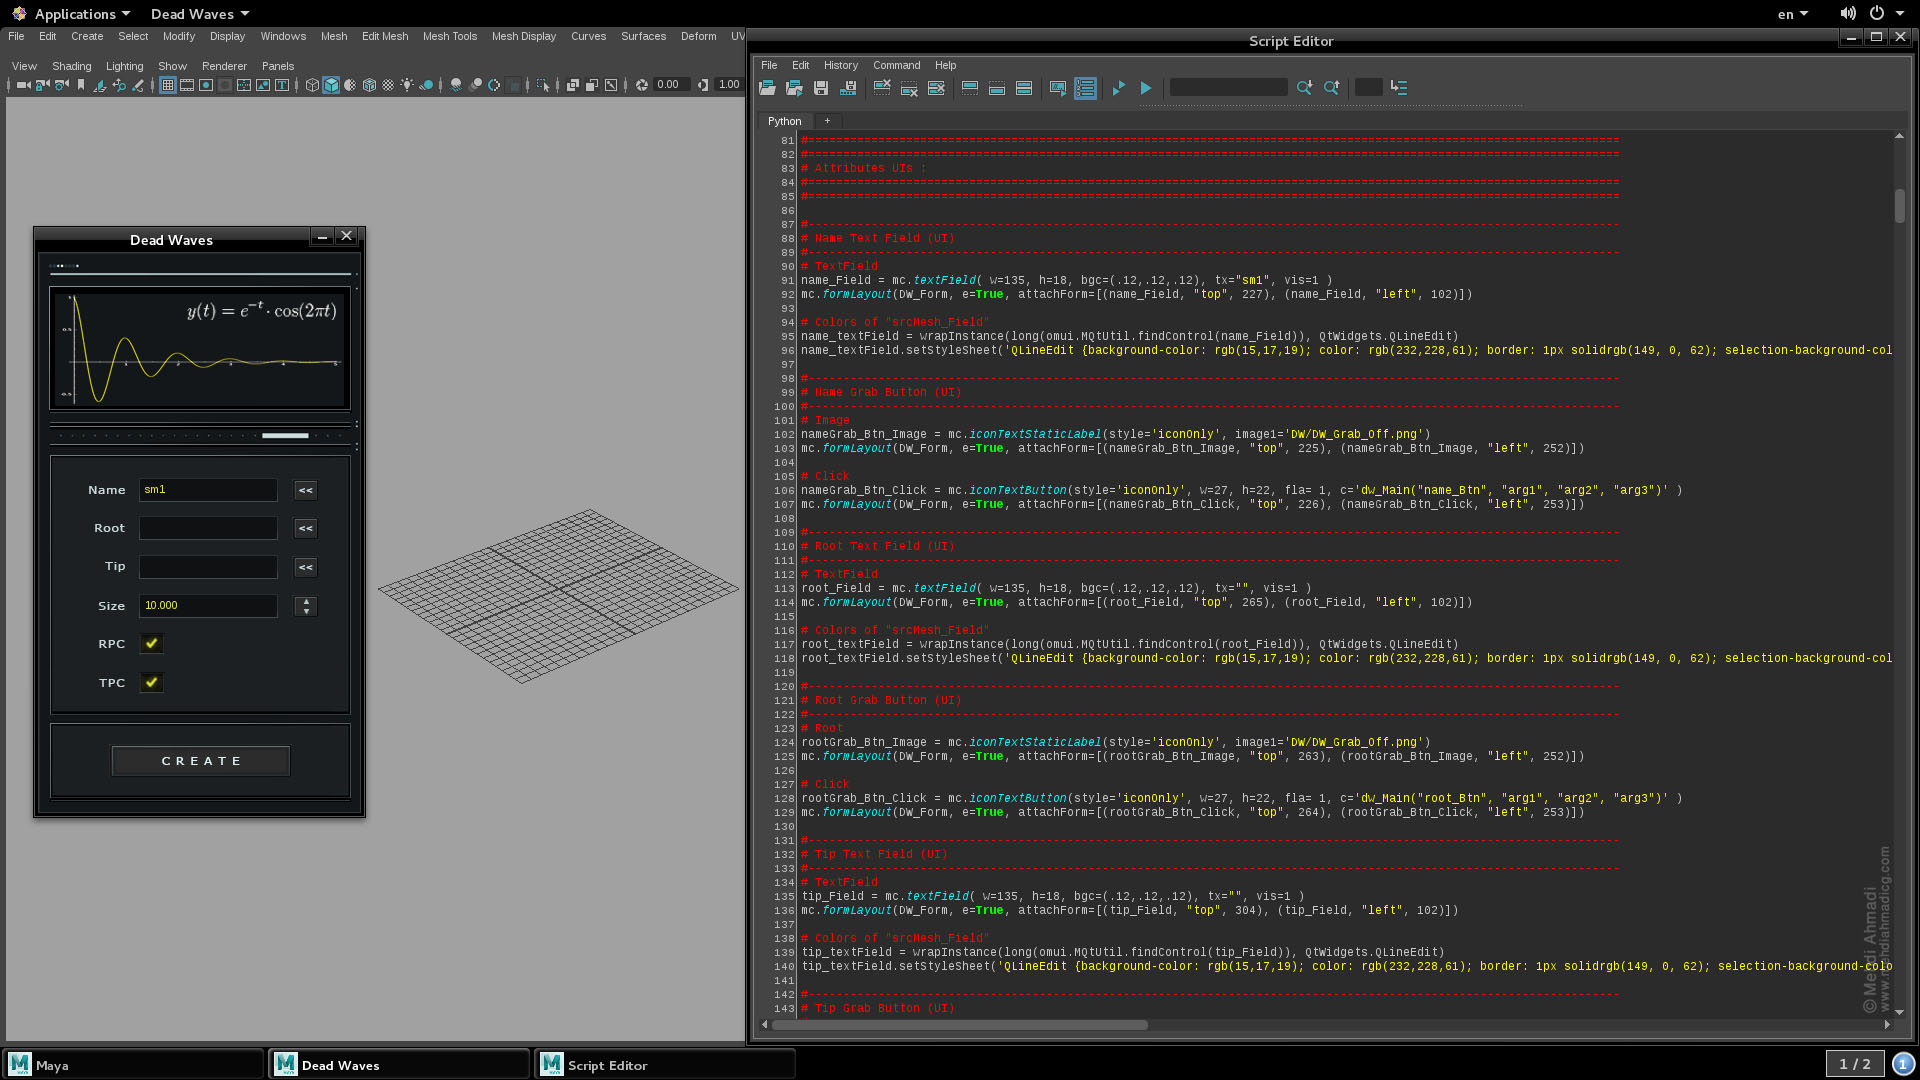
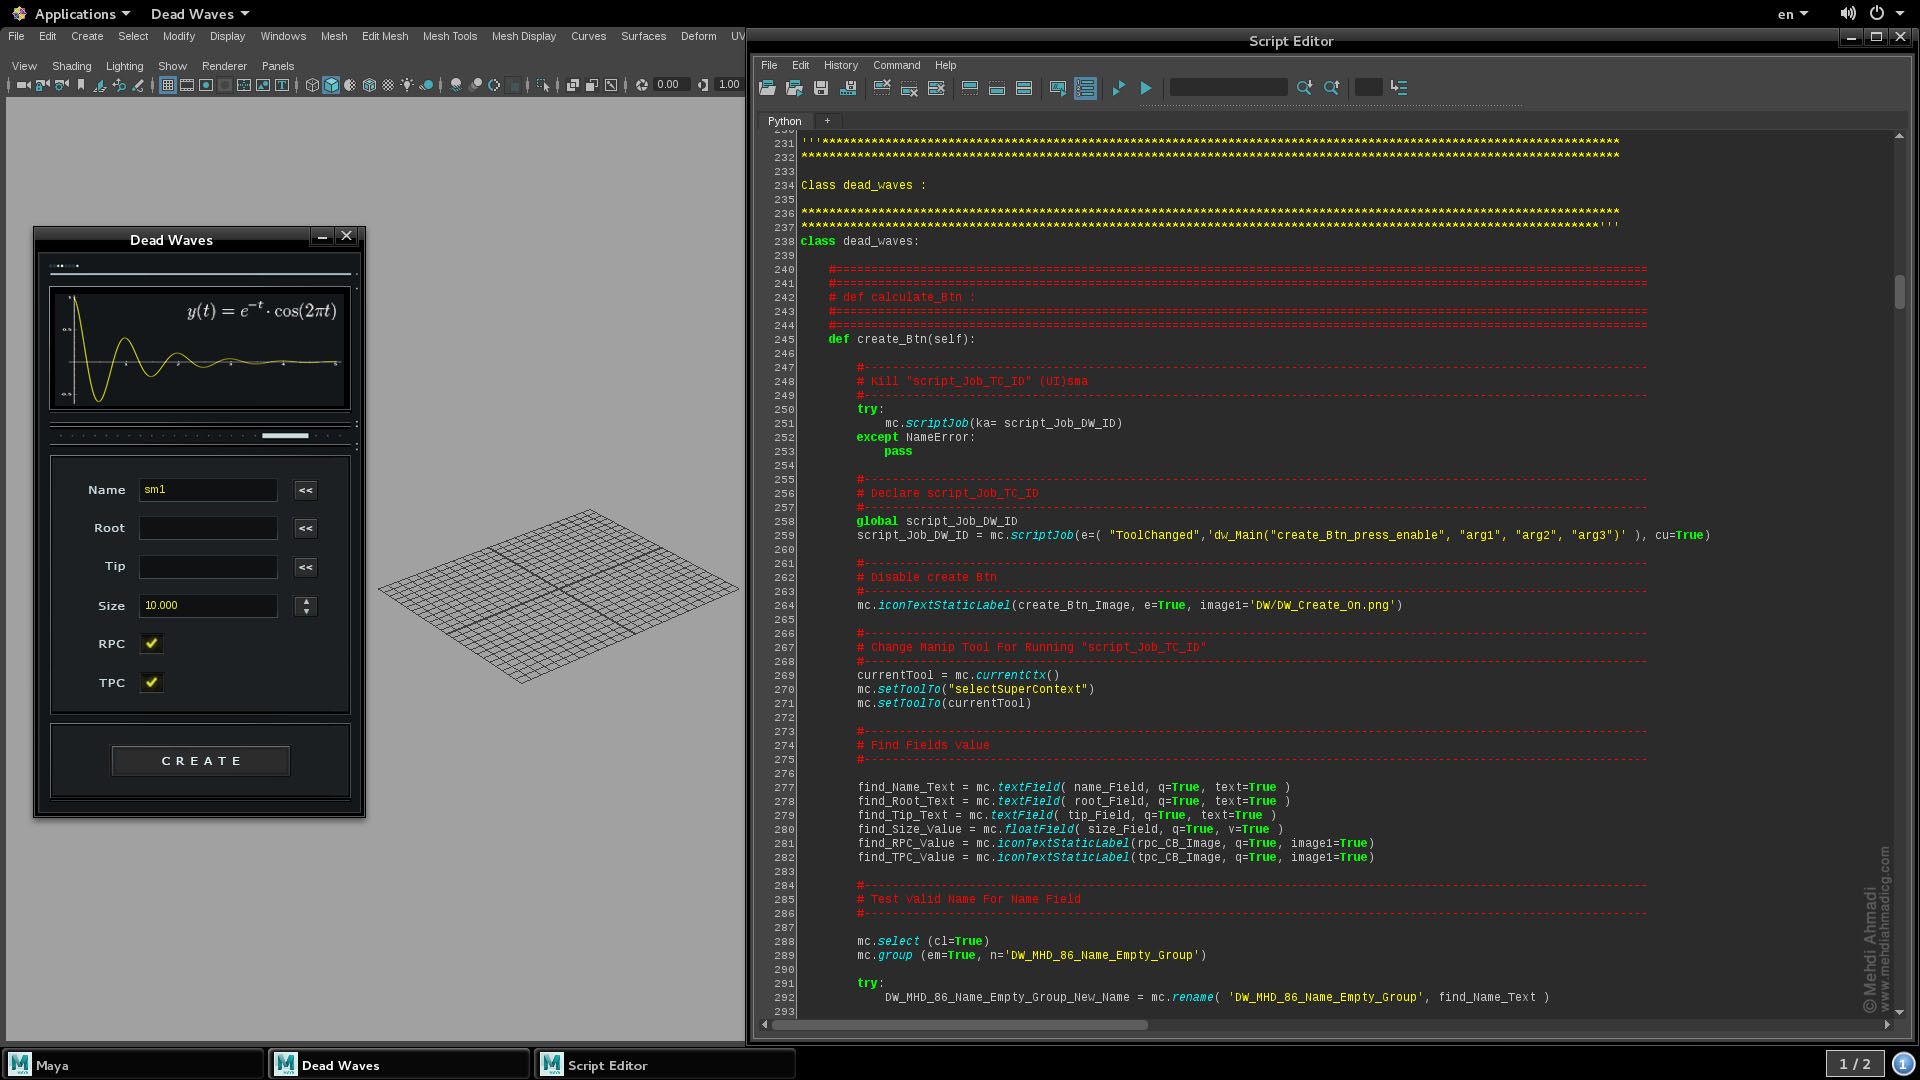
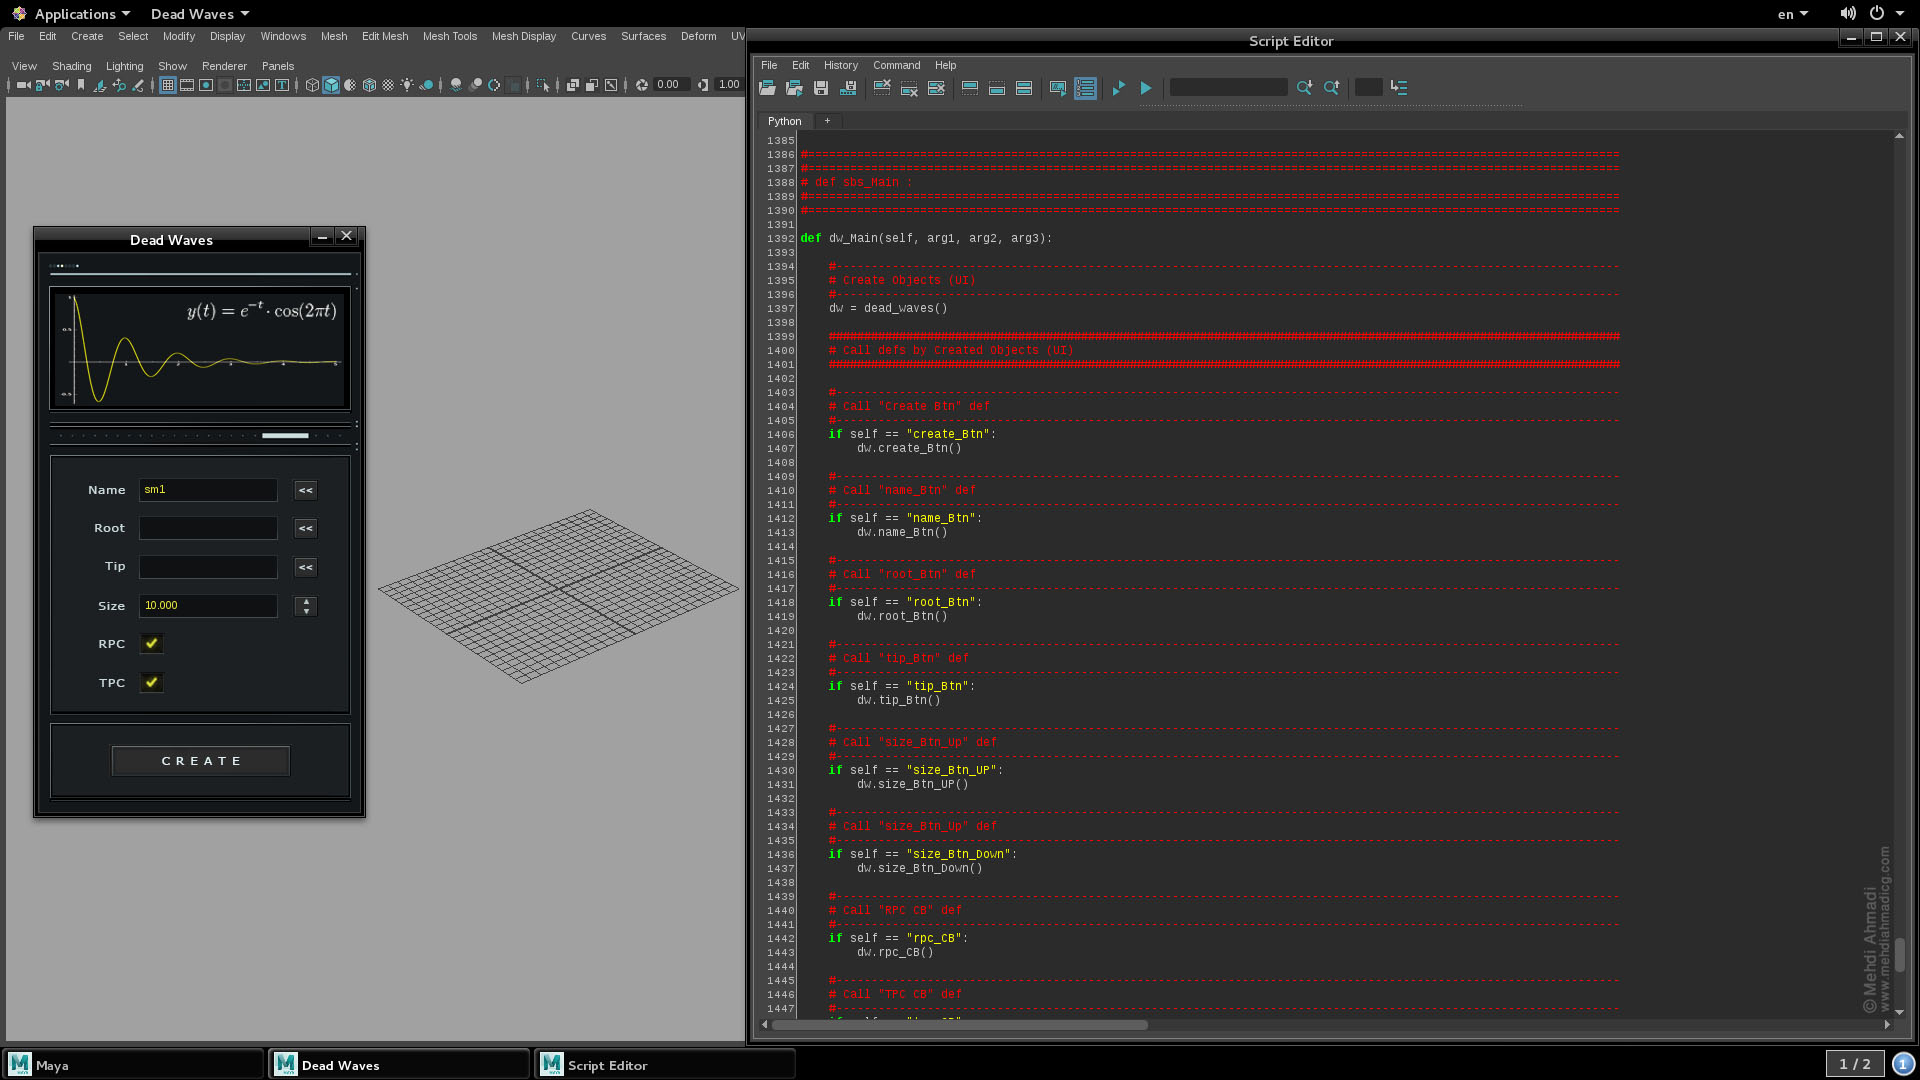
Therefore I made a tool with the python script for this project so that I could easily add the secondary motions calculation feature into my rigs, and I called it "Dead Waves".
The features which are added to the rig with this tool, make the rig calculate the next
secondary motions completely automatic, based on the initial motion which is created by the animator, and the animators just need to adjust a few parameters in Maya's channel box in order to reach their favorite secondary motion.
The calculations which are done to create secondary motions are fully real-time, without any need for expression or simulation or baking, so it is completely
animator friendly.
The main core for calculating is based on a mathematical formula that you are observing at the bottom.
y(t)=e^(-t) .cos(2πt)
This formula calculates a sinusoidal wave whose amplitude approaches zero as time
increases, and thus calculates the secondary motions based on your initial motion.
In the Cheetos project, I worked as a Lead Rigging TD, and I was responsible for Rigging and Tools Development.
And for this project, I used Maya, ZBrush, and Qt Designer.
Below you can see some pictures from different steps of my work.
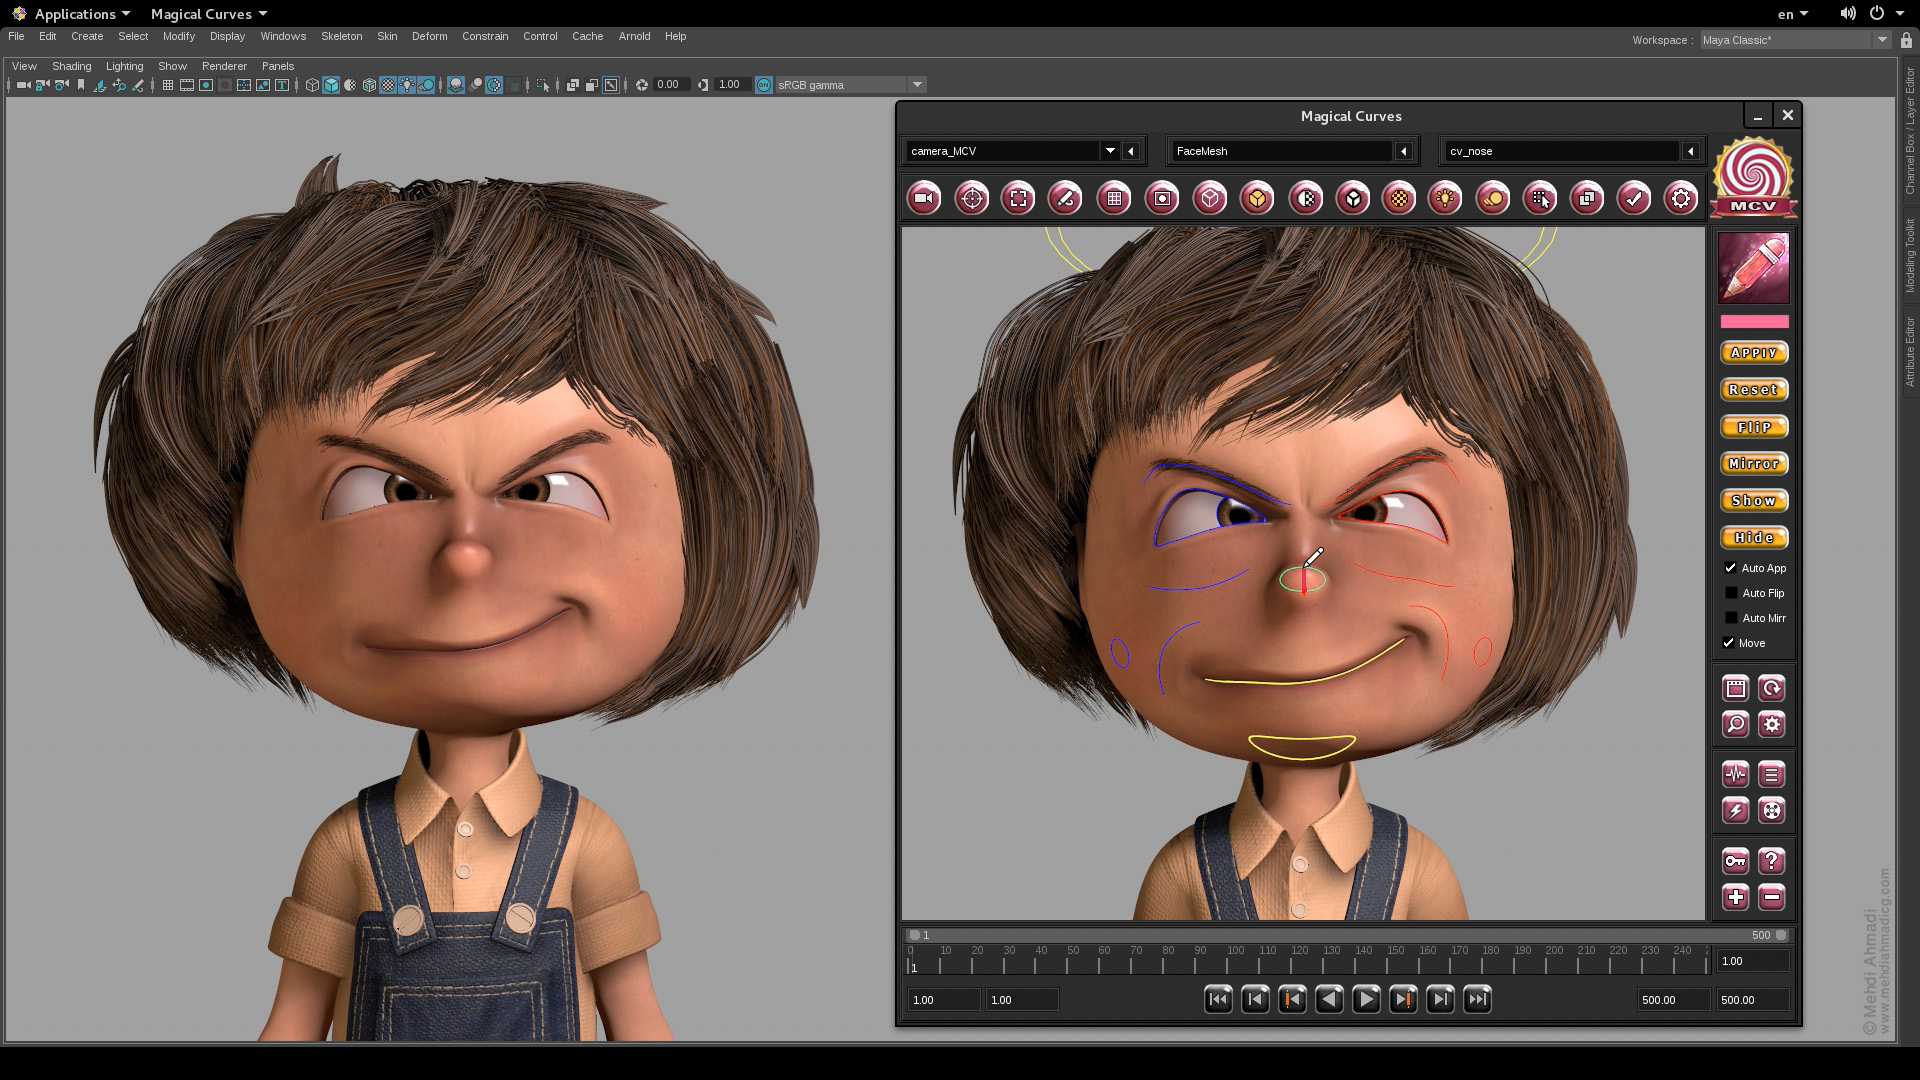
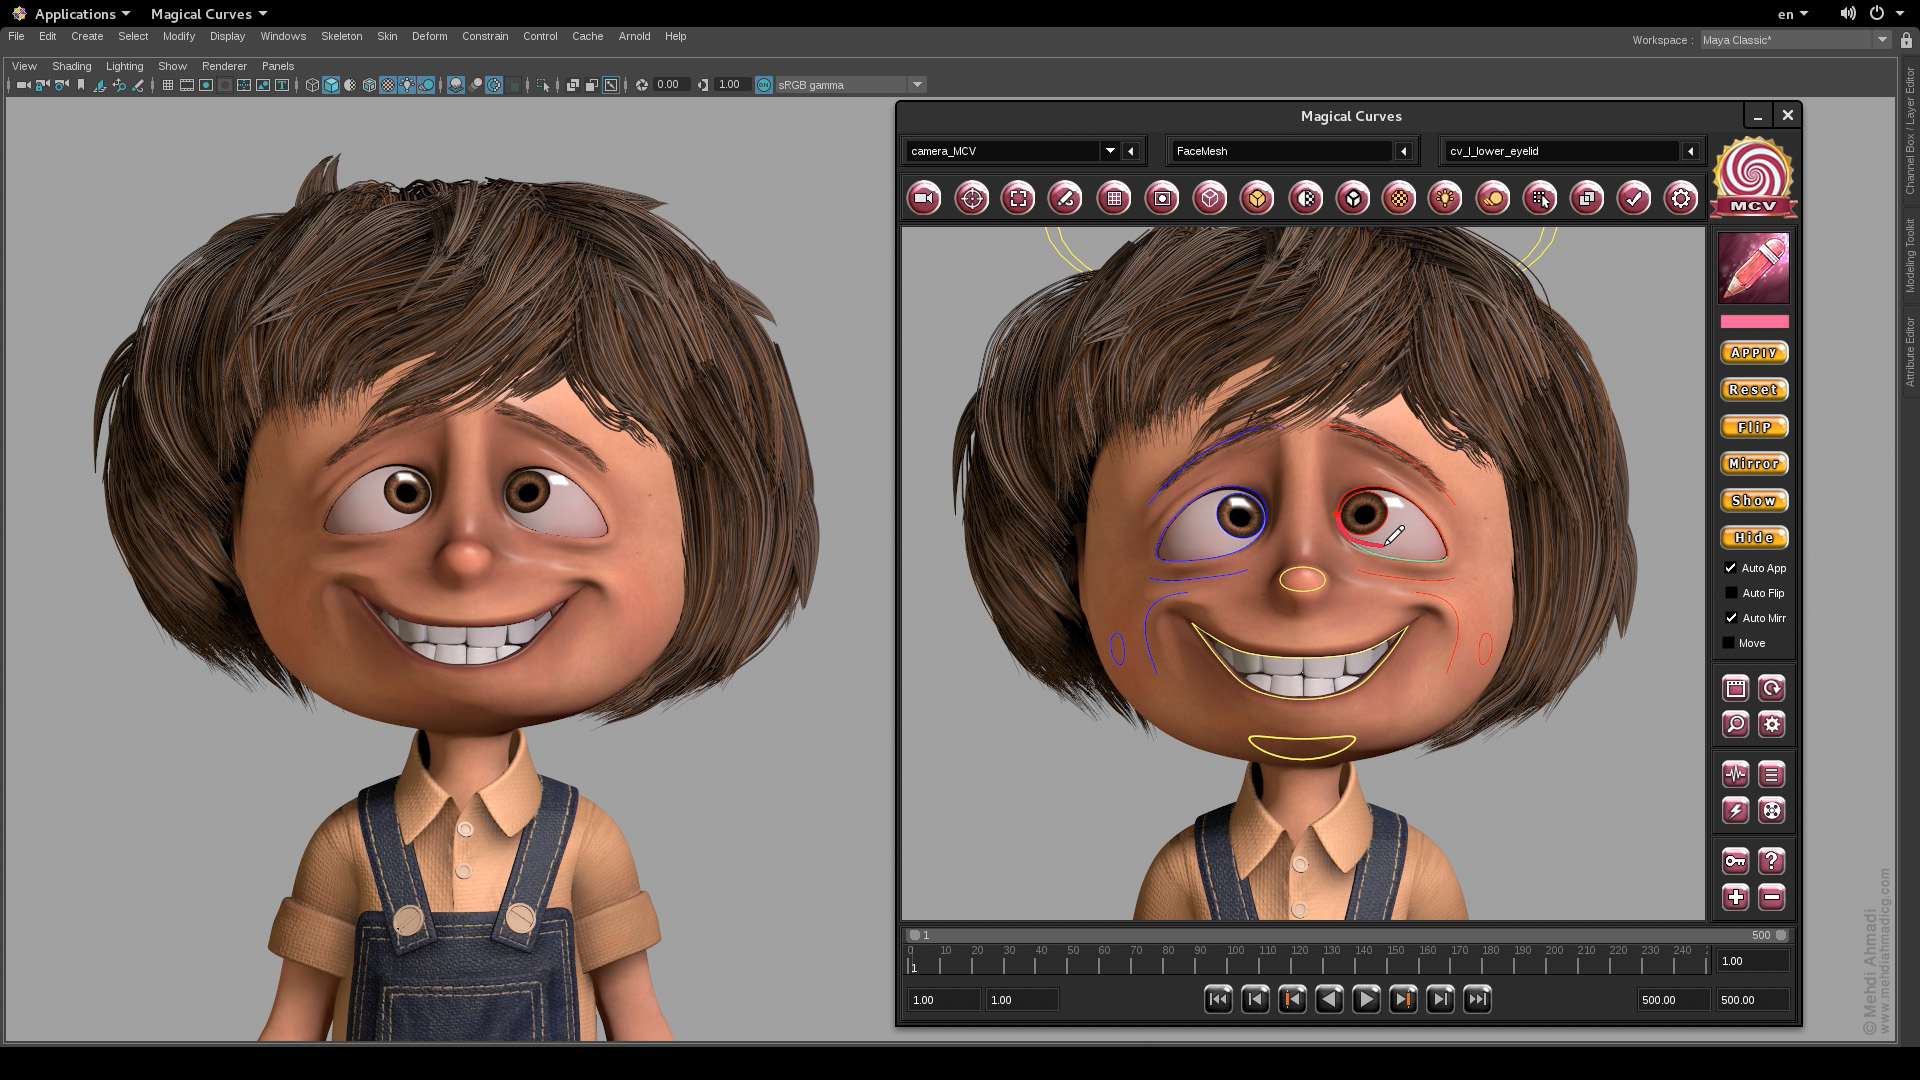
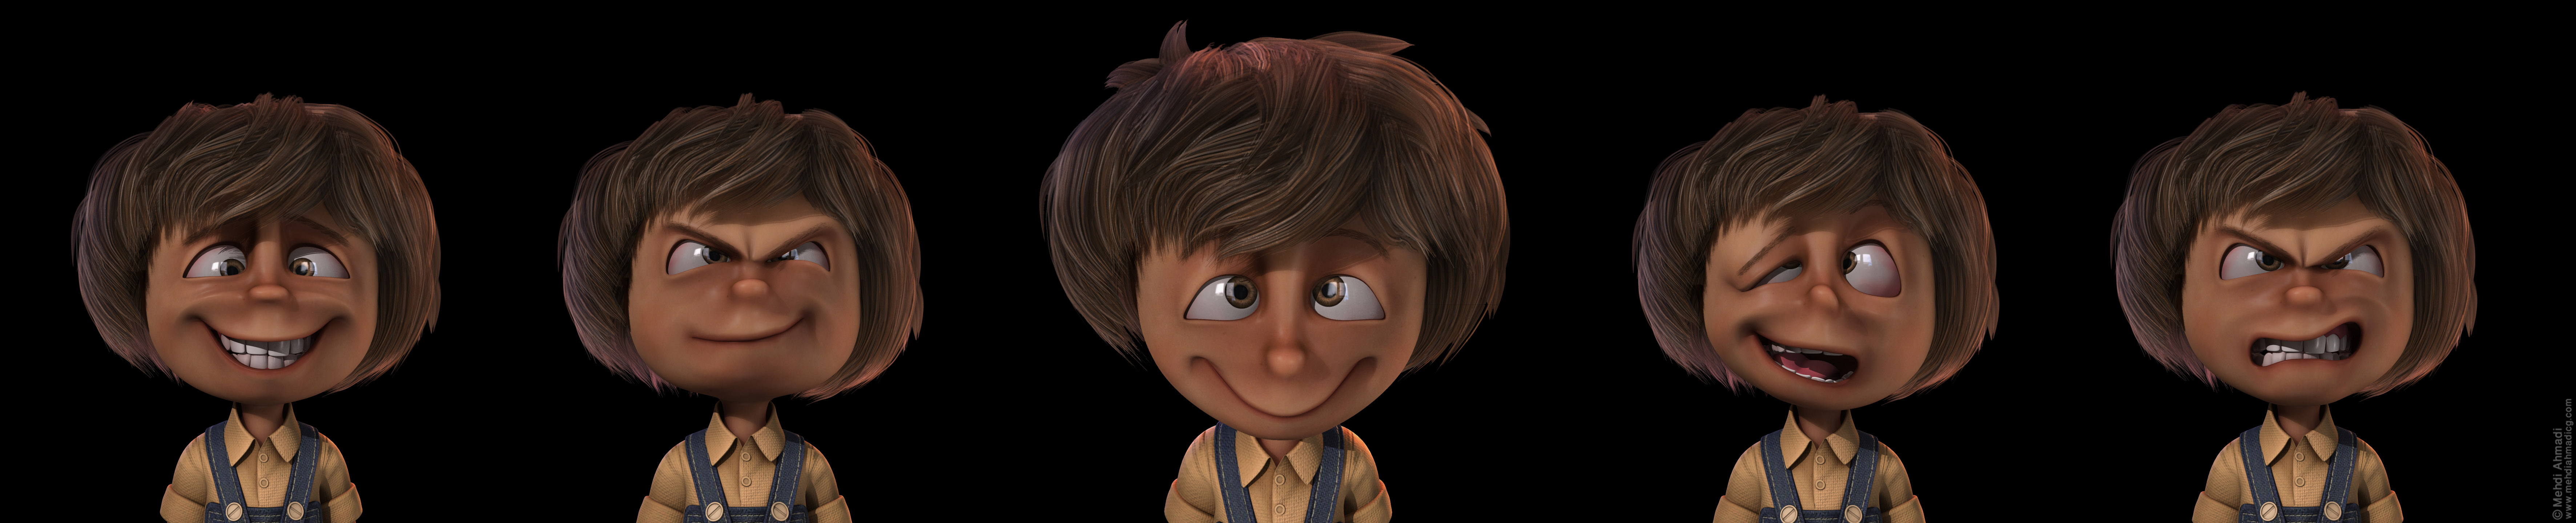
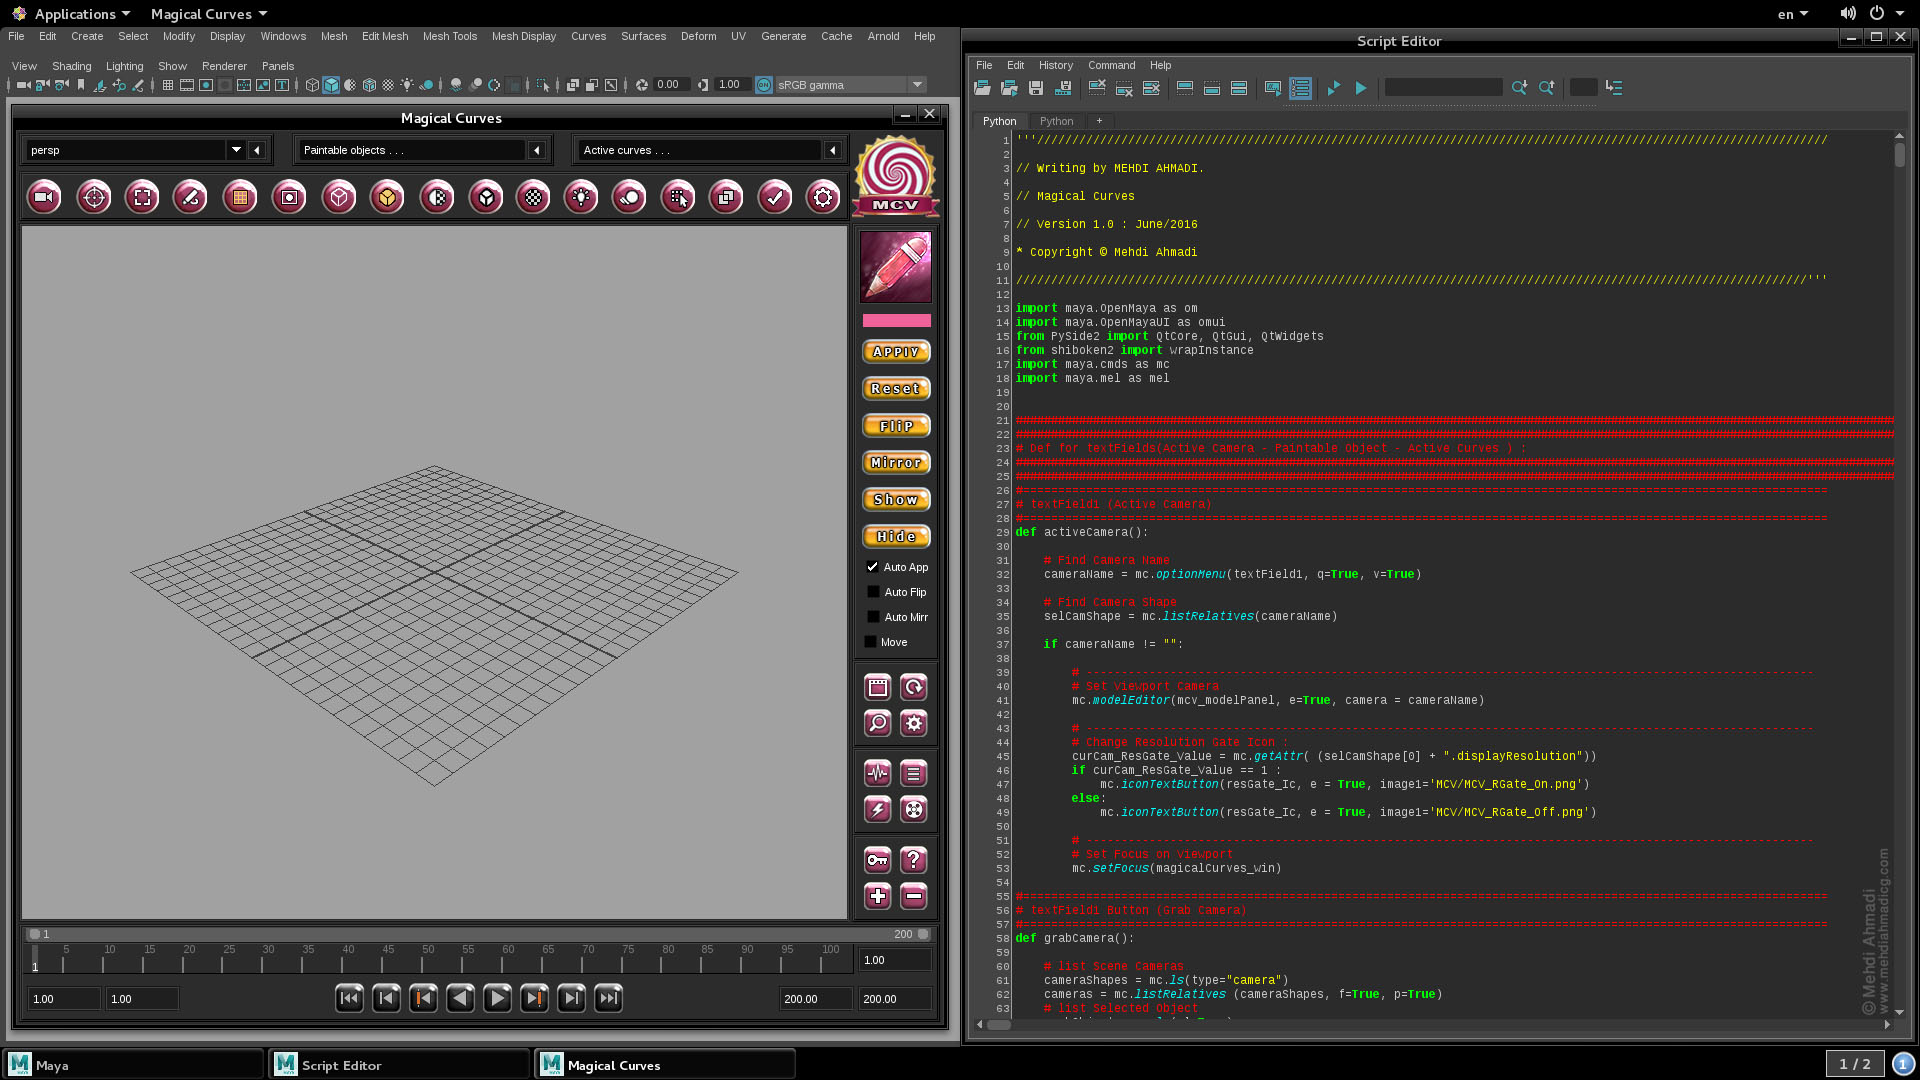
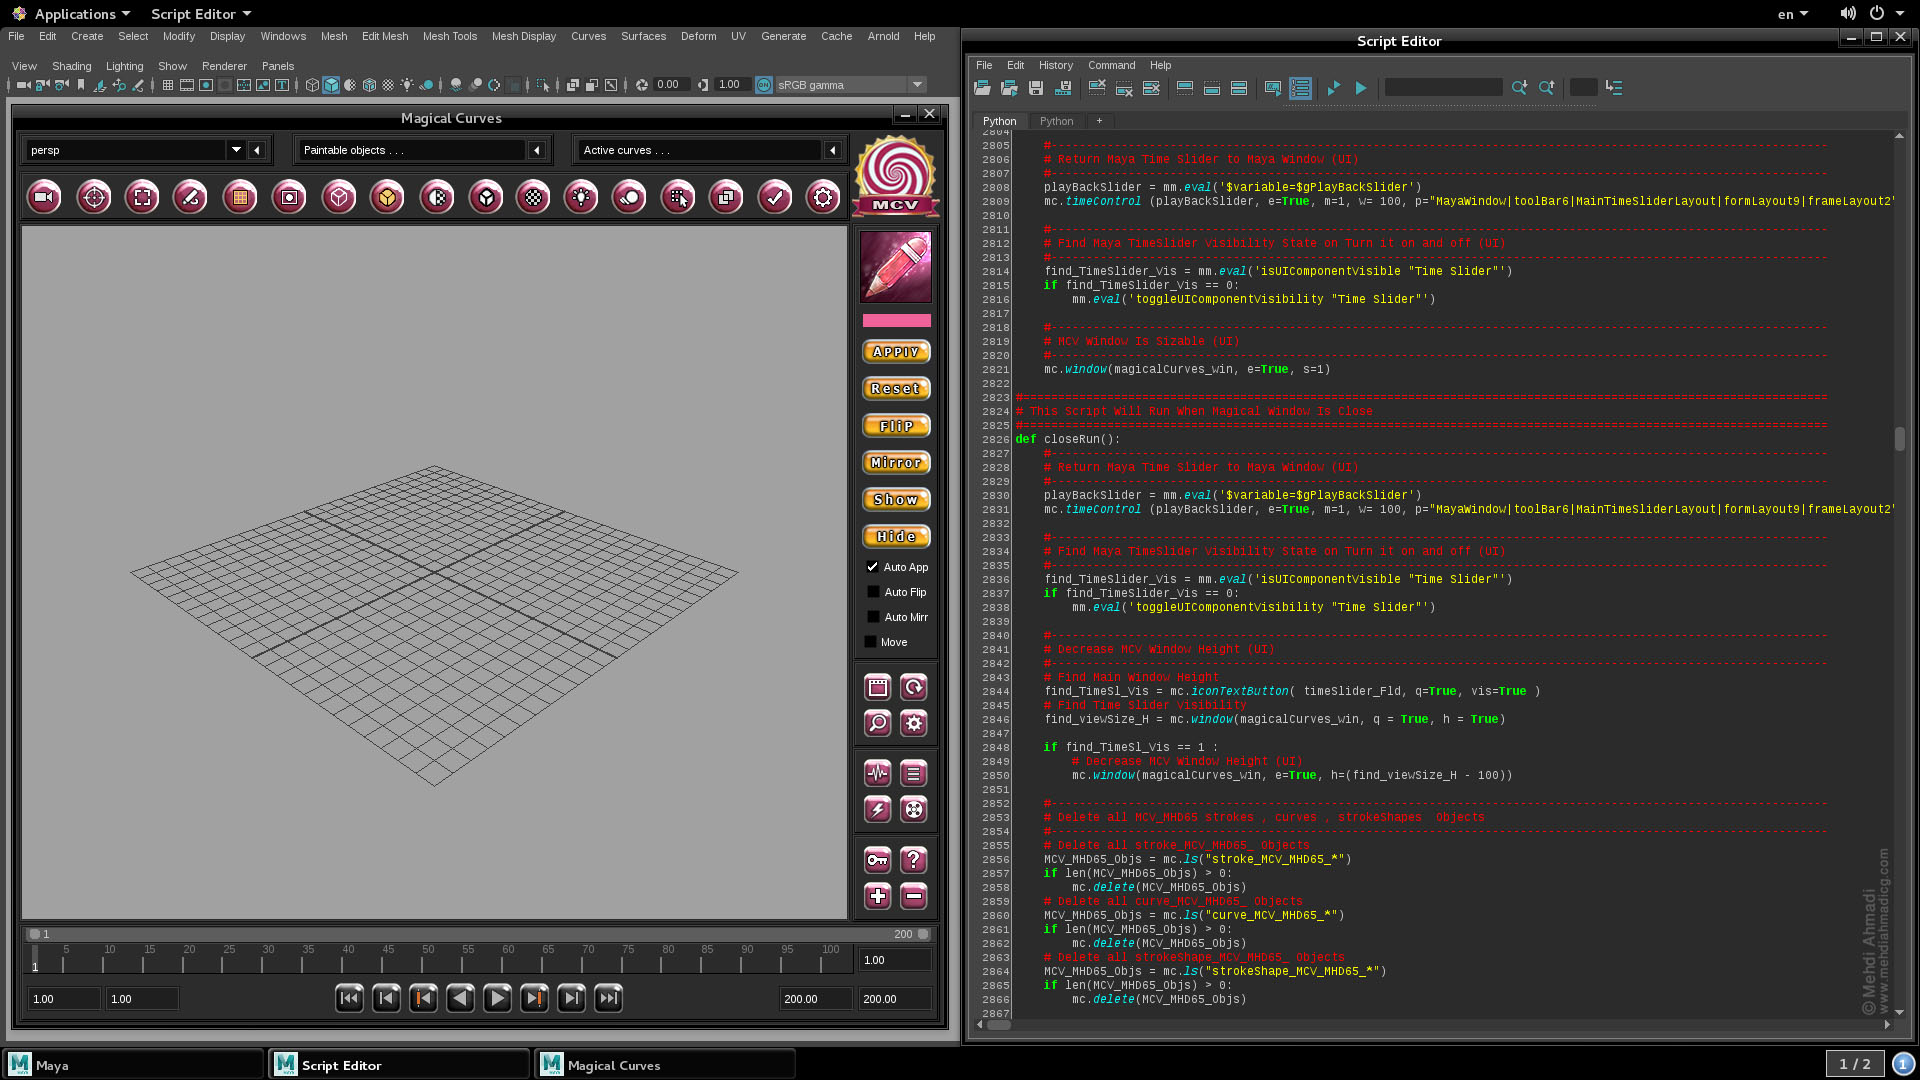
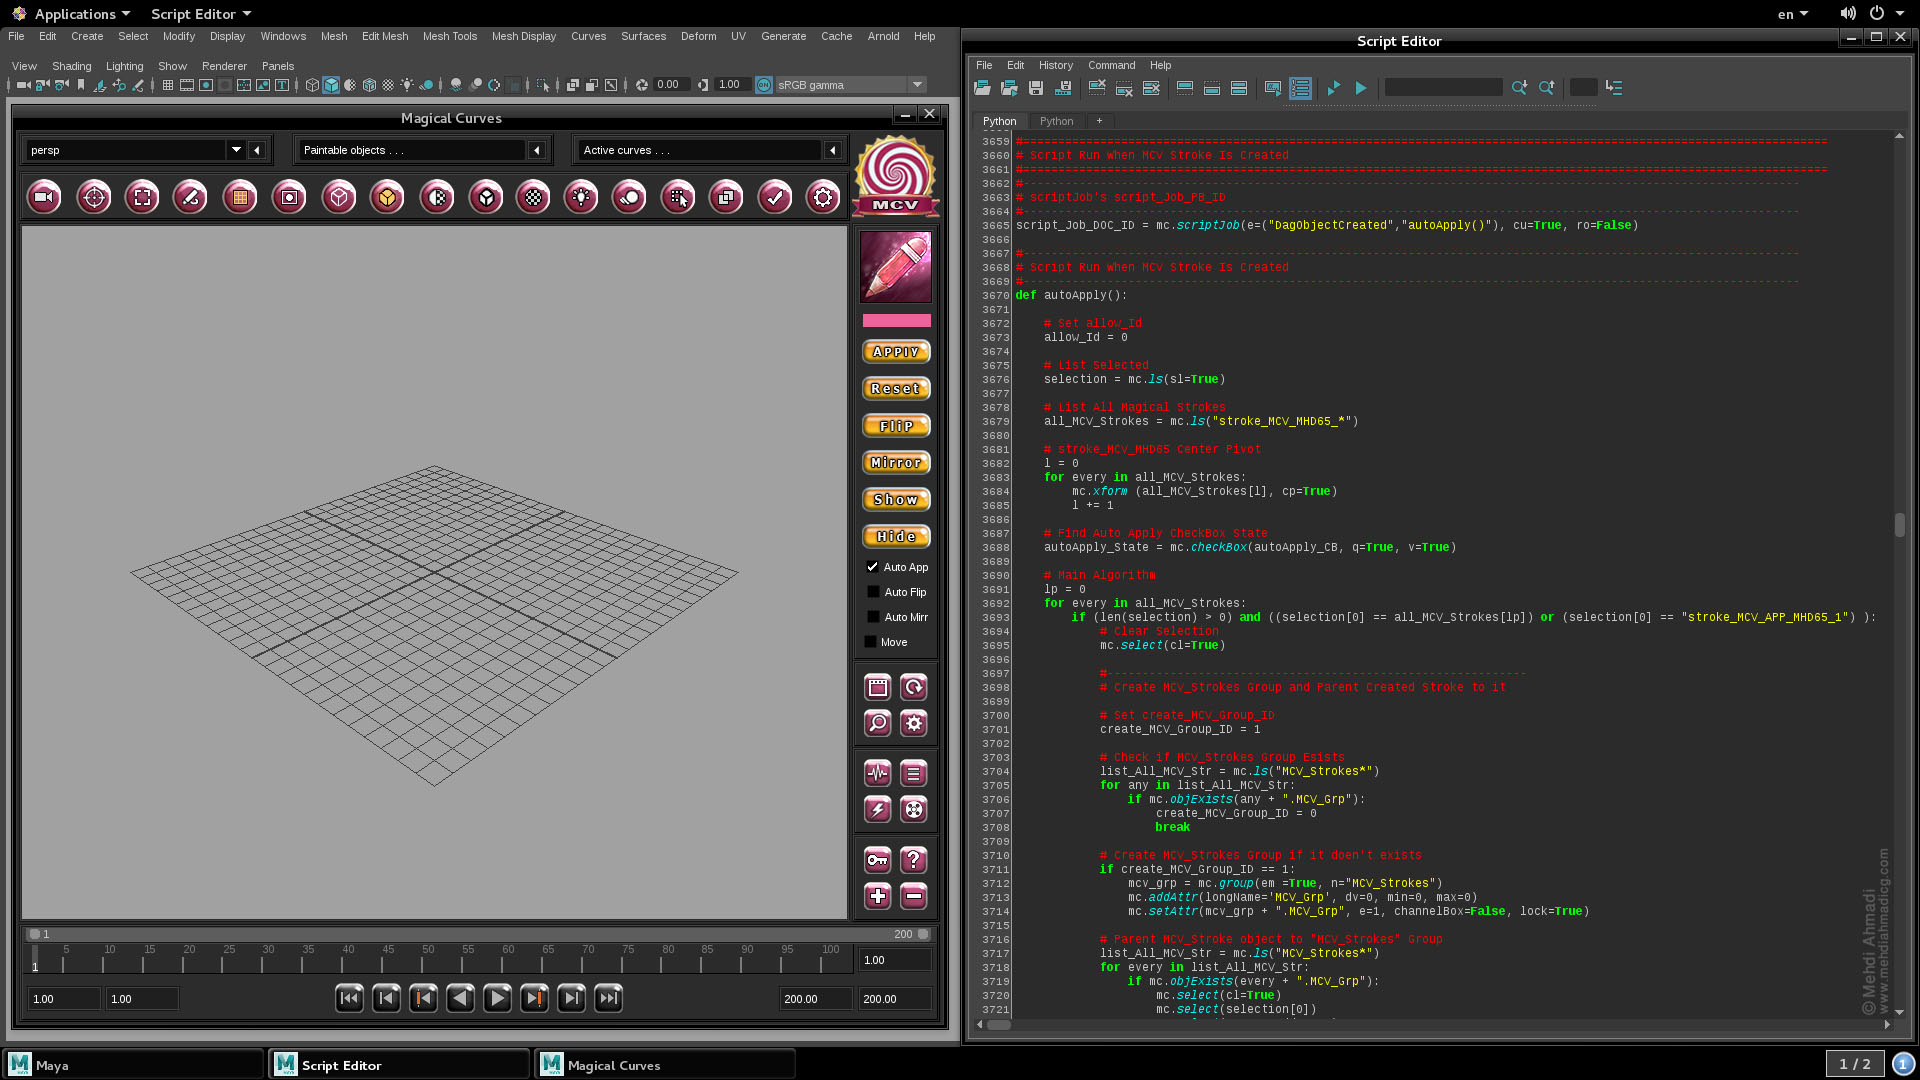
In this project, I tried to show you the capability of one of my tools called "Magical Curves".
Magical carves is a Python API plug-in, and if you have a curve based facial rig, you can easily draw and animate your facial expressions, and also you can save the facial expressions that you have drawn, and use it in future projects, or combine the saved files and create a new facial expression.
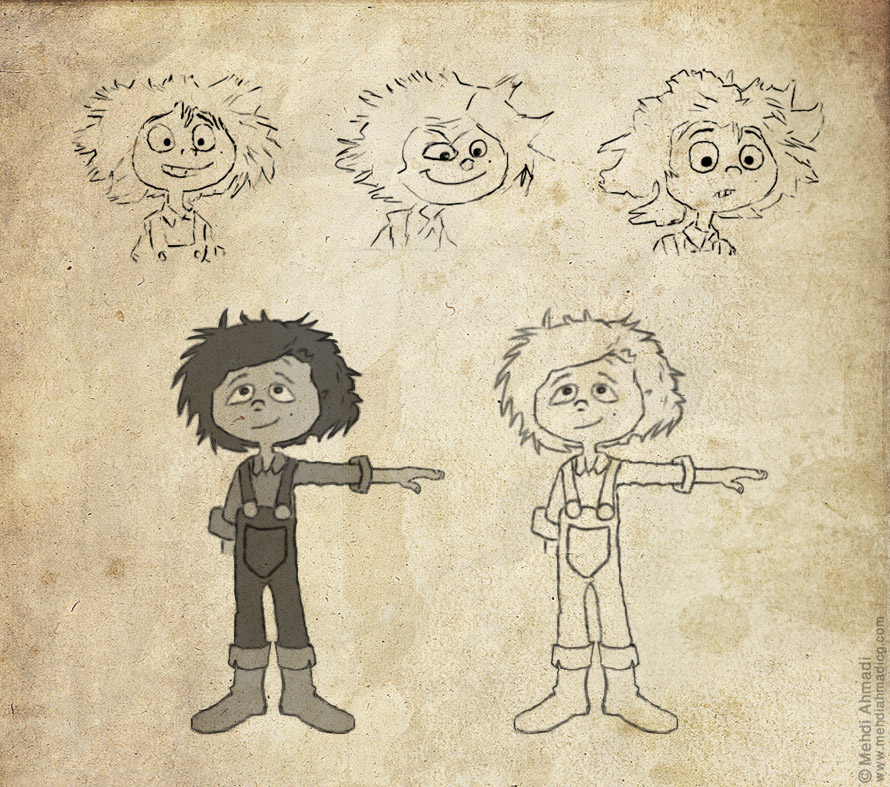
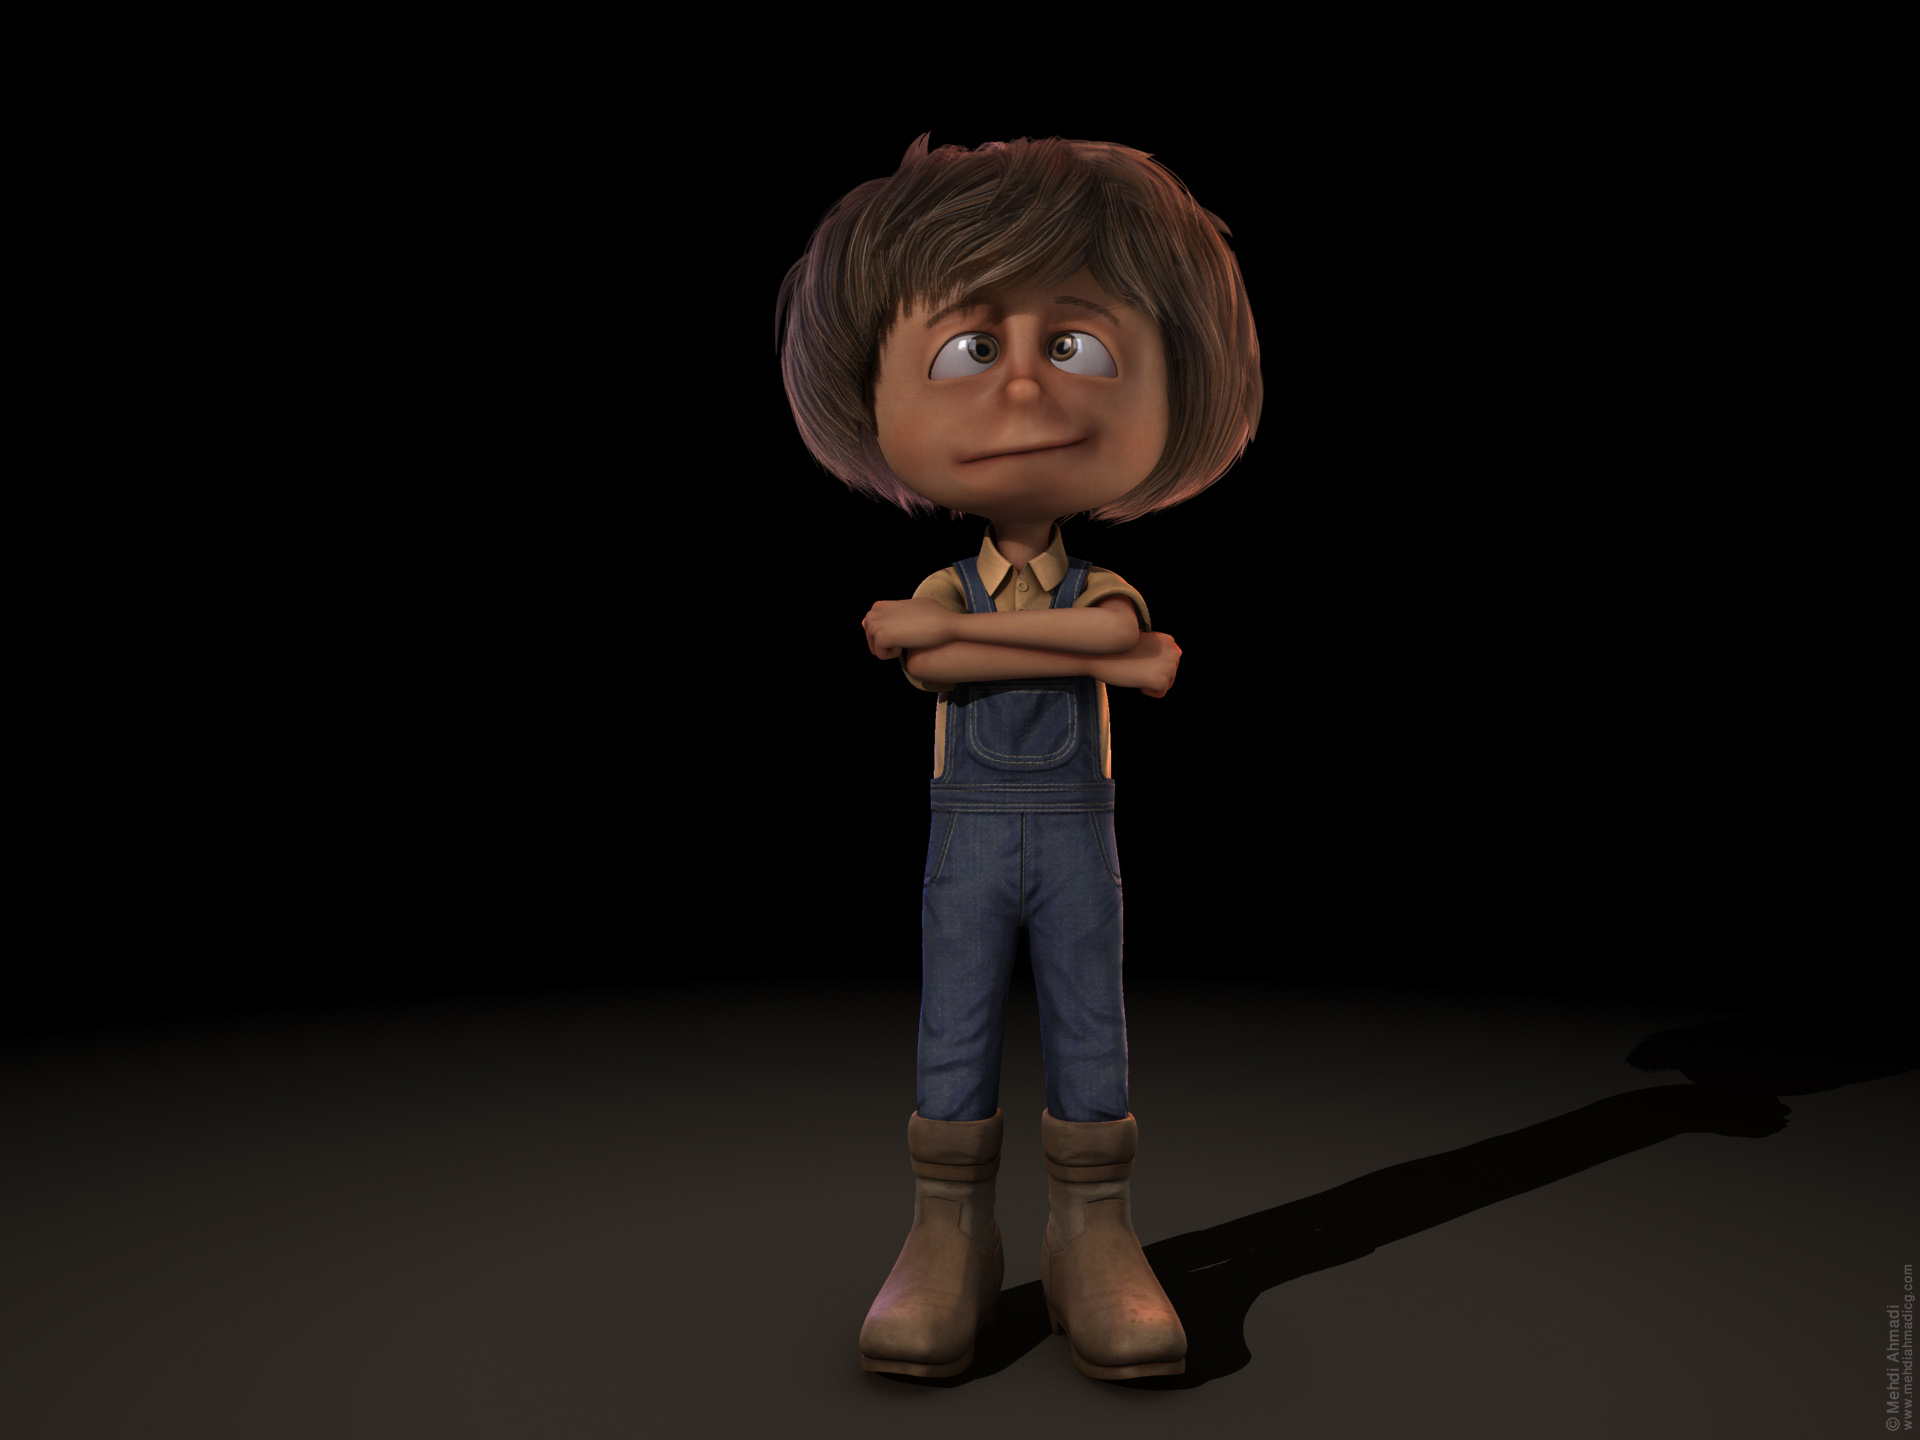
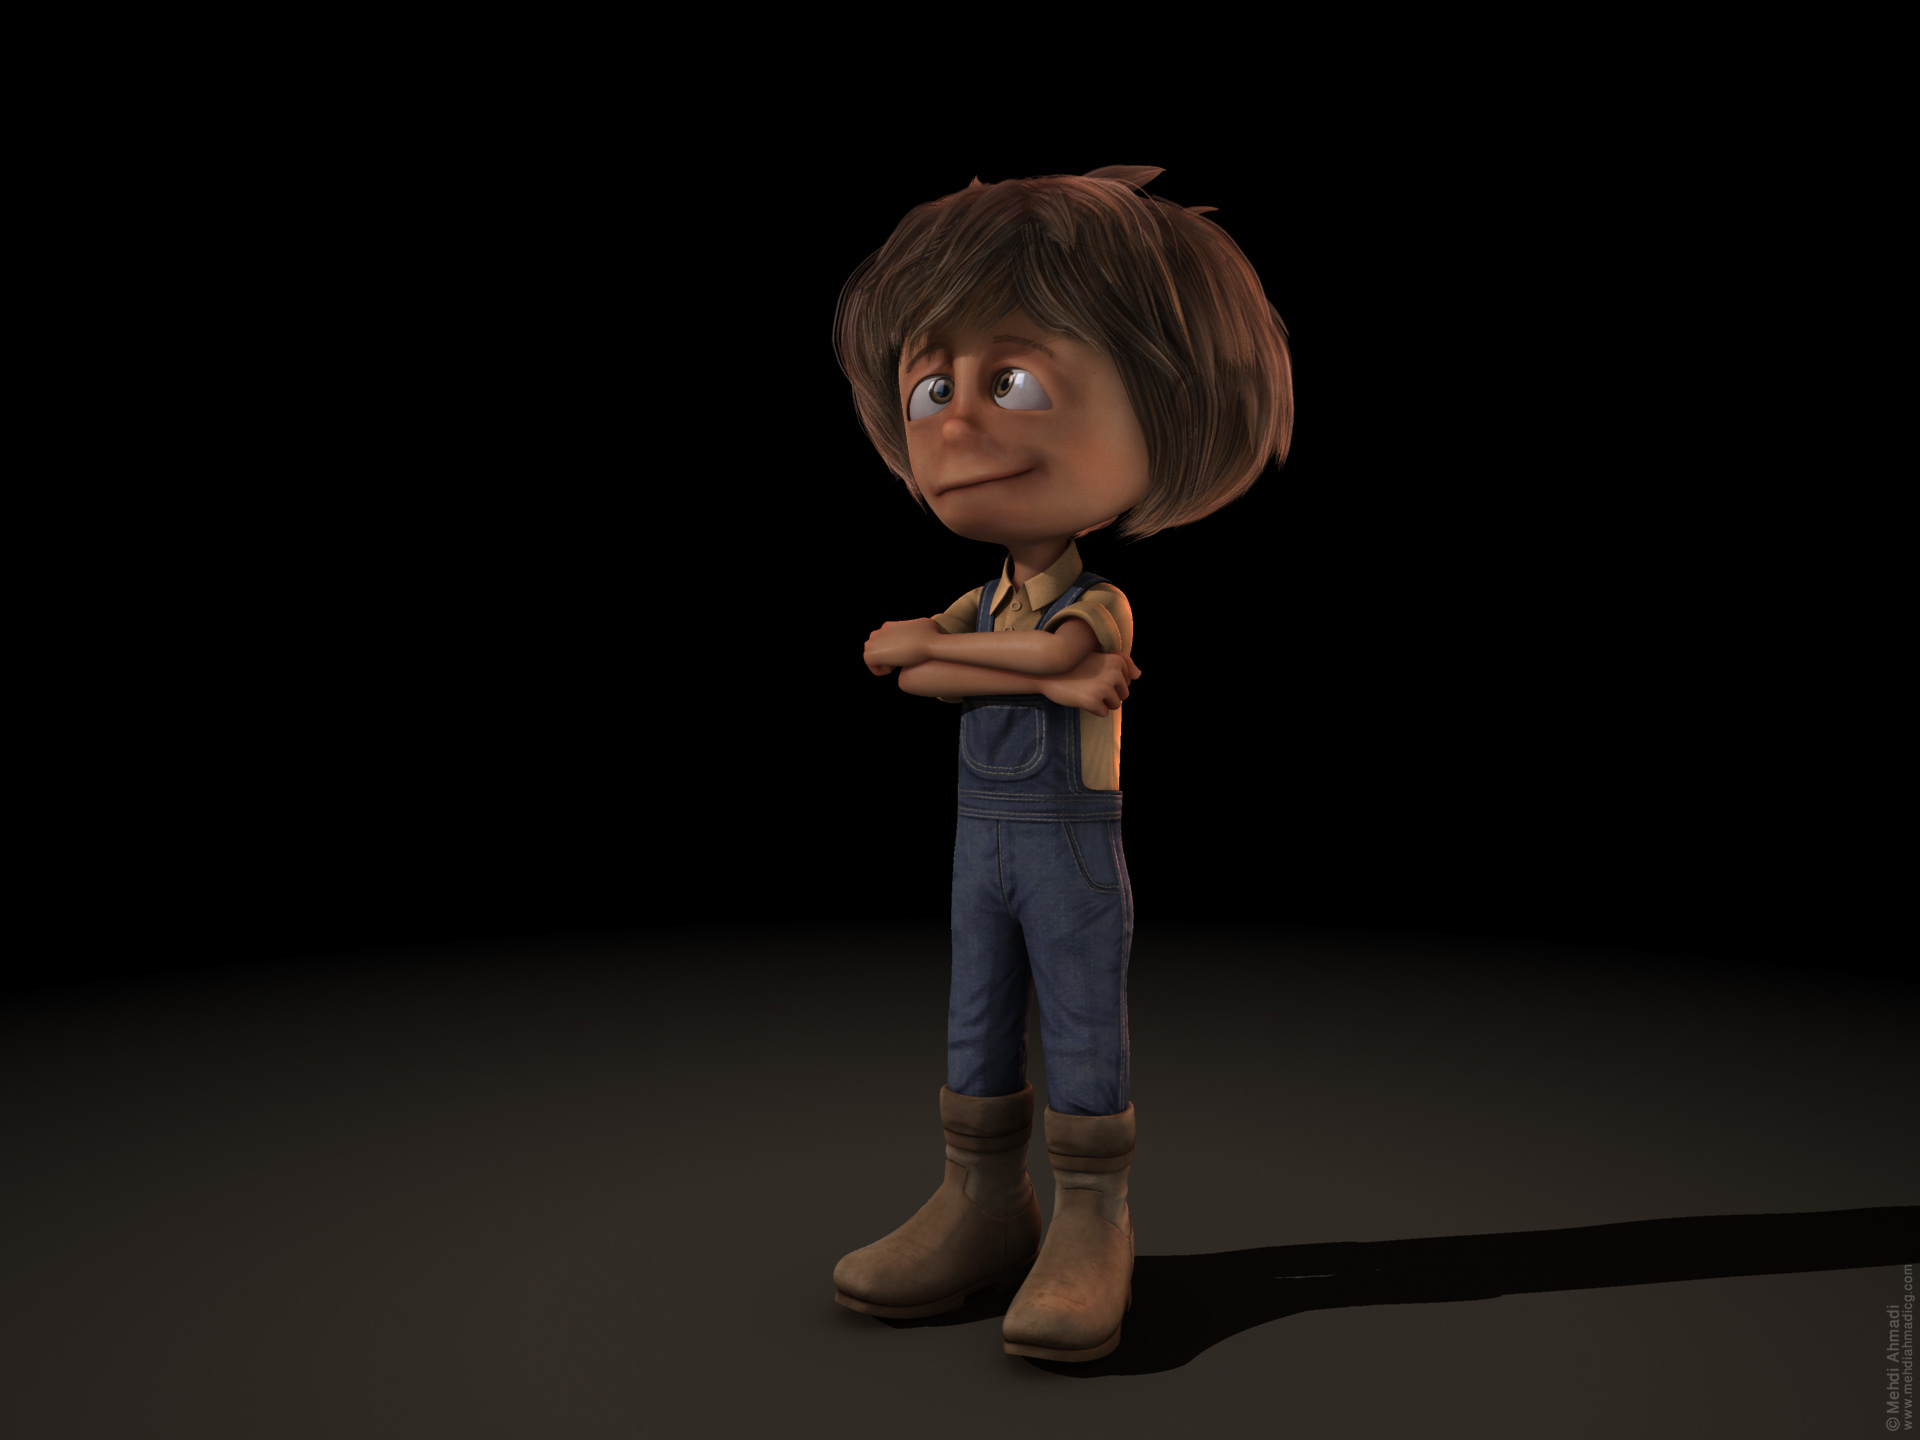
In the project "Naughty Kid" I was responsible for all aspects of work from beginning to end, and I did all the steps of the work myself.
These steps included:
Concept Art, Modeling, Texturing, Grooming, Rigging, and Tool Development.
And for this project, I used Maya, ZBrush, Mari, Photoshop, and Qt Designer.
Below you can see some pictures from different steps of my work.

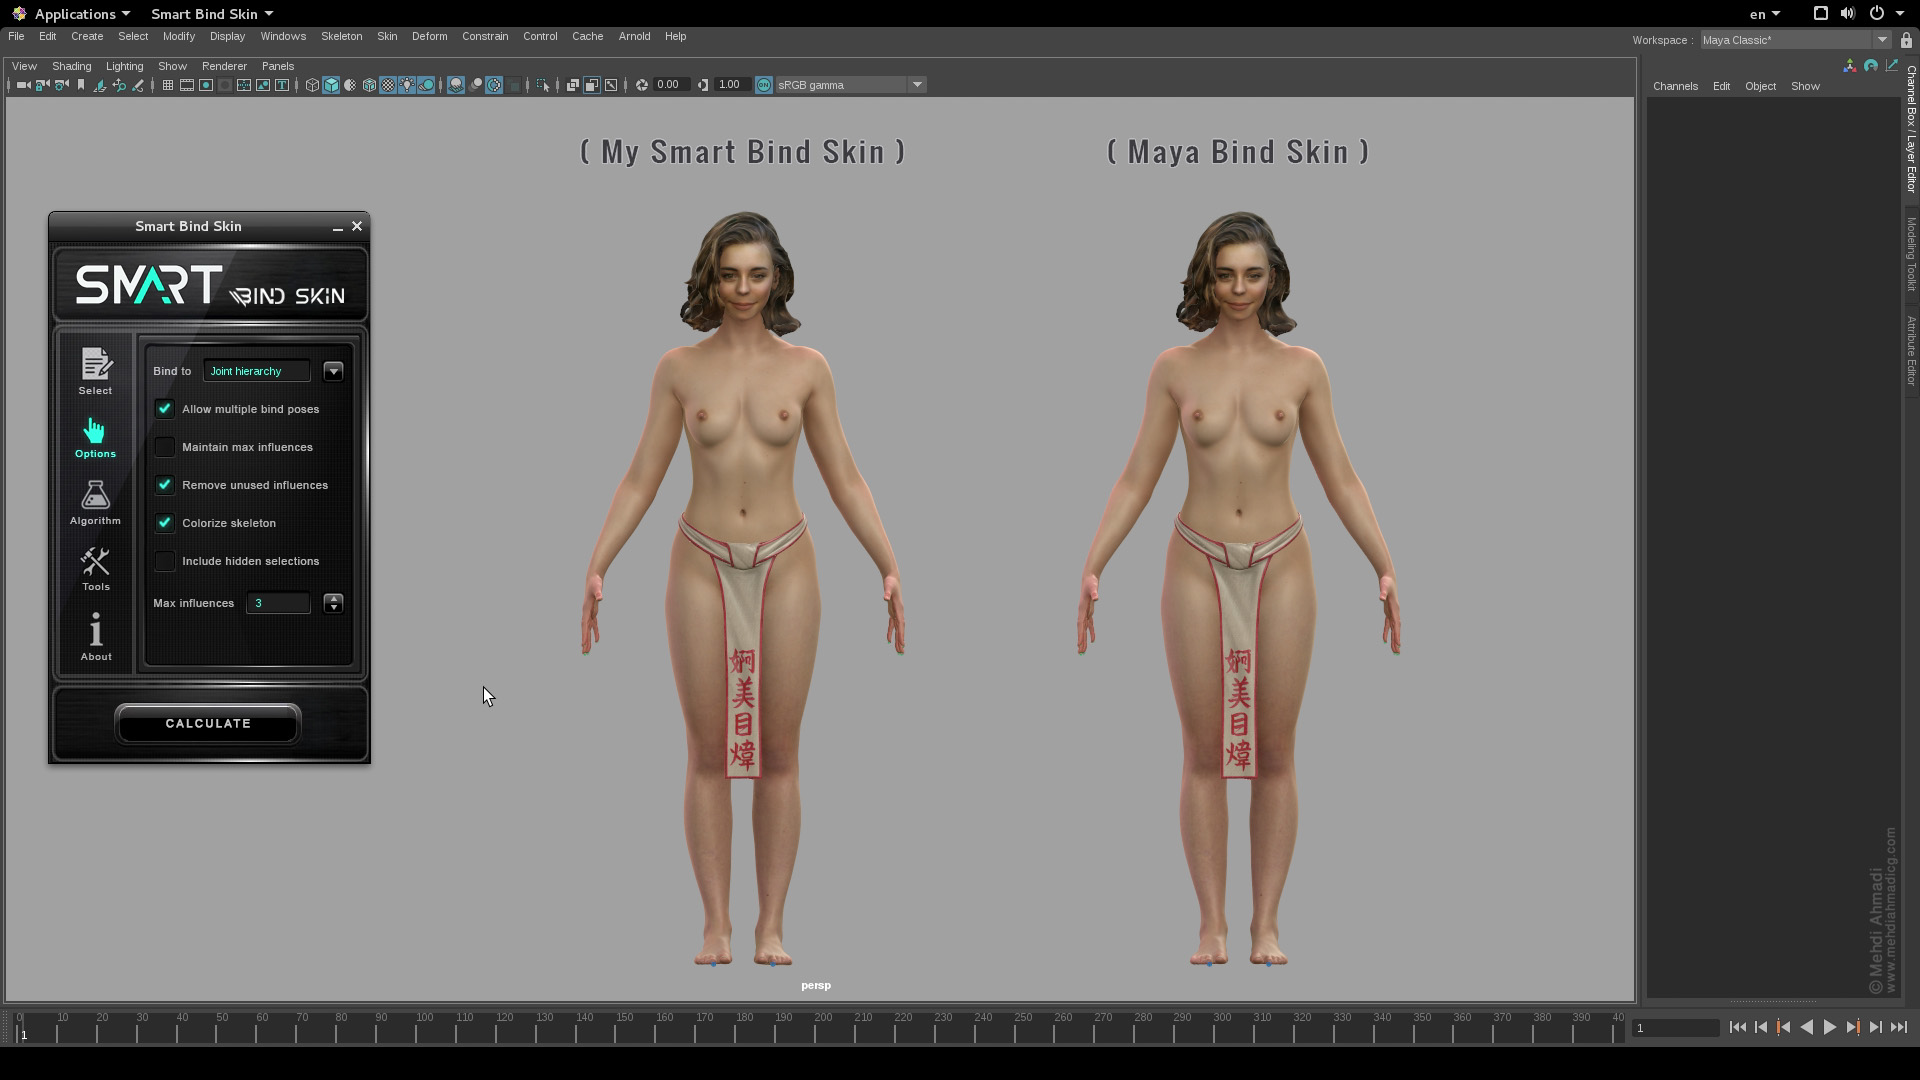
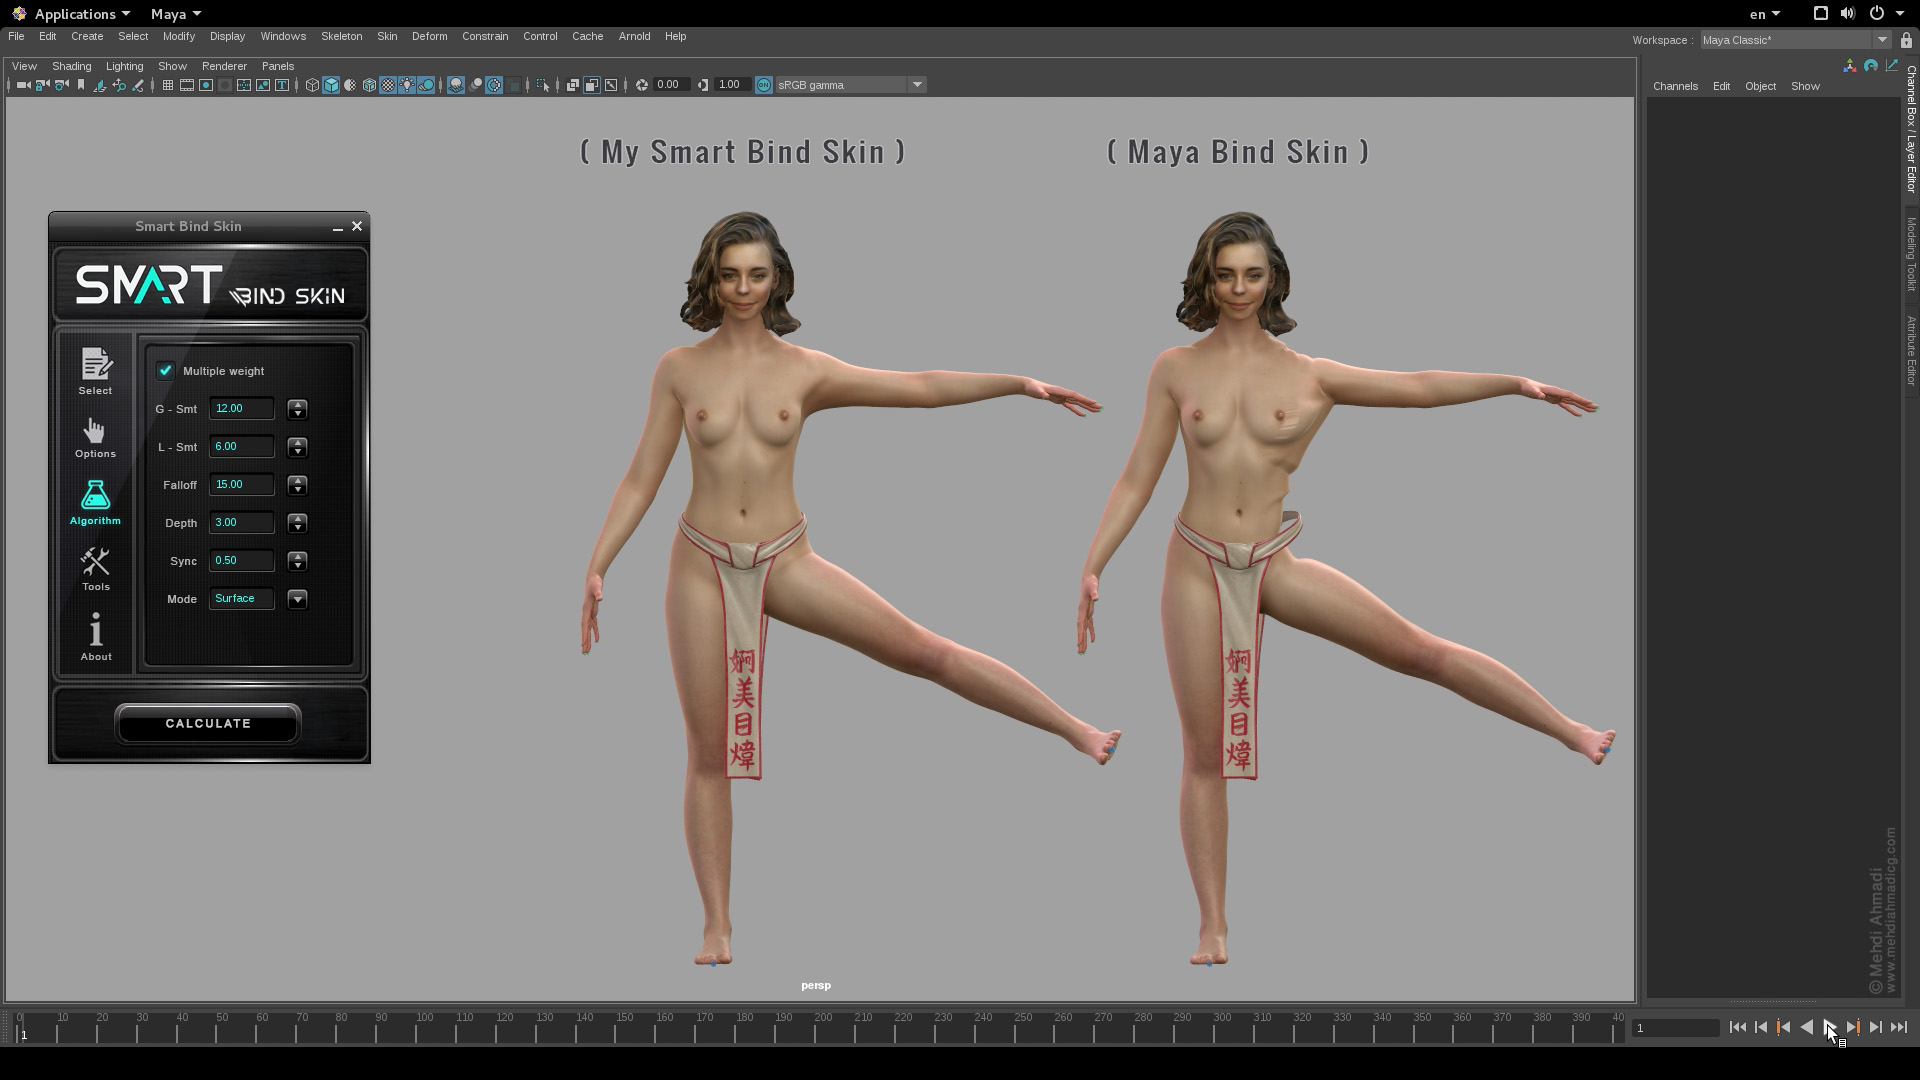
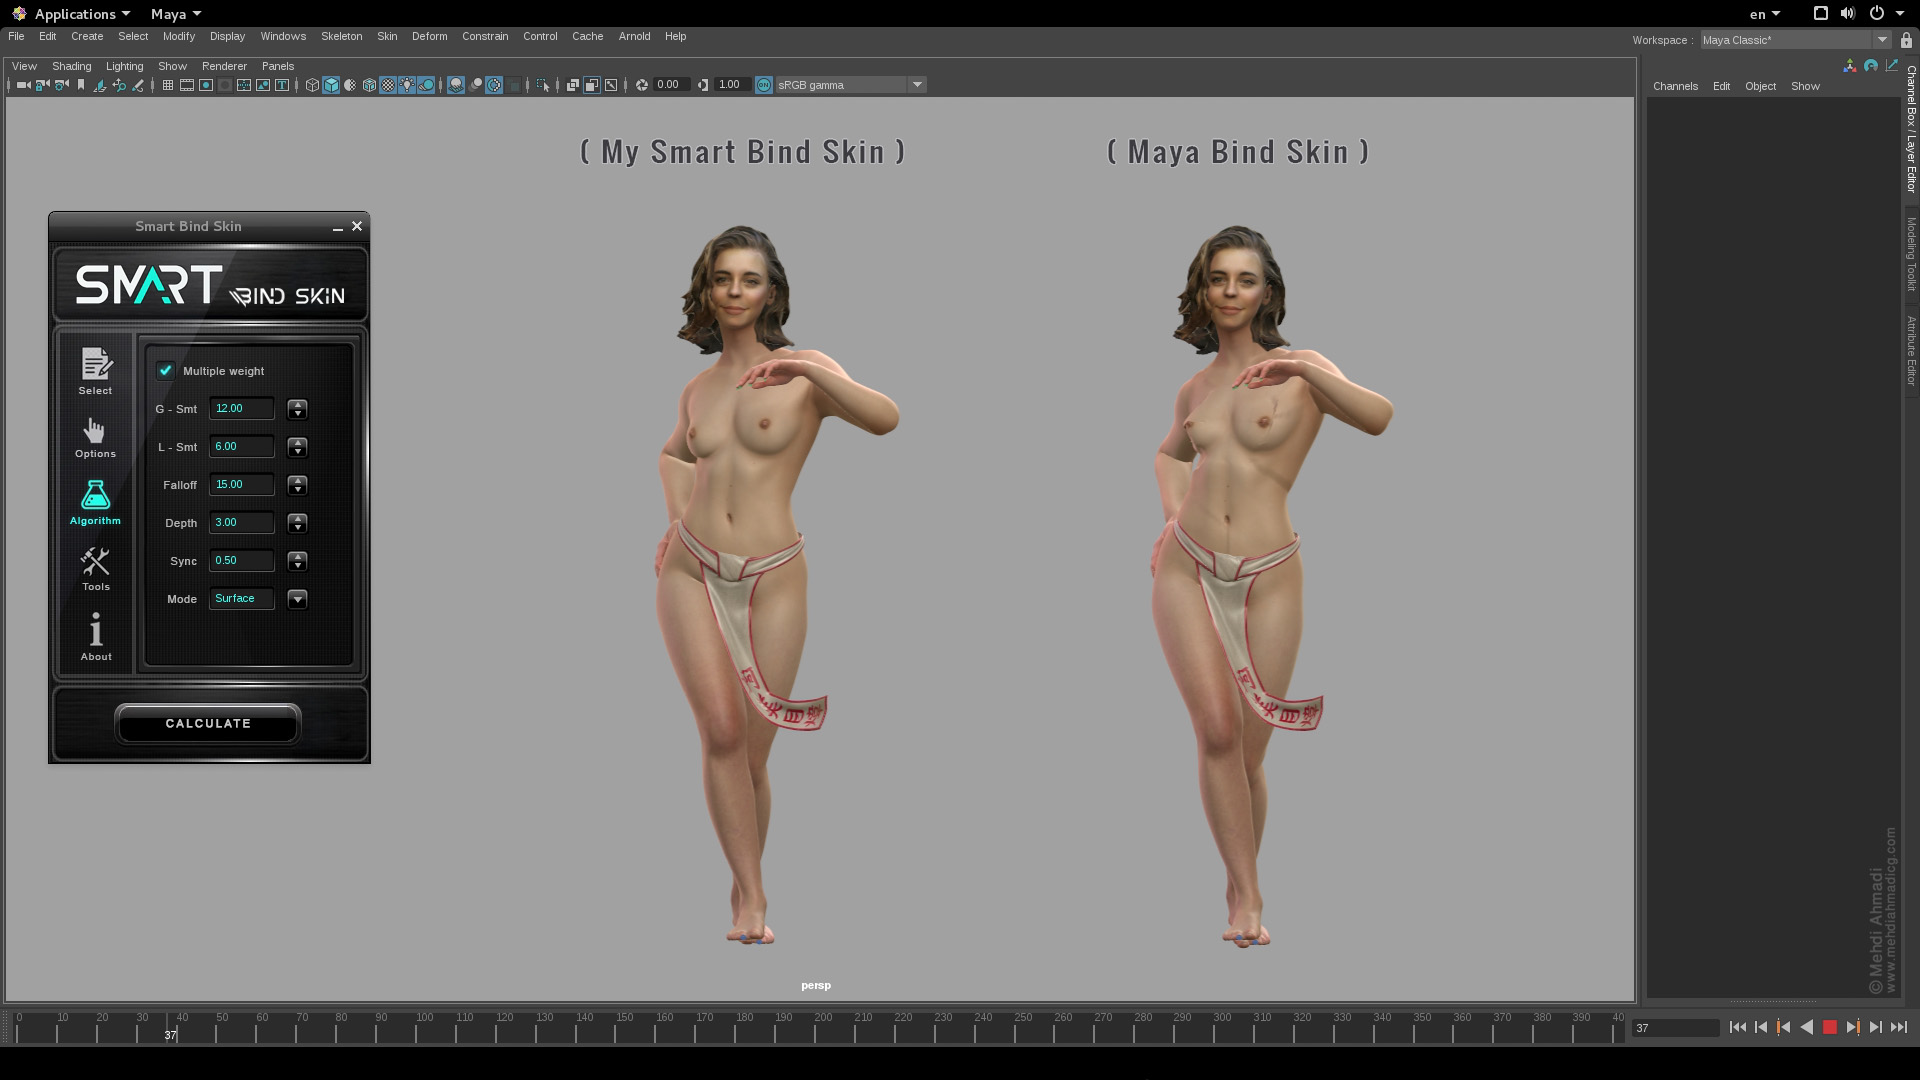
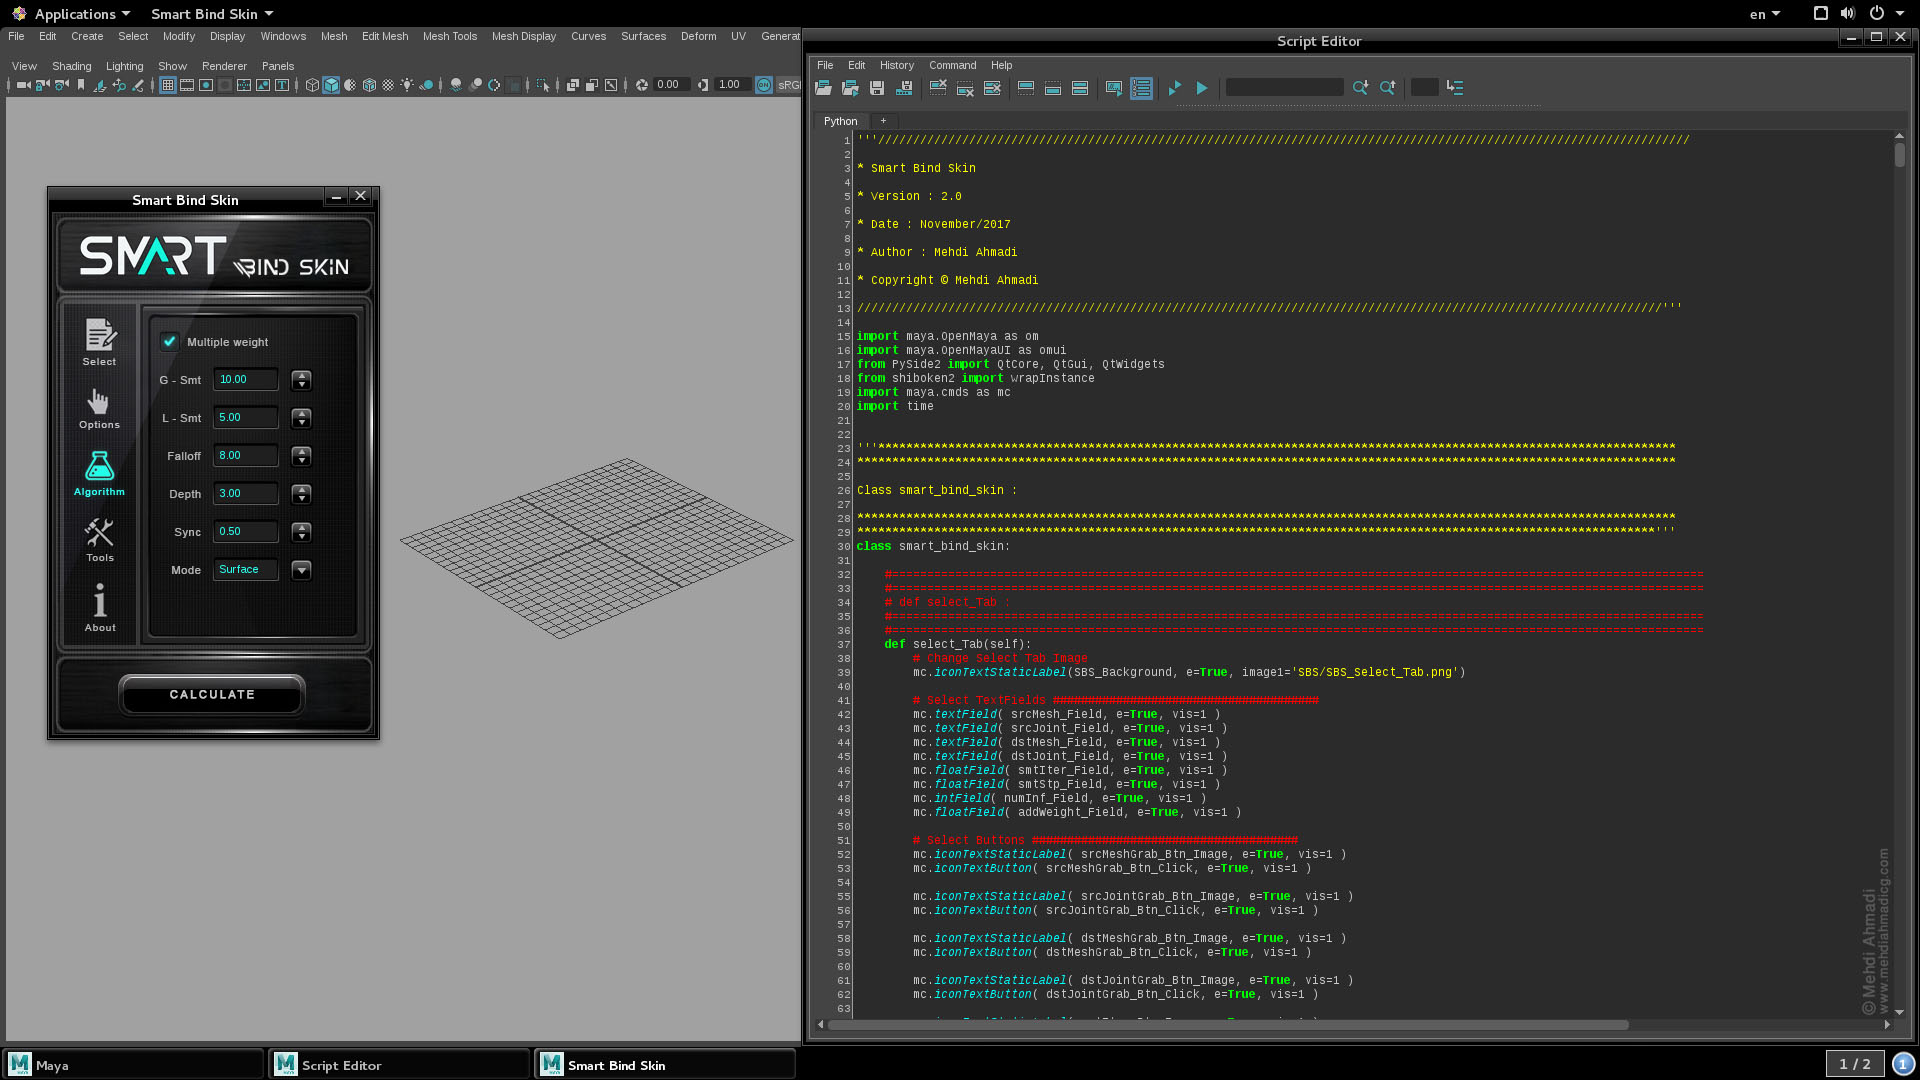
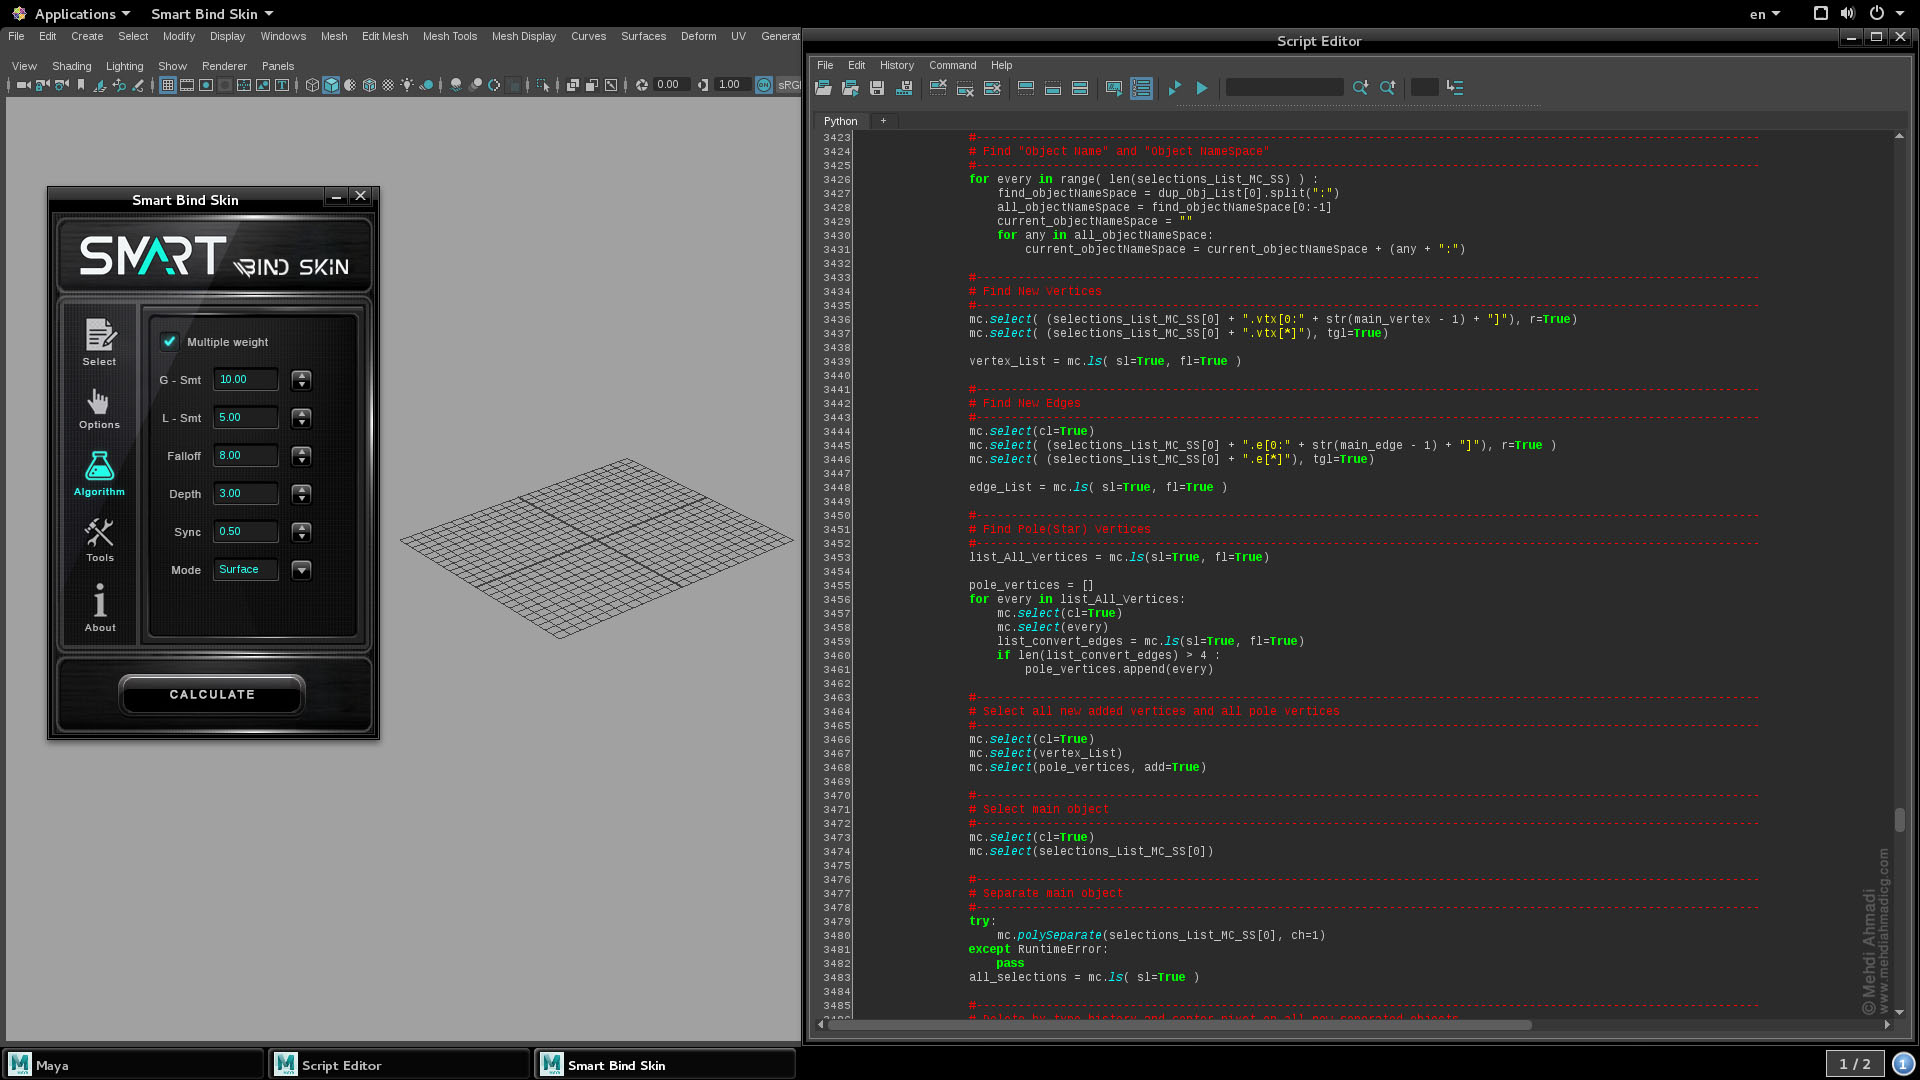
The process of skinning a character had always been a time-consuming task, therefore I decided to create a python tool in order to perform the process of skinning automatically and I called it "Smart Bind Skin".
Working with "Smart Bind Skin" is very easy you just need to choose your joints and meshes and adjust a few parameters in the "Smart Bind Skin" window and then press the calculate button, the amount of time that "Smart Bind Skin" needs to perform your skinning, depends on the number of vertices in your model, but usually this calculation won't take more than 2 or 3 minutes, and in the end, it has a much better result than Maya's default bind skin.
It saves you a lot of time using "Smart Bind Skin" in order to do the process of skinning, and only a little or no manual paint skin is required to finalize your skinning after using the "Smart Bind Skin.
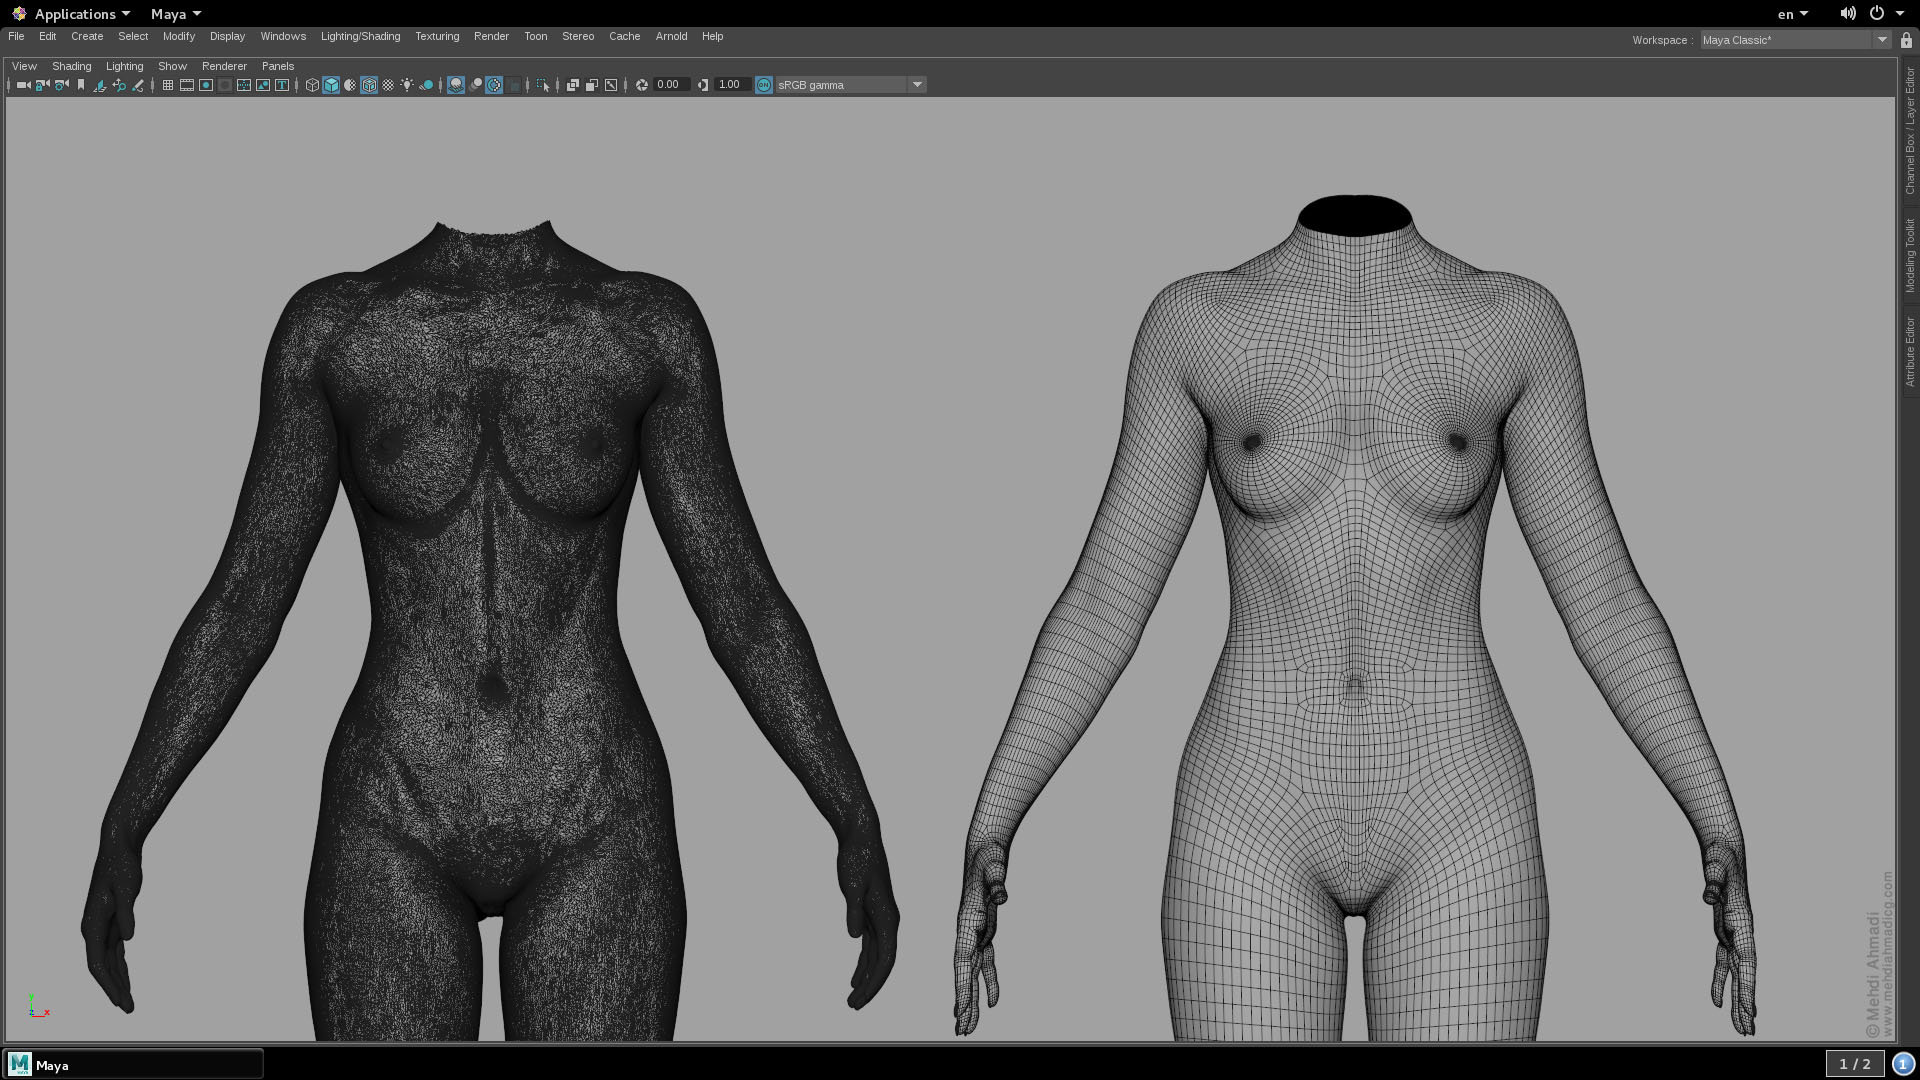
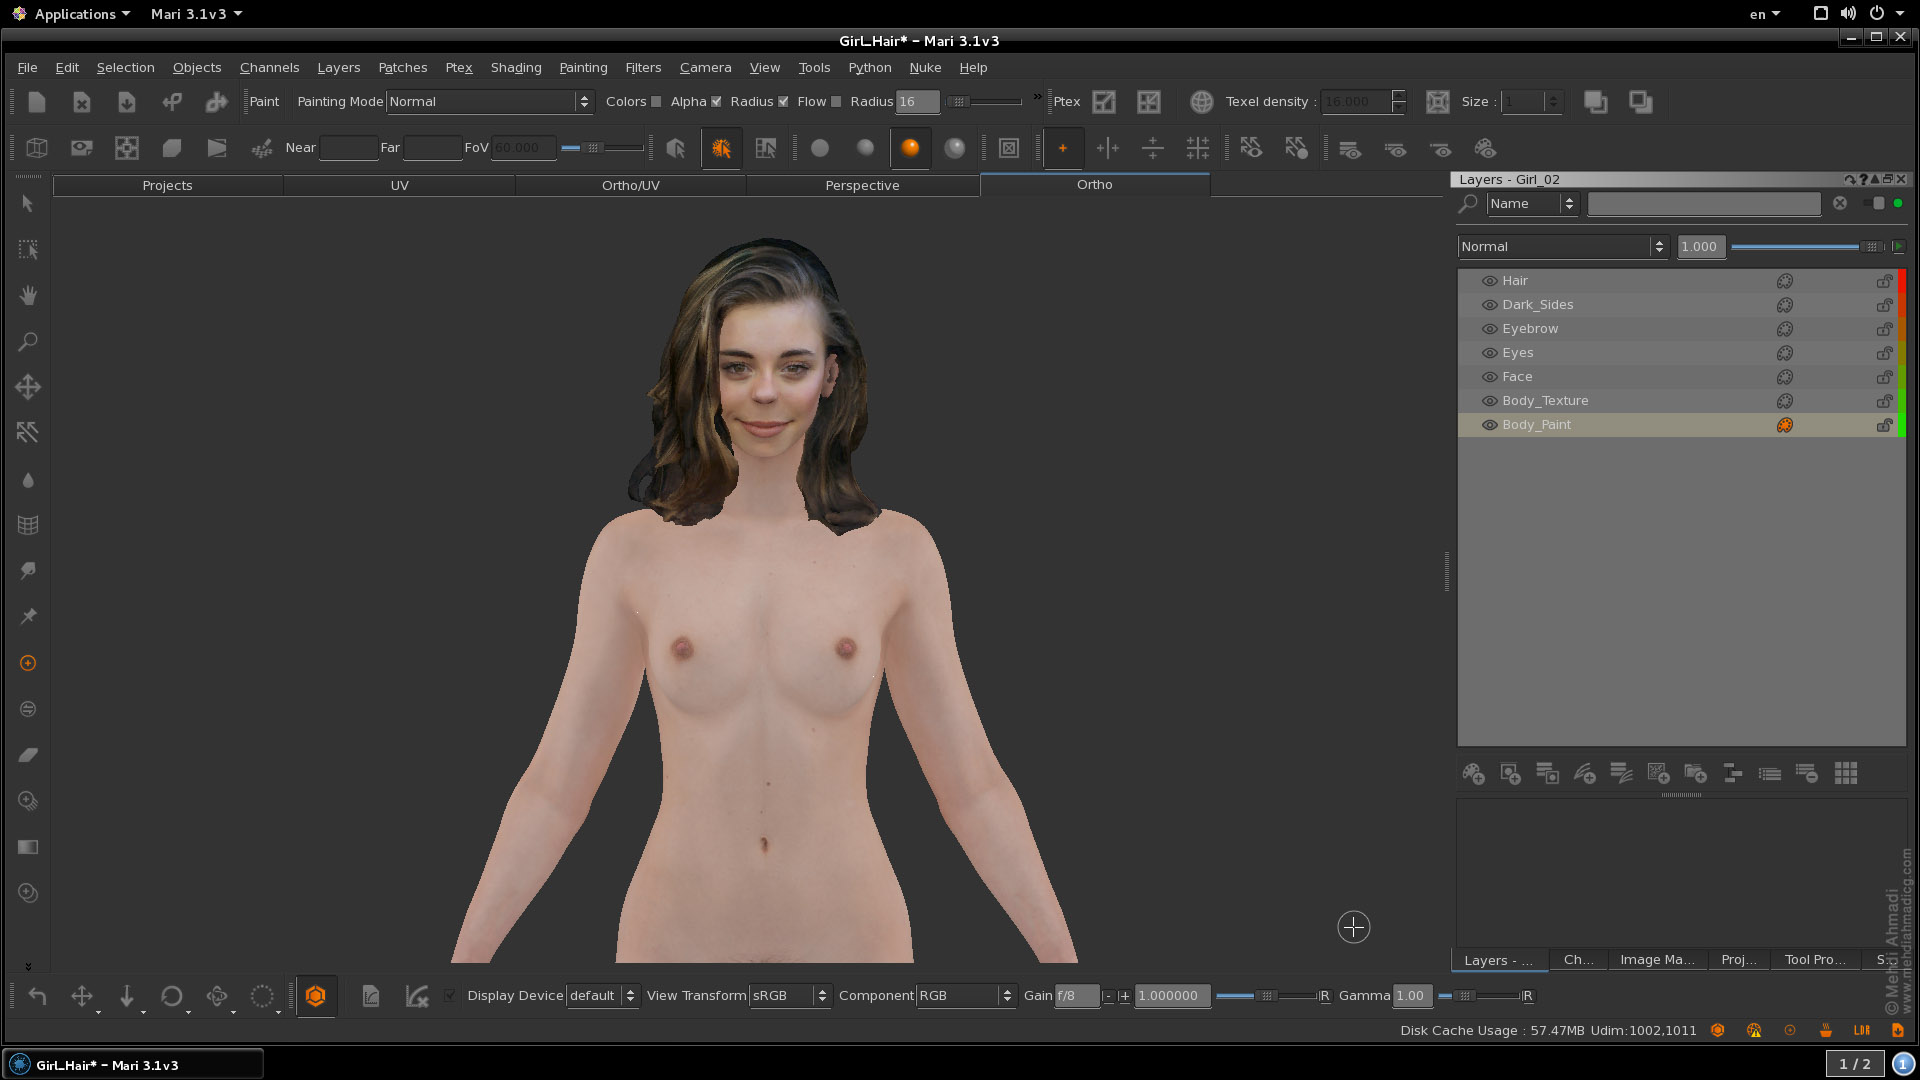
To create the character in this project I wasn't responsible for modeling or texturing, but because I didn't like the face of my character, I had to replace another character's head with my own character, and because models had no topology, I retopologized the new model again and projected the textures of the main model on my new model.
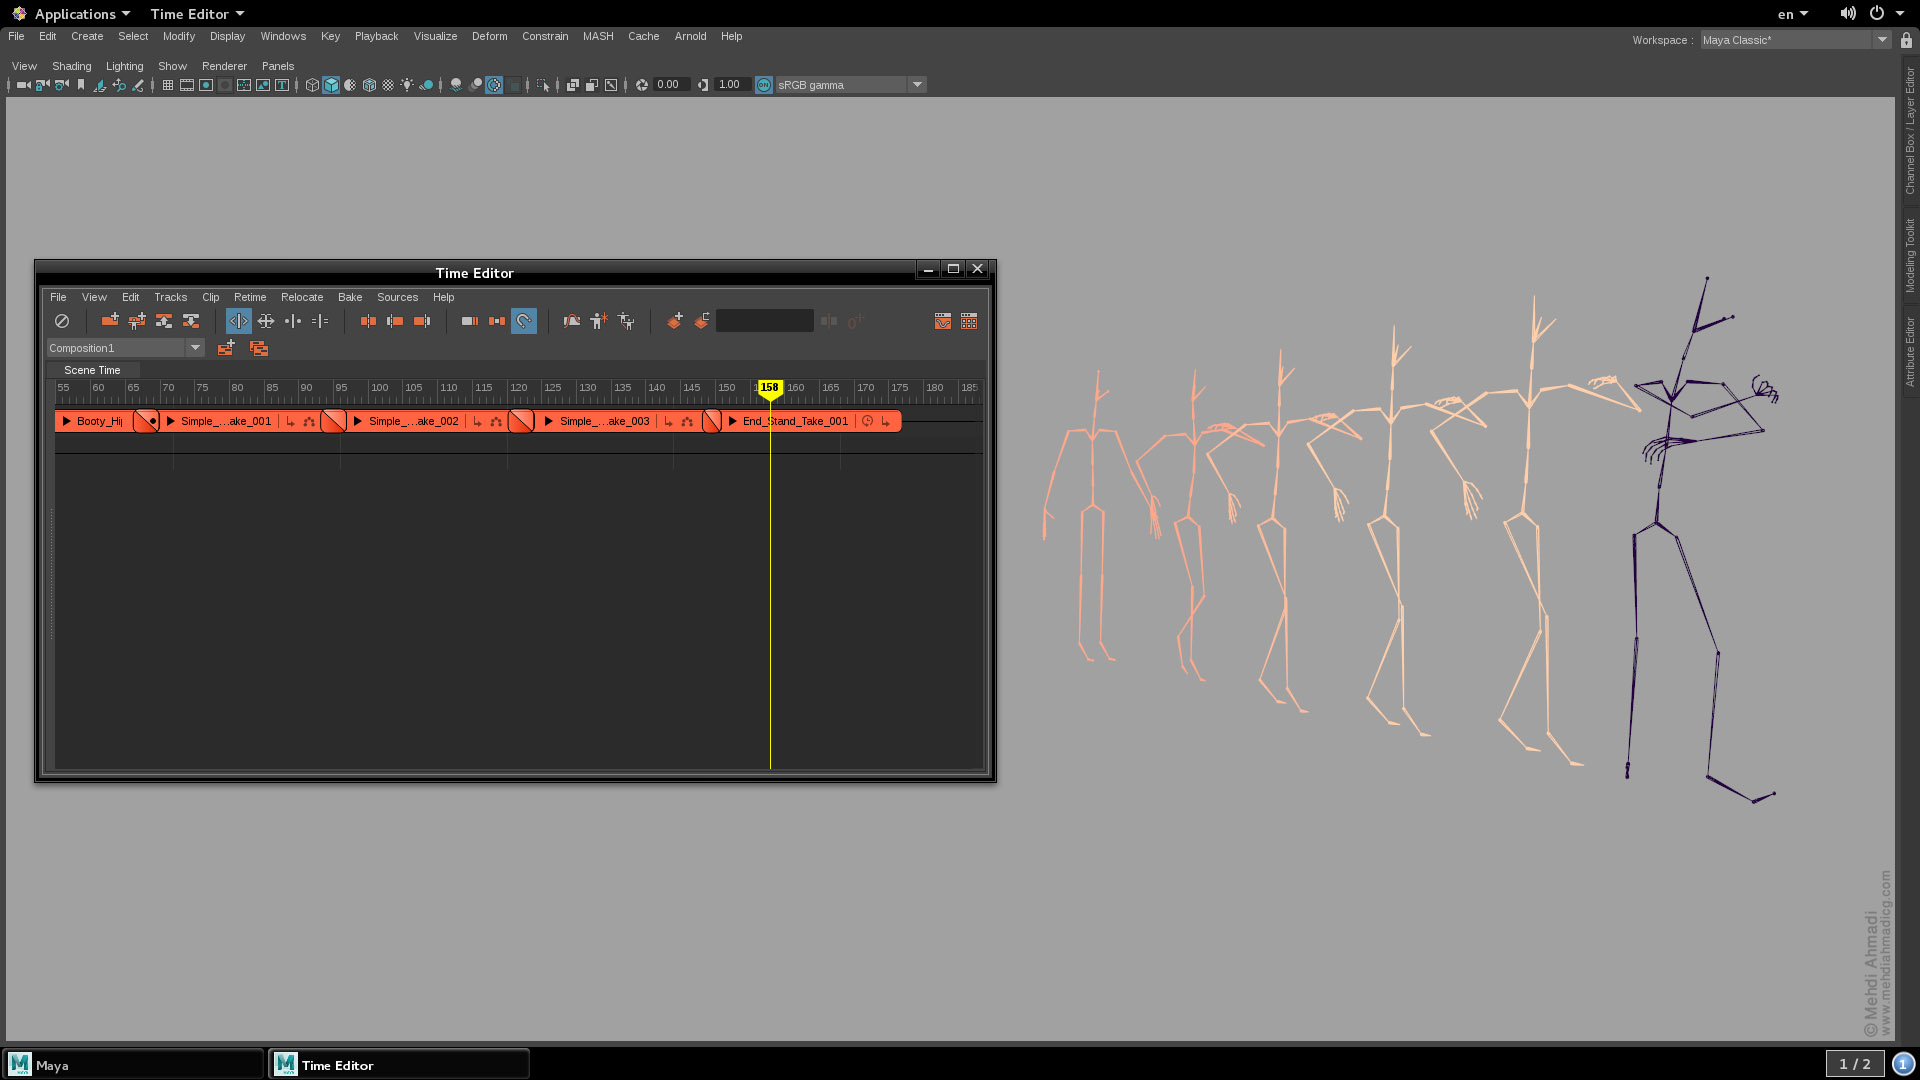
And I used 5 different motion capture files, and combined them together in order to gain the animation which I intended.
In this project I was responsible for:
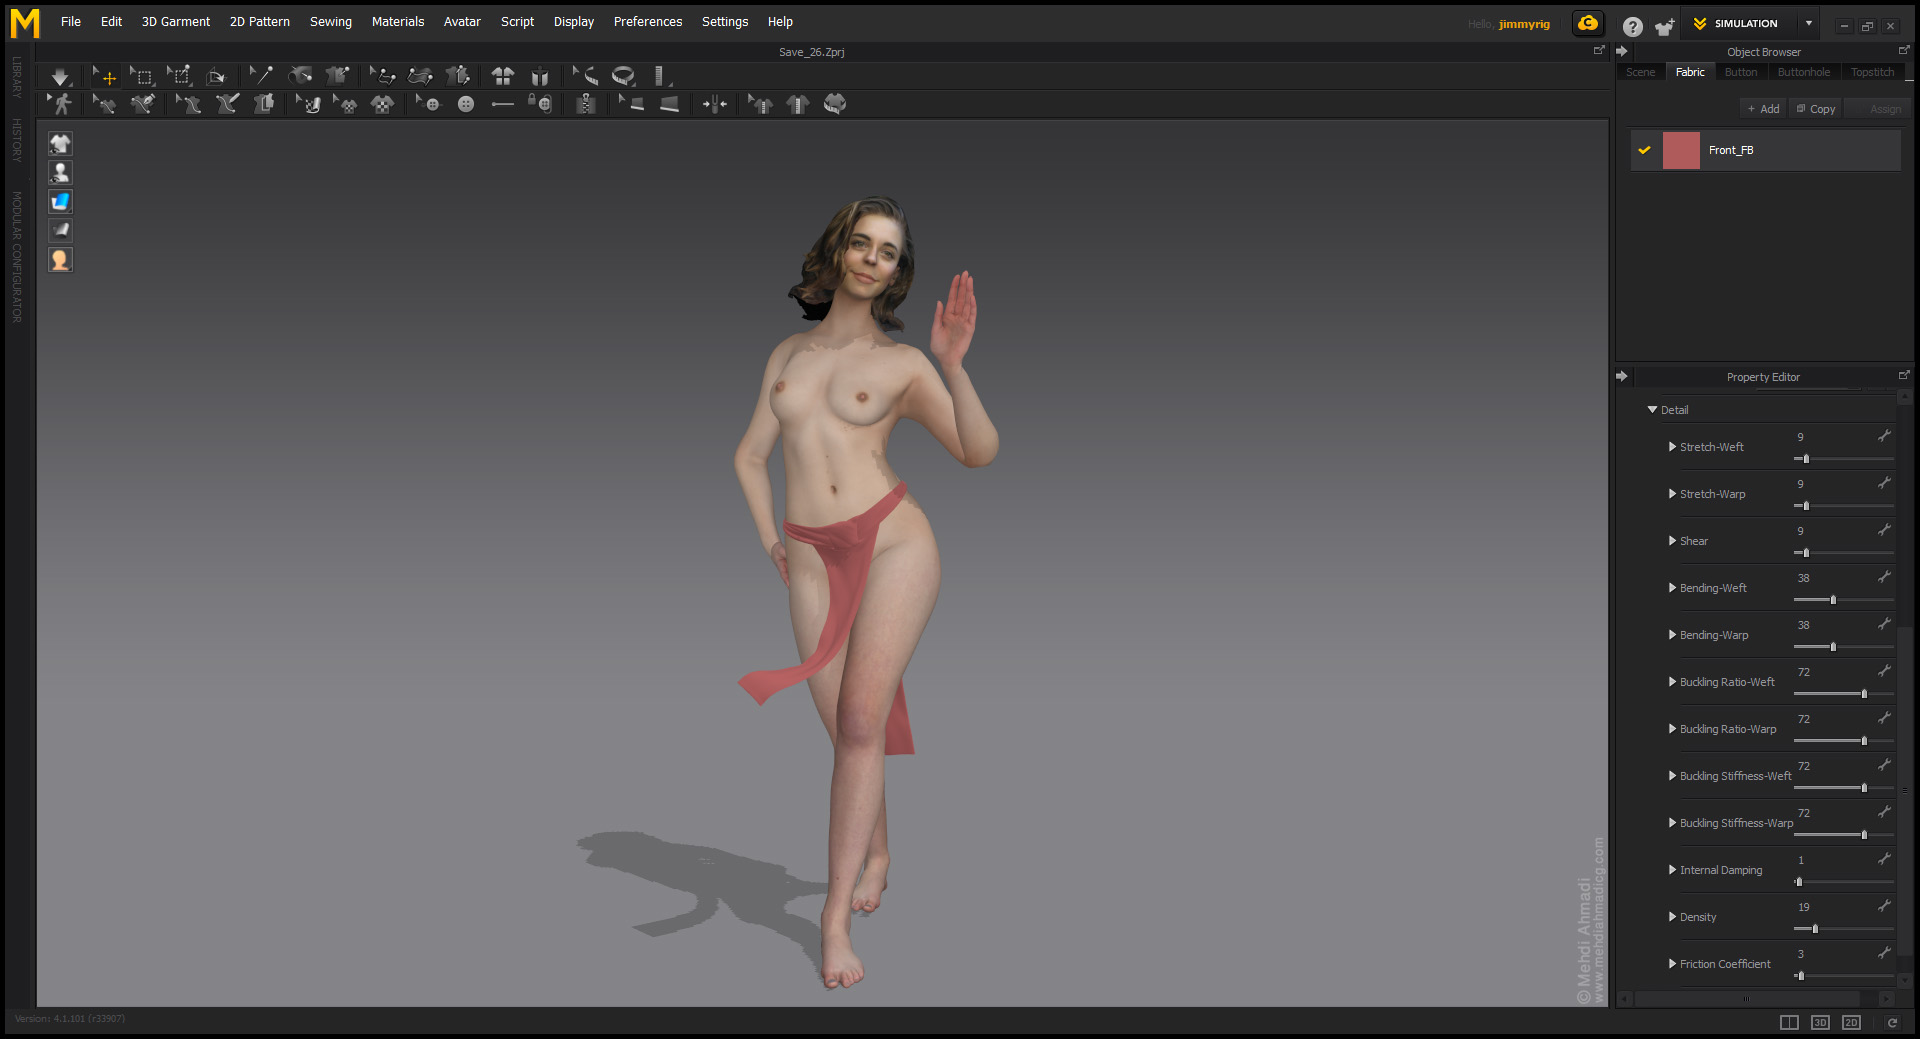
Retopology, Texture Projection, Cloth Setup and Simulation, Rigging, Motion Capture Editing and Retargeting, and Tool Development.
And for this project, I used Maya, ZBrush, Marvelous, Mari, Photoshop, and Qt Designer.
Below you can see some pictures from different steps of my work.
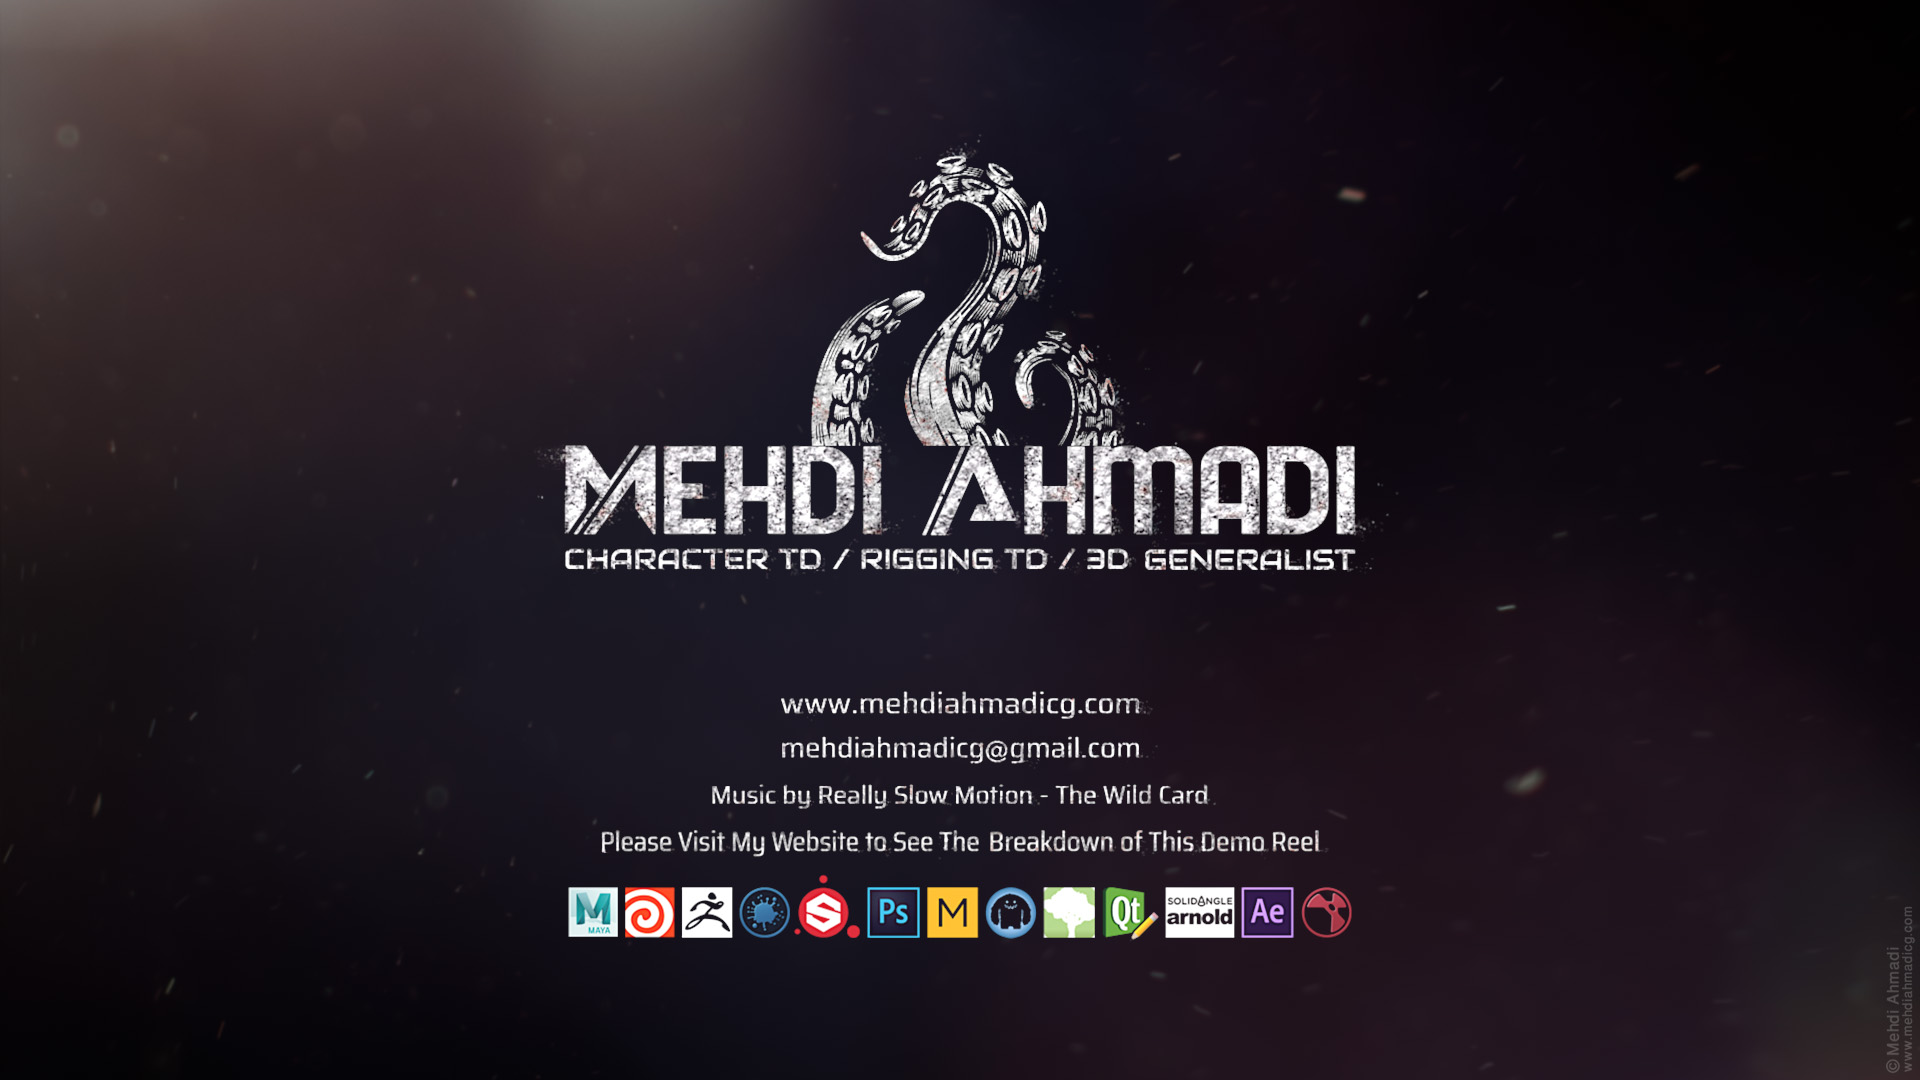
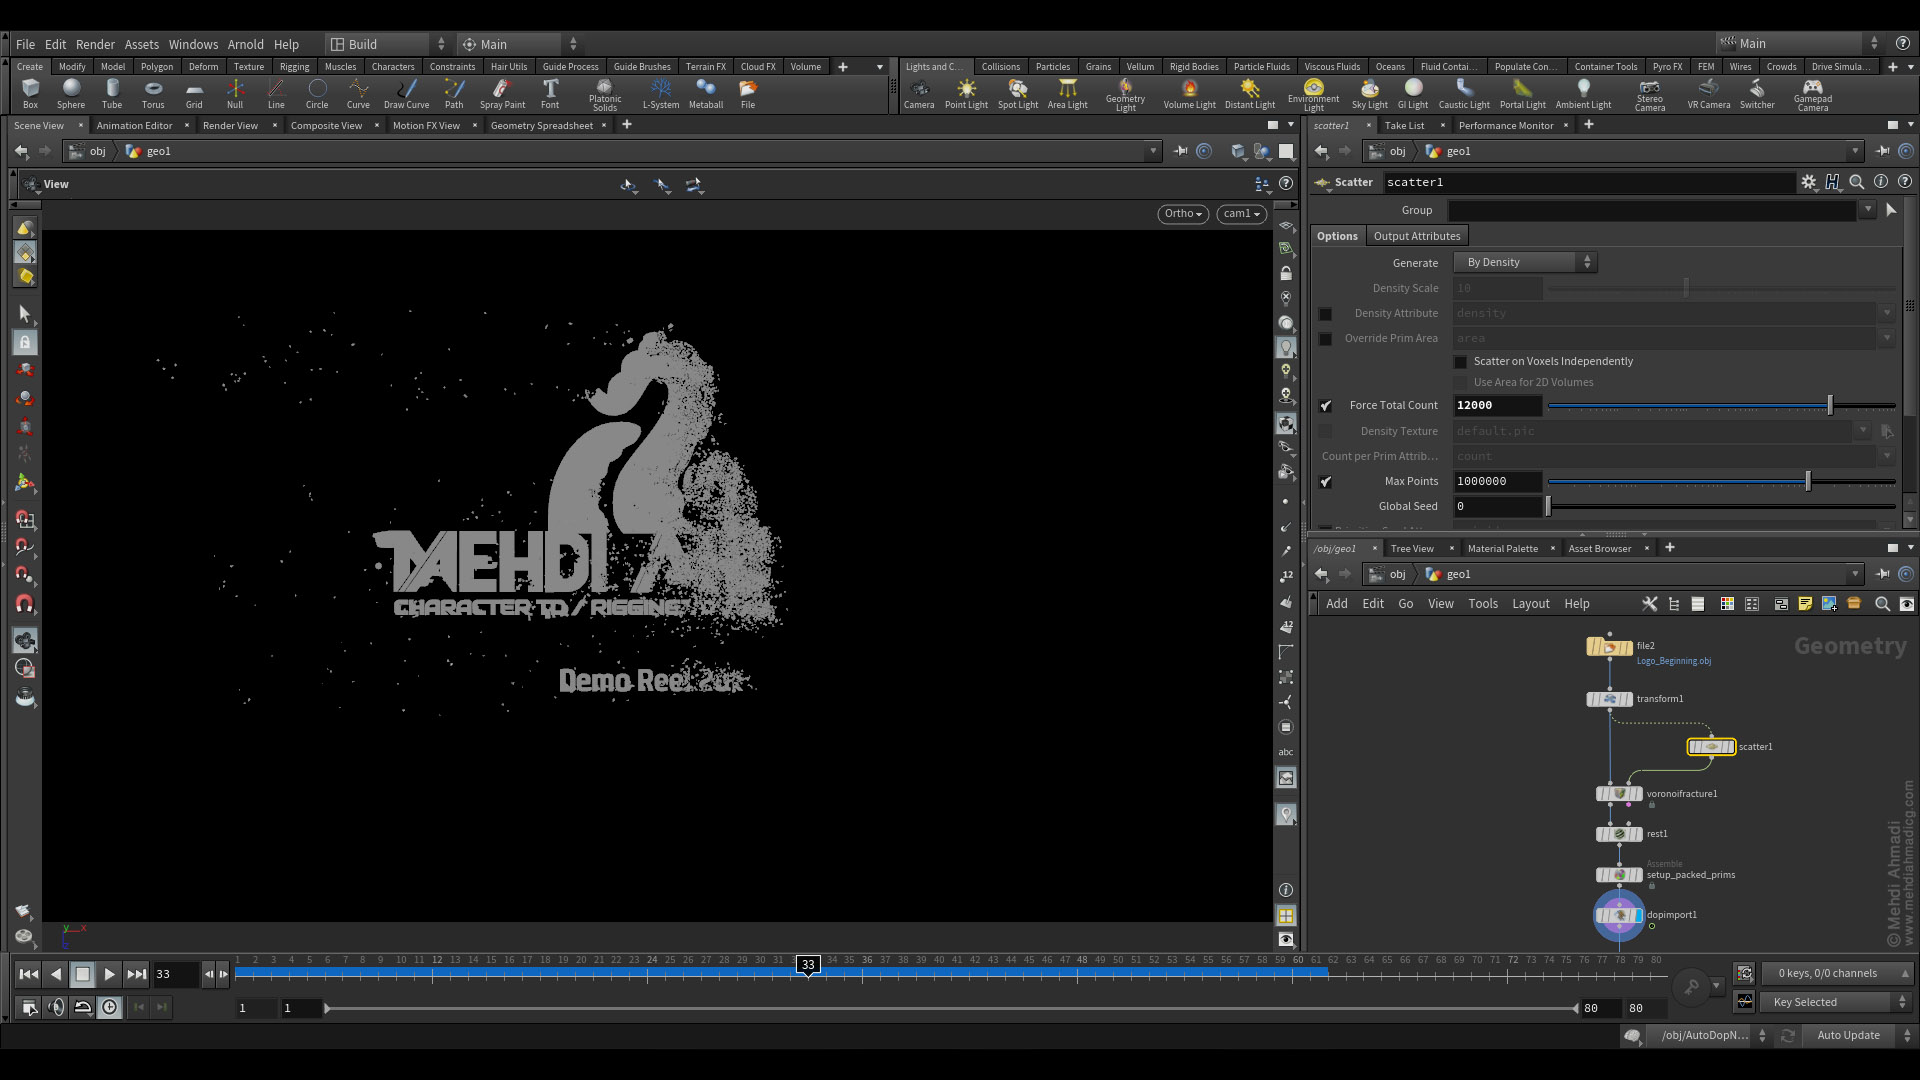
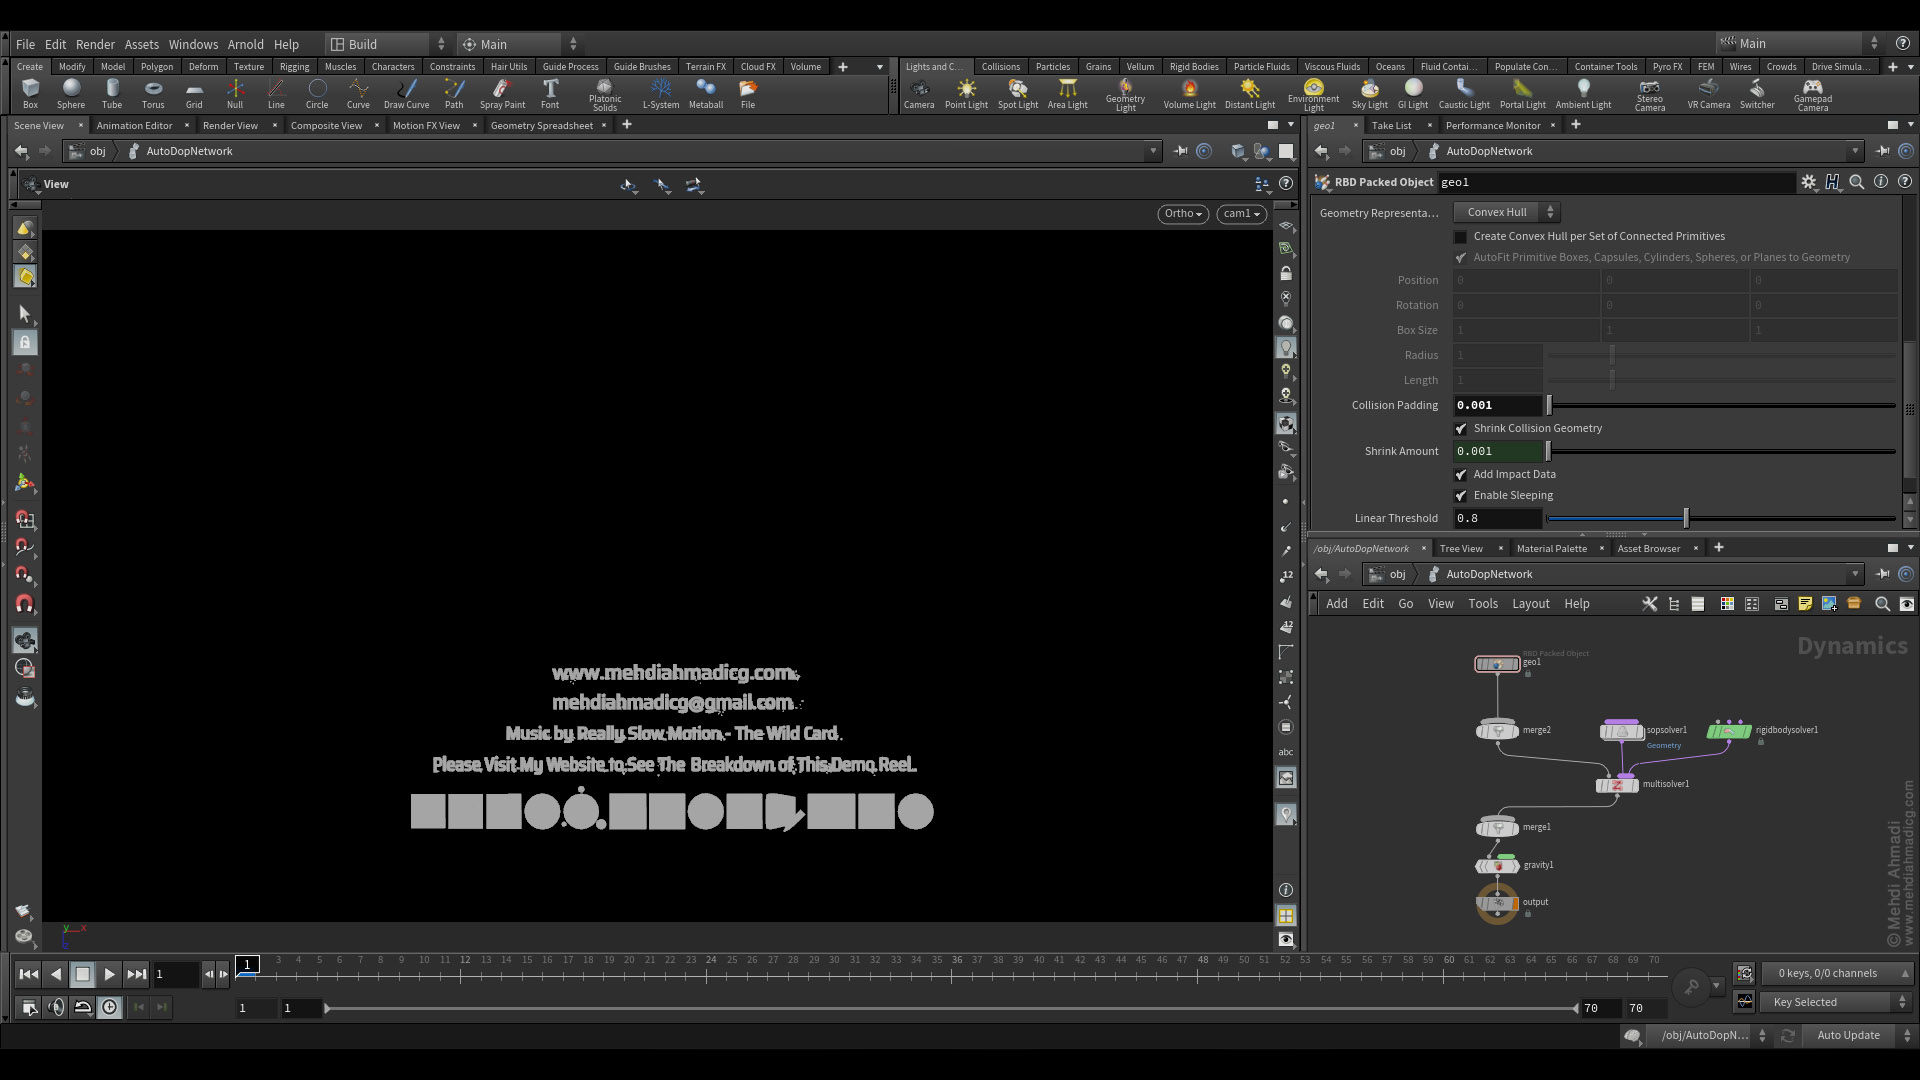
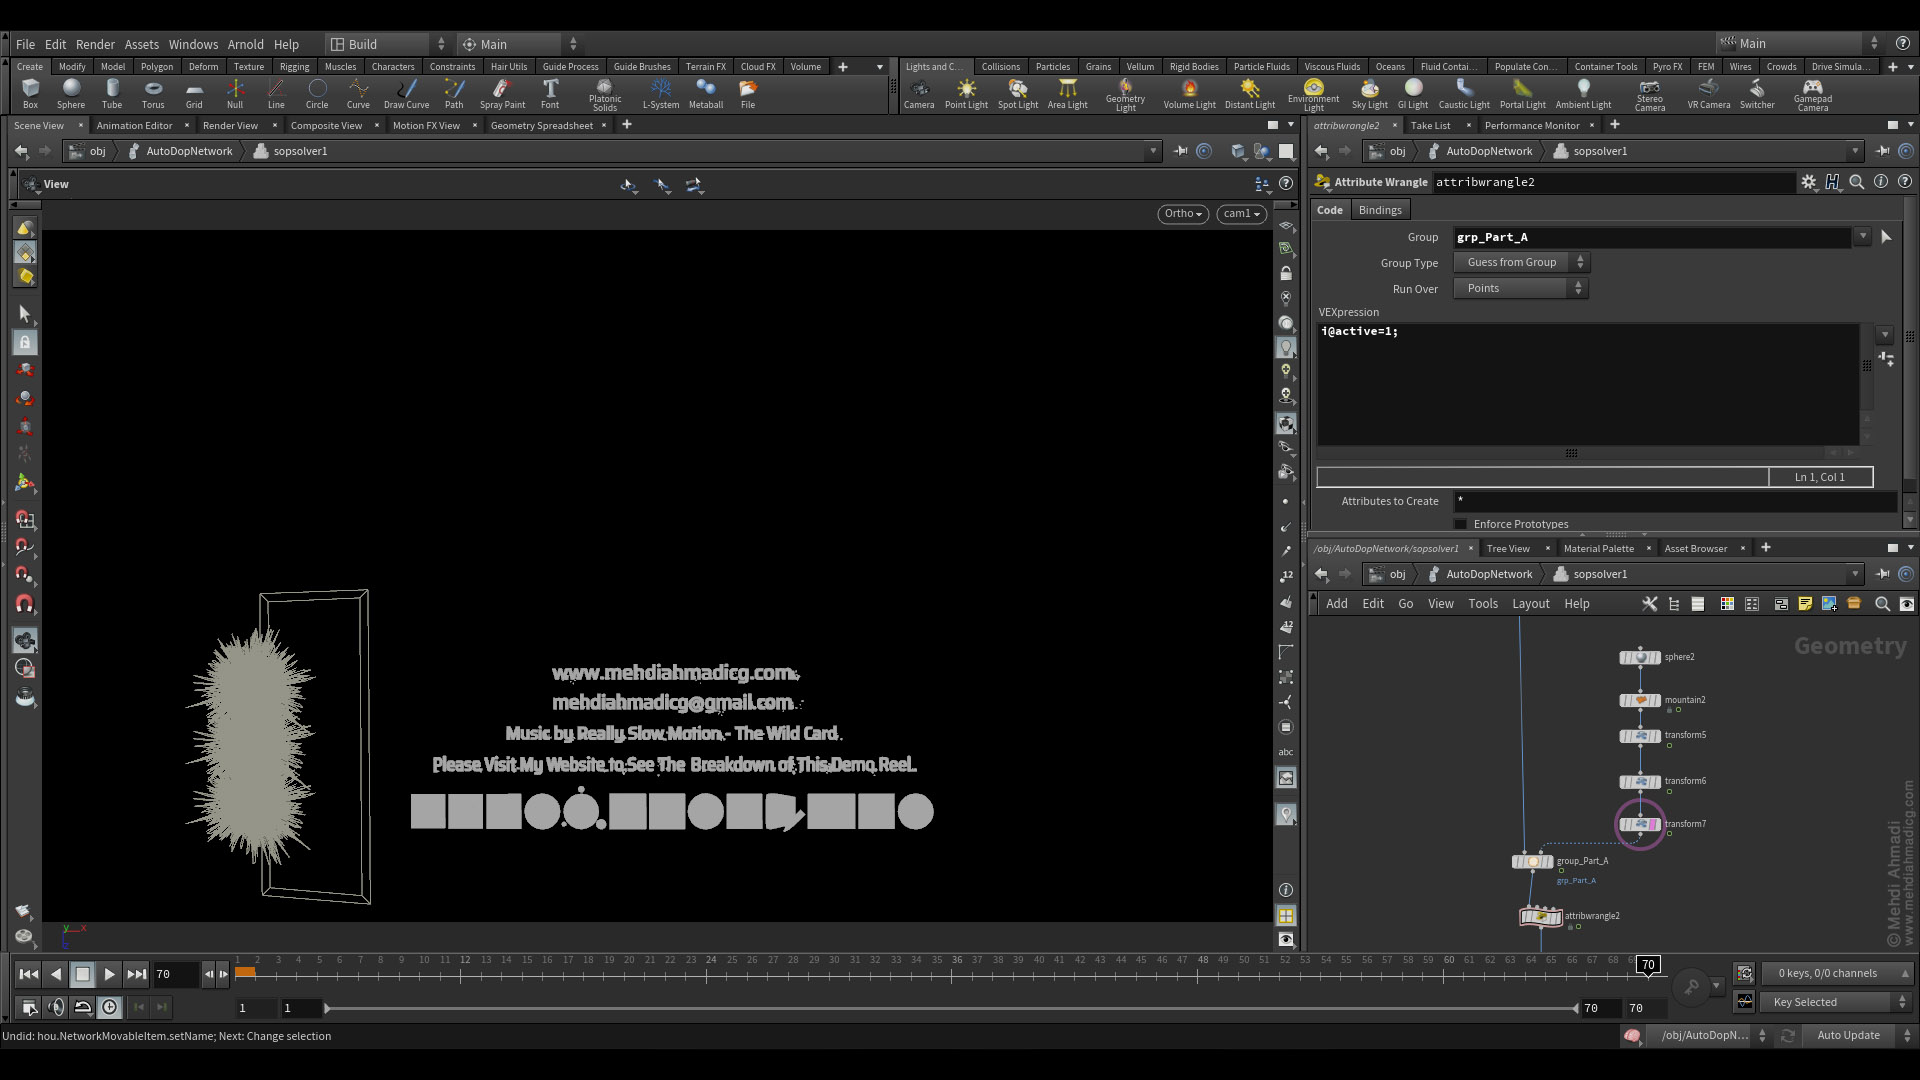
To design my logo, first, I gathered some images via the Internet, and then I designed my logo in Photoshop. But my main idea was to bring my logo's particles into the scene by wind, therefore I chose Houdini.
My scene setup was simple in Houdini, first I shattered my logo into 12,000 pieces and then I blew a wind to them and simulated them.
I was responsible for all aspects of this project from beginning to end and I did all the steps of the work myself.
These steps included:
Designing the Logo, Modeling, Texturing, Dynamics Simulation, Shading, Lighting, Rendering, and Compositing.
And for this project, I used Houdini, Photoshop, and Nuke.
Below you can see some pictures from different steps of my work.